Table Mountain

June 24, 2017.

Table Mountain is in the Castle Wilderness area in Alberta, overlooking Beaver Mines Lake. It’s a challenging hike/easy scramble, with variable options to get to the top. Ambrosi describes the on-trail approach in his Southern Rockies Trail Guide, and Nugara describes a scramble route in More Scrambles in the Canadian Rockies. Since this was our first visit to the mountain, we decided to take the trail. (Update: I later returned and tried the scrambling route. Check out the post here.)

The weather was slightly cool, but amazingly still for the southern rockies. We were lucky enough to have only partly cloudy skies, and when the sun was shining it felt hot along the trail. I think on a typical hot summer day, this hike would be a scorcher.

The trail head is very easy to get to. From Pincher Creek take Hwy 507, then turn onto Hwy 774. There will be signs for the Beaver Mines Lake campground at about 14.7 km. Follow them, turning left onto a good gravel road which takes you to Beaver Mines Lake and the campground. If you continue along the main road, you reach a small parking area with a marked trailhead for both a short interpretive trail and for Table Mountain.
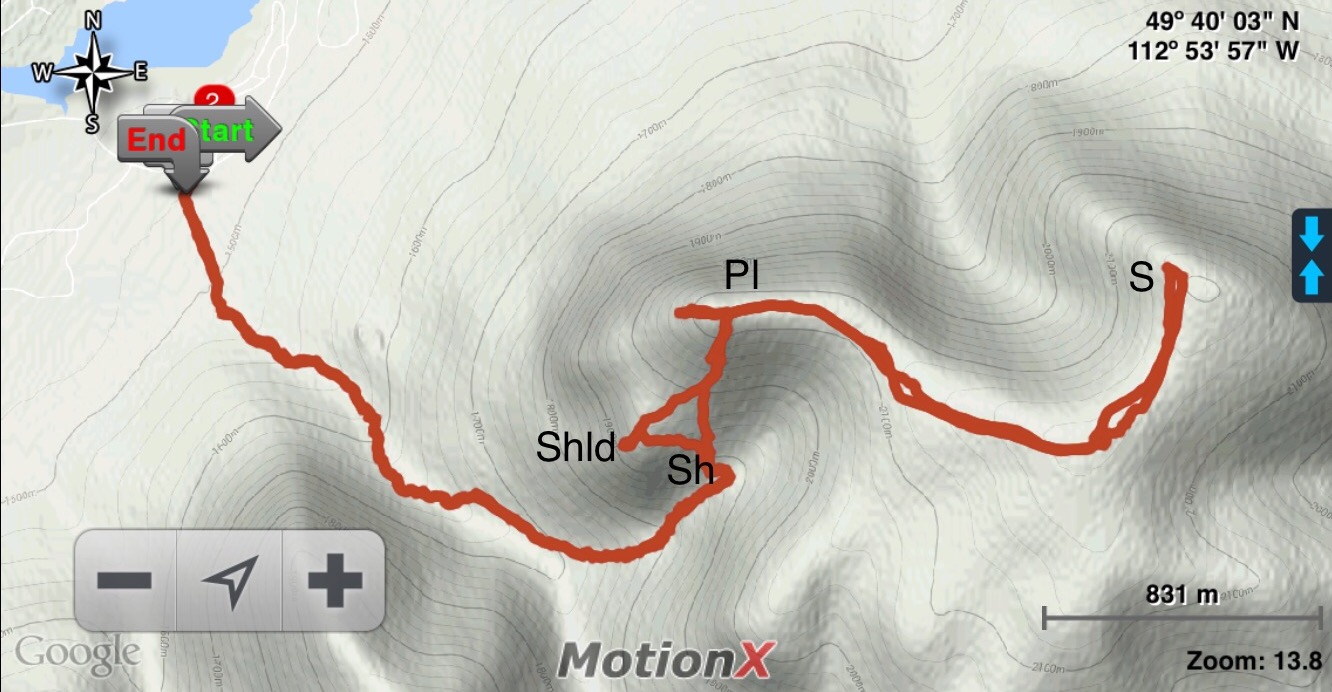
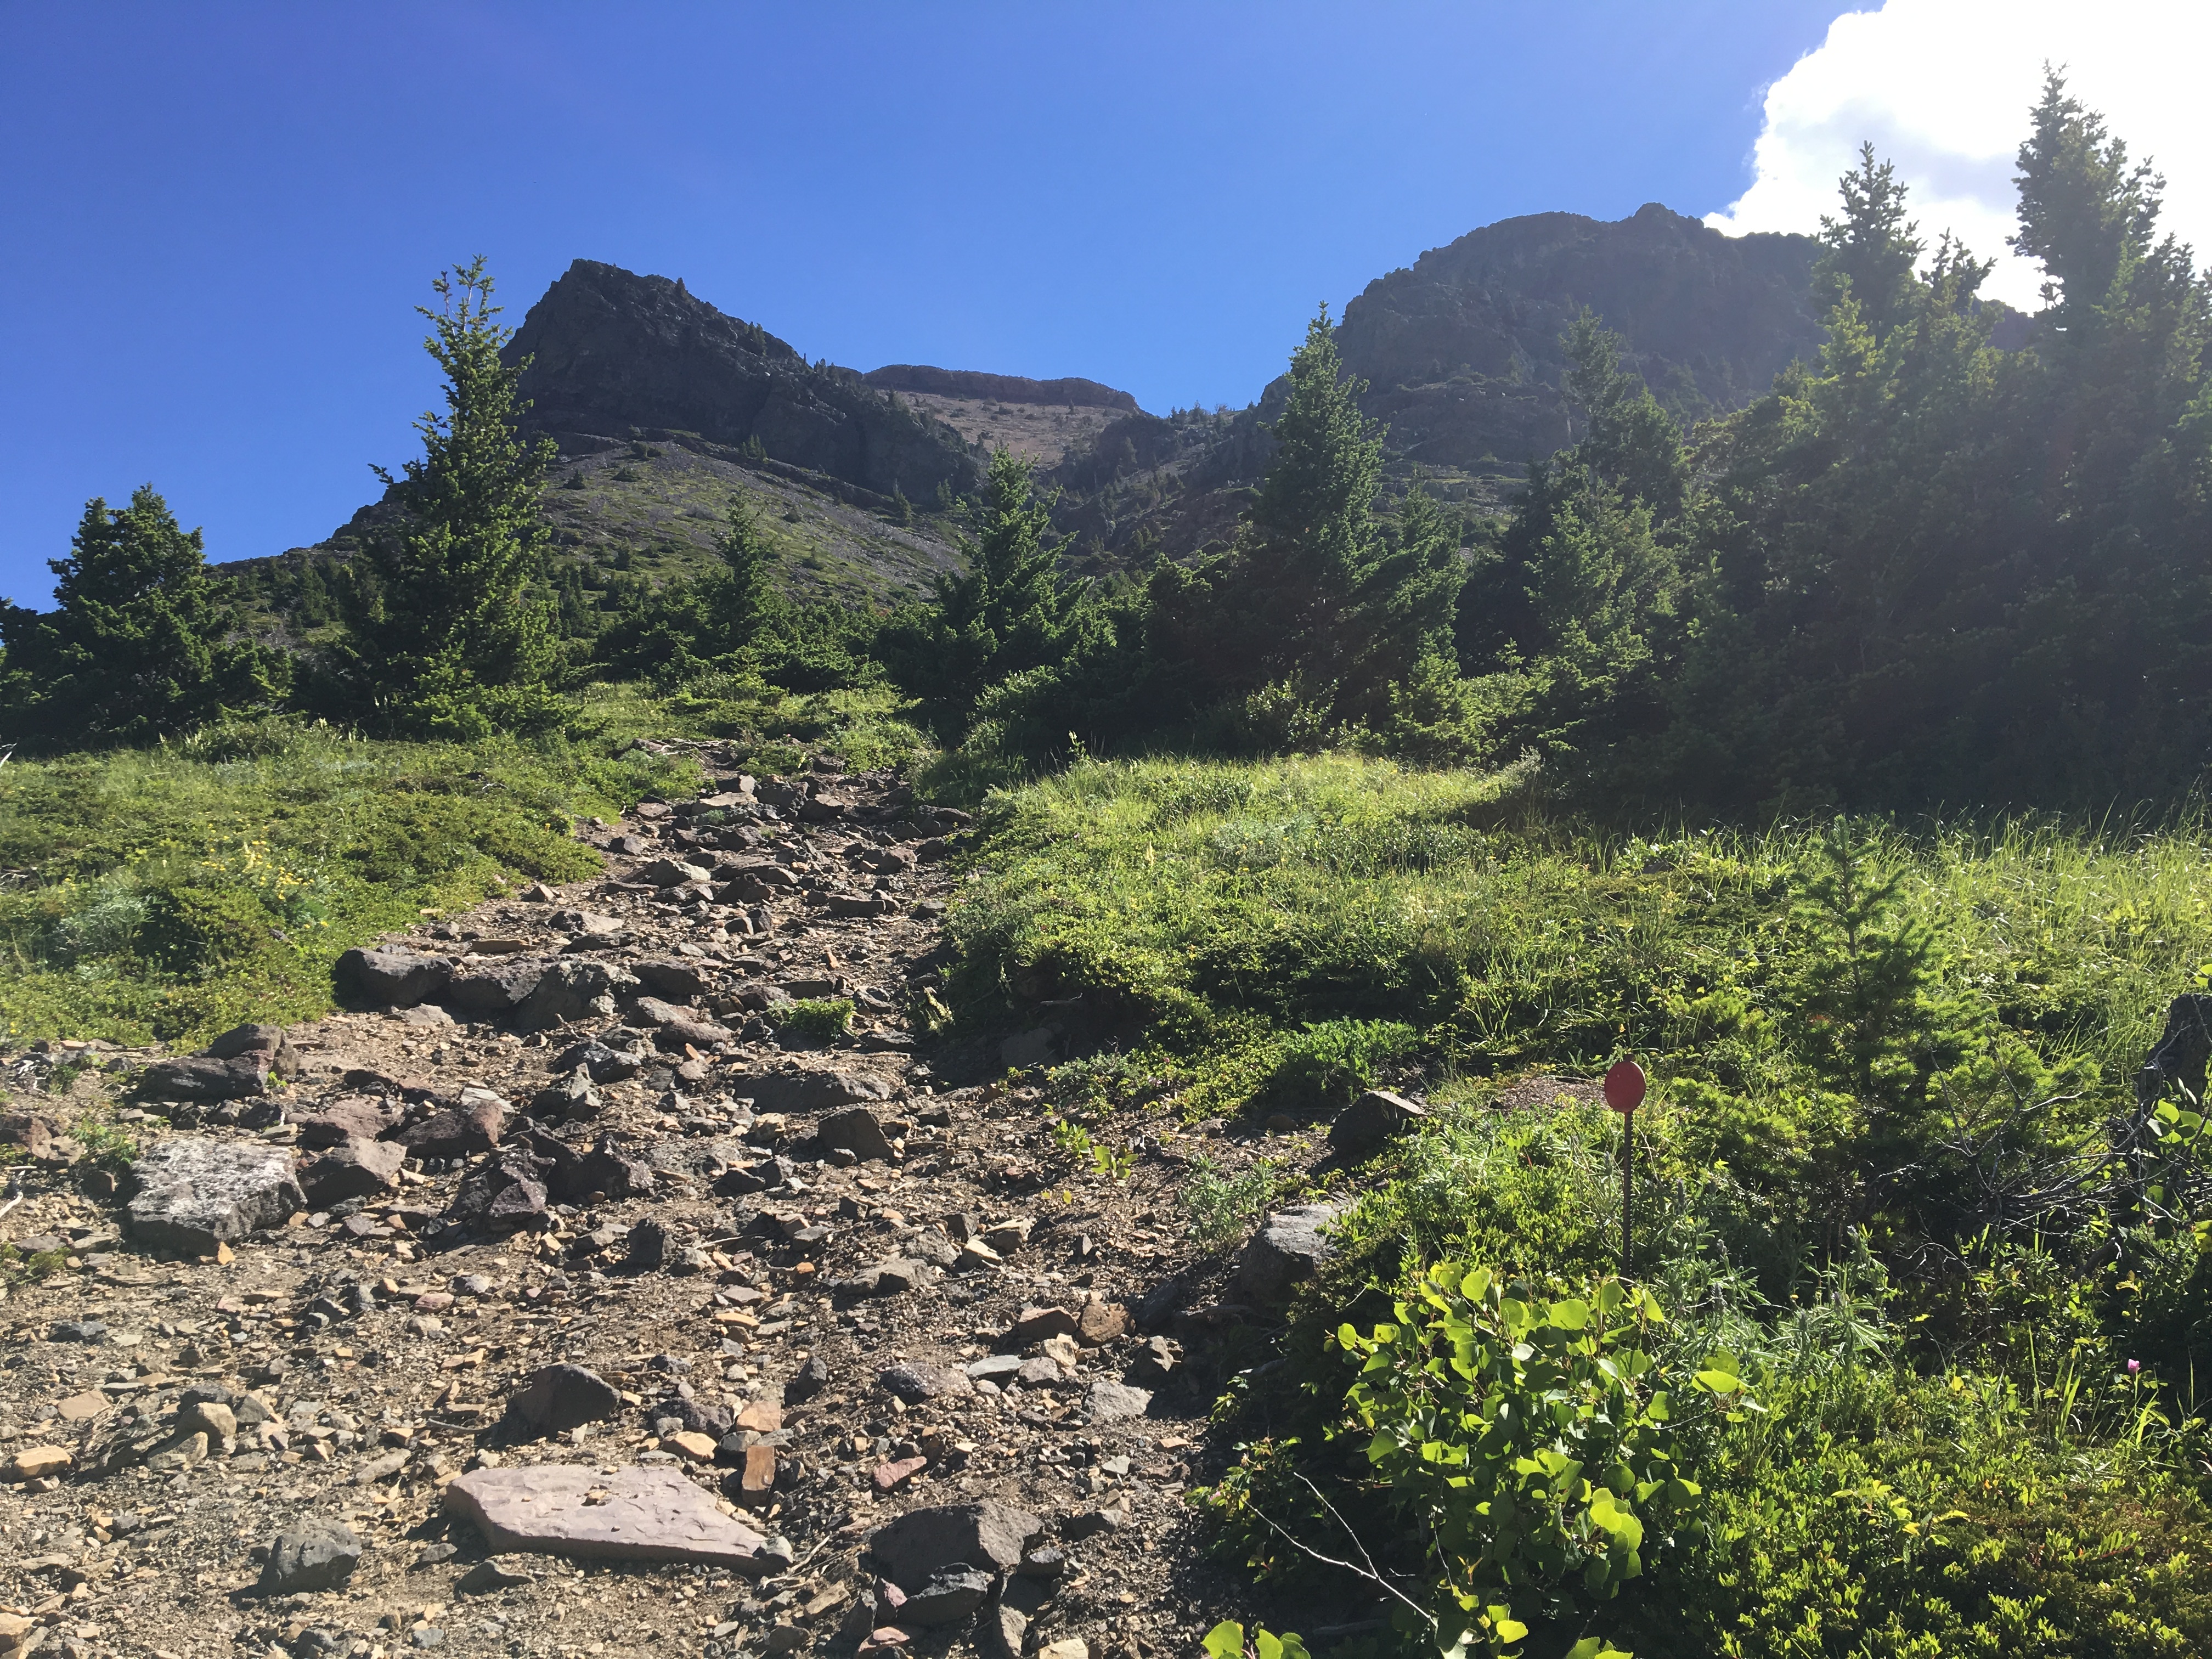
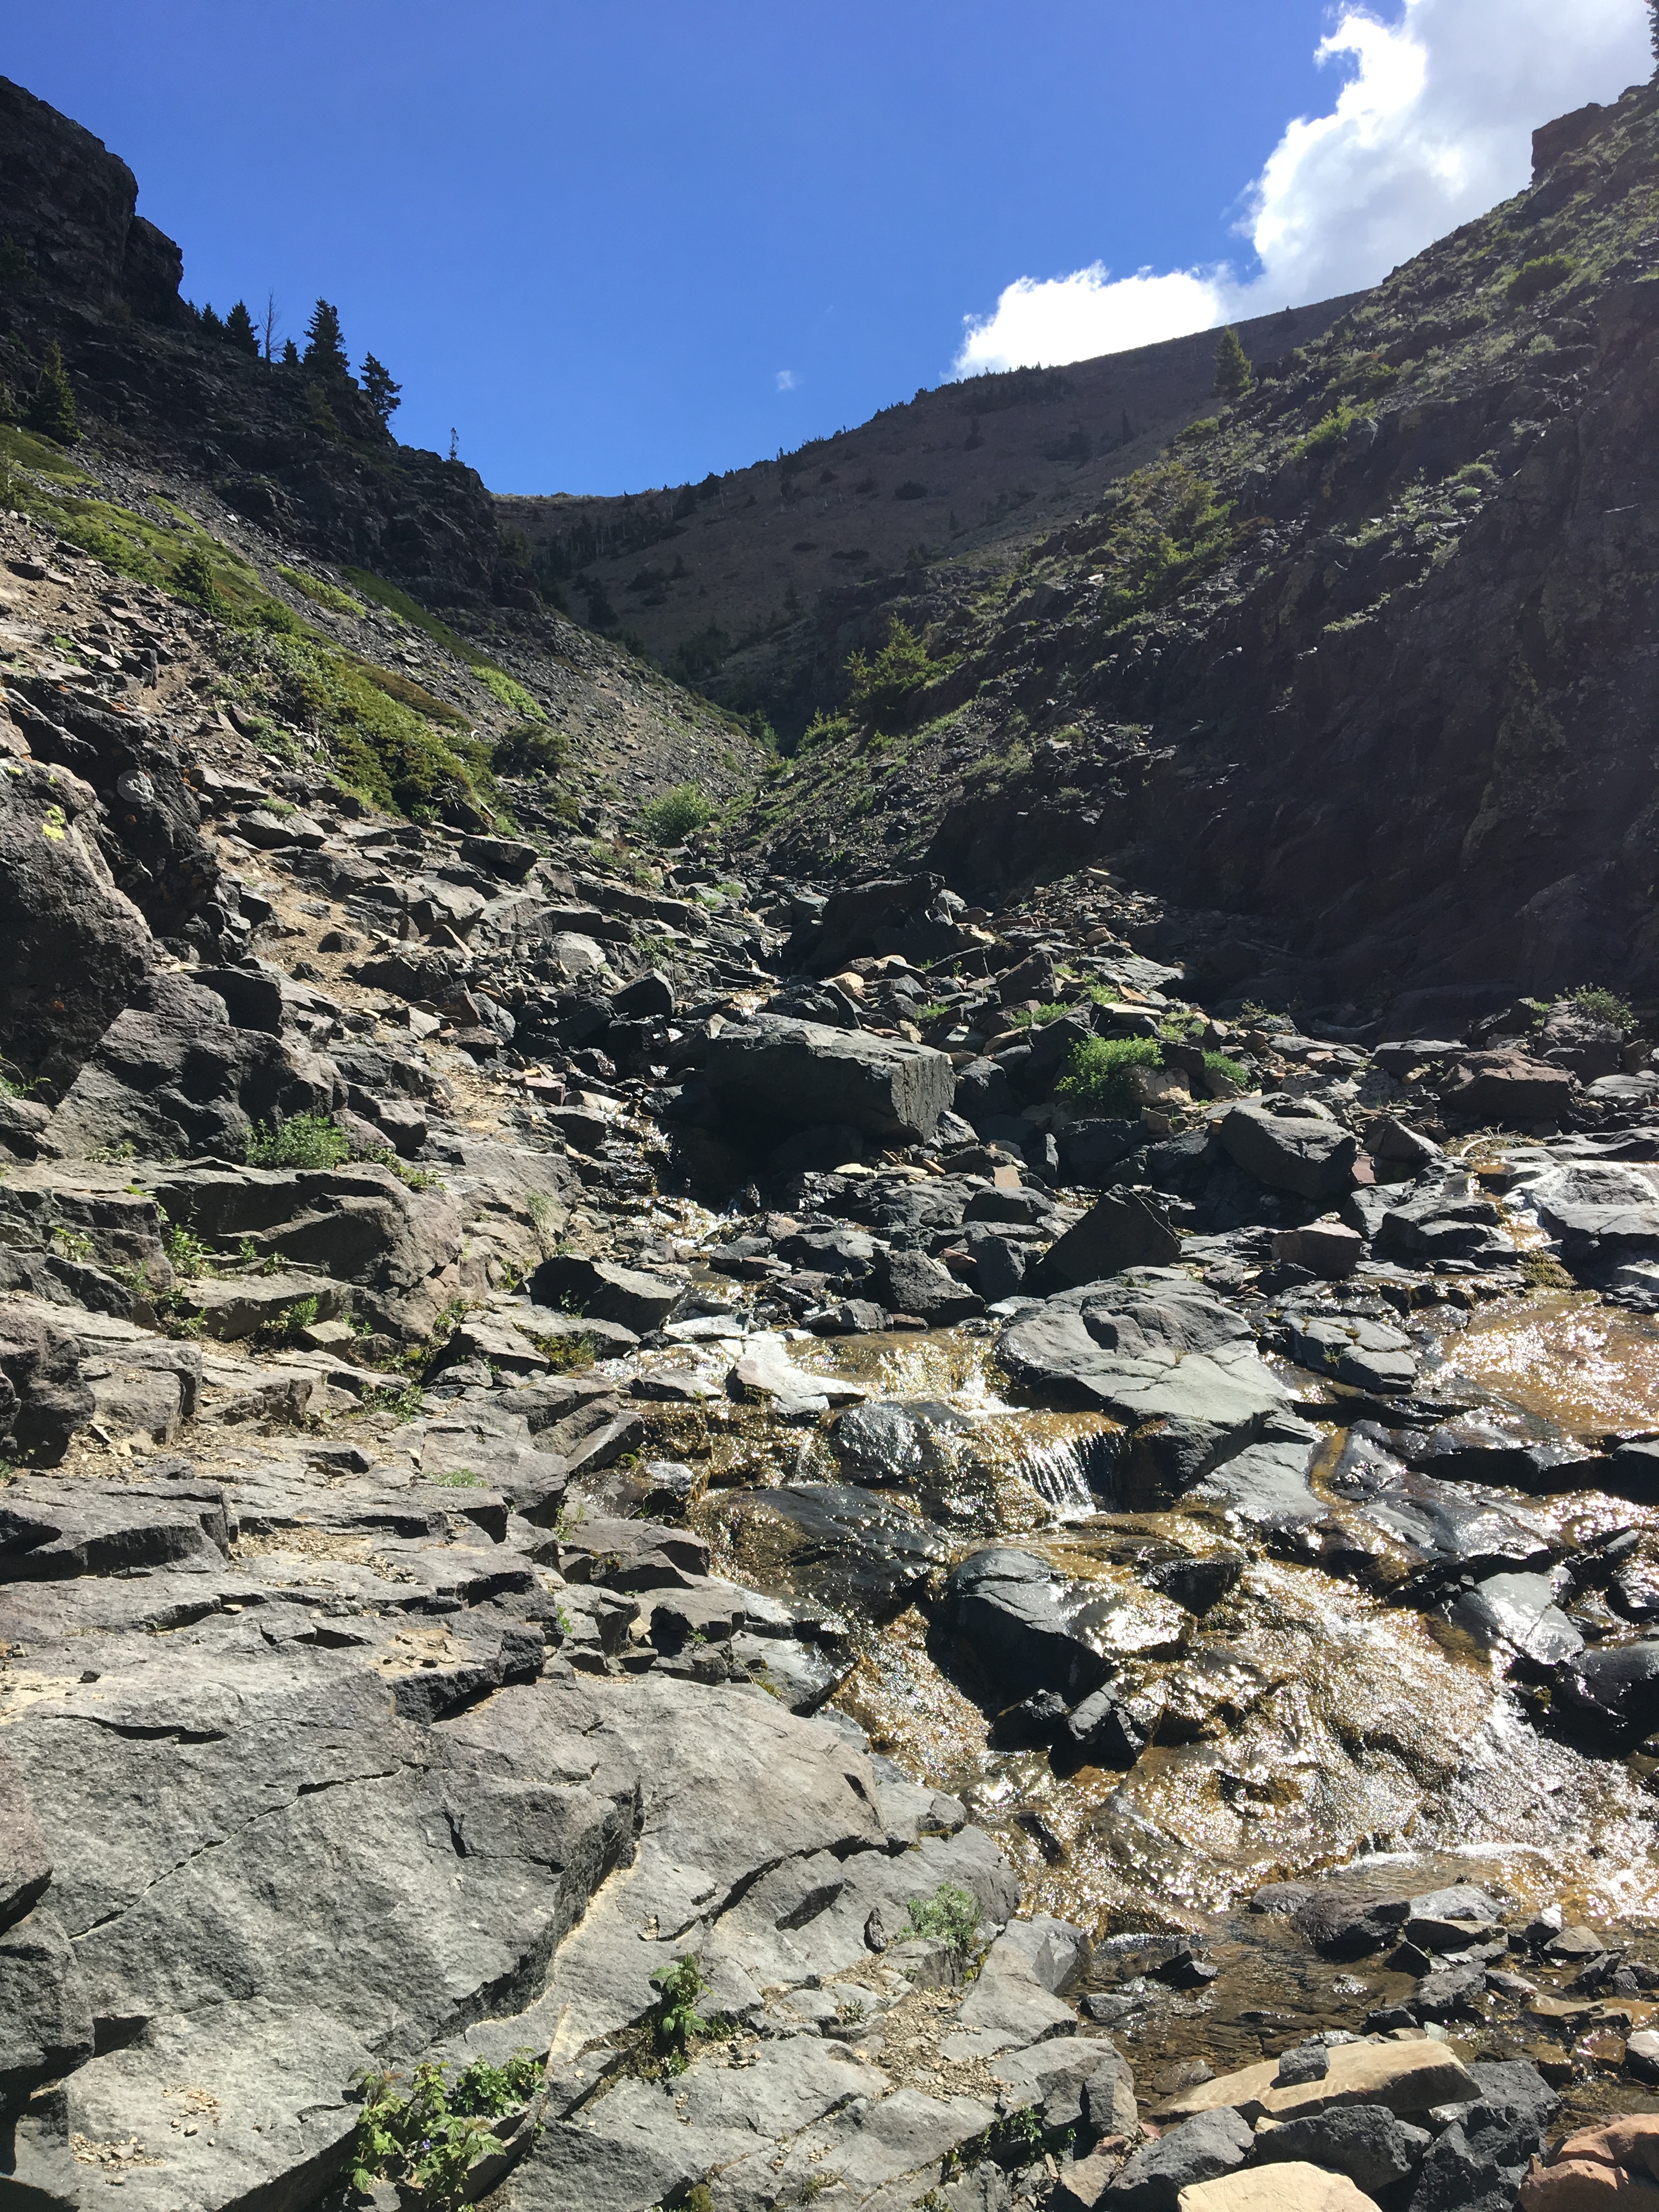
You start out in cool aspen forest, eventually reaching a gully, where your climb begins. Along the way, there are 4 “milestones” that I’ll show in pictures and on the map below: I’ll call them the Shelf, the Shoulder, the Plateau and the Summit. Any one of them would be a reasonable goal depending on your group’s mood and ability.

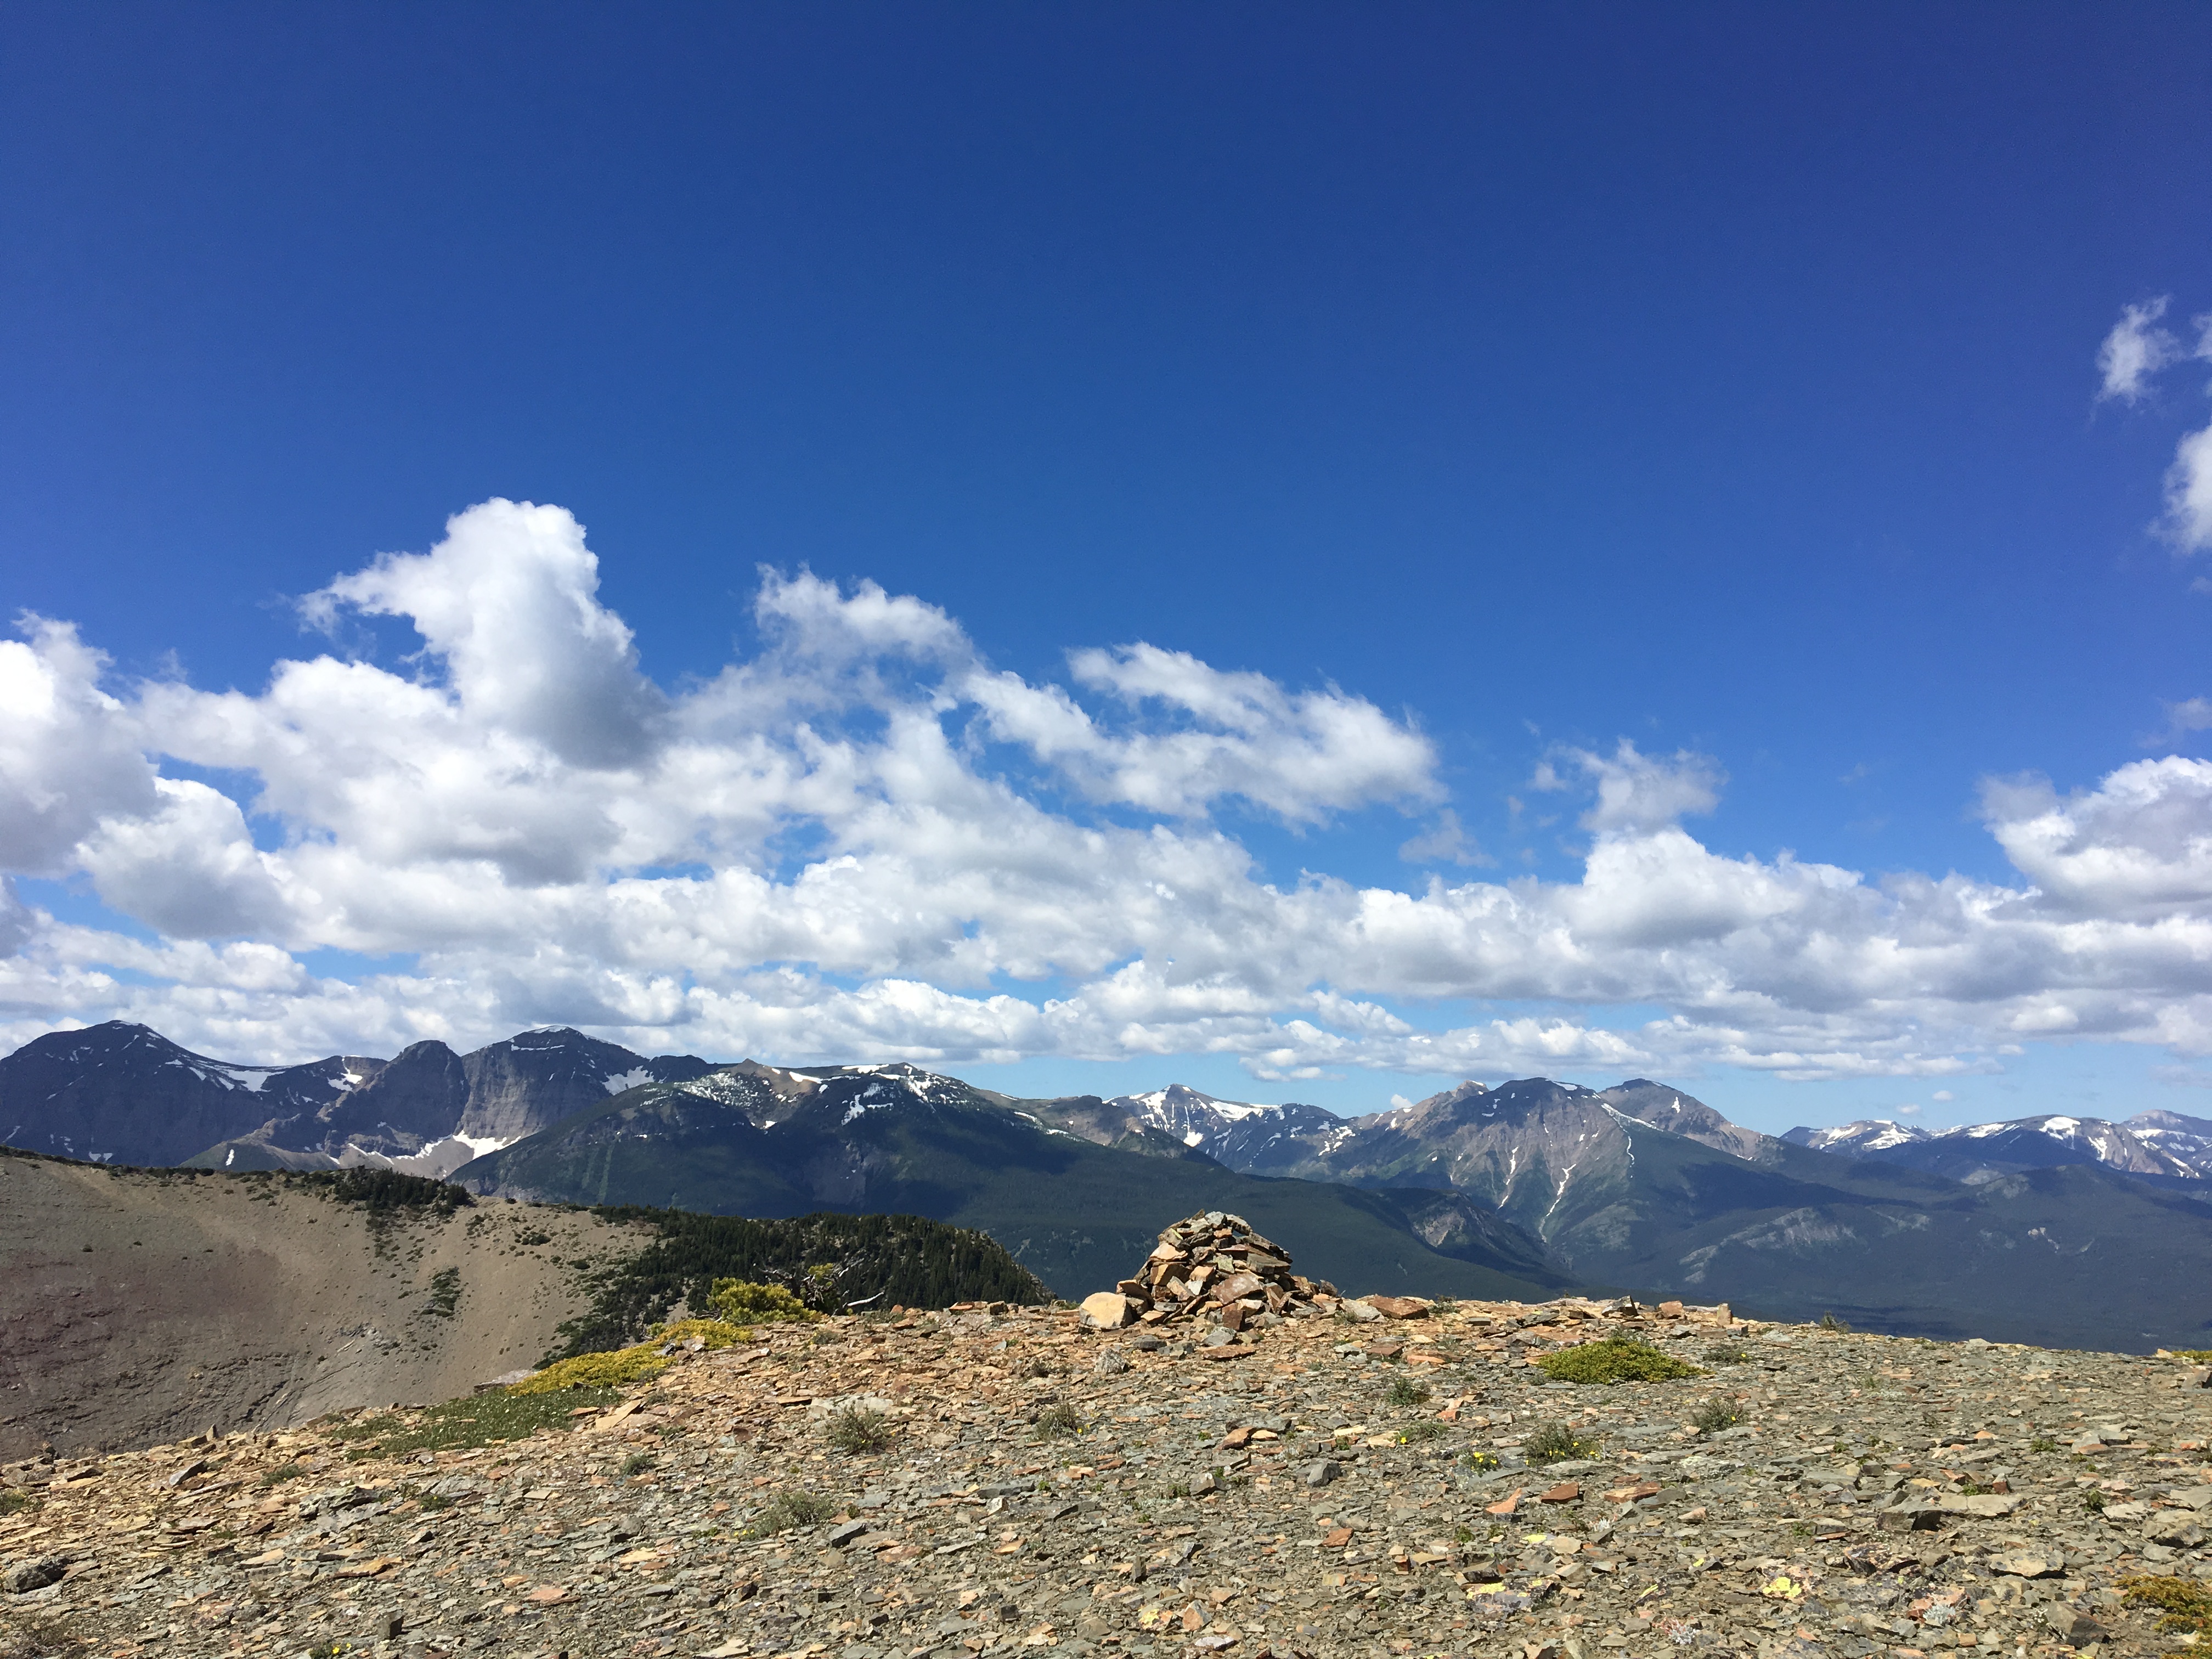
The trail takes you to the Plateau with its amazing views. The Summit is beyond and requires a bit more hiking to attain. However, by the time you’ve reached the Plateau, you’ve done most of the tough climbing and reaching the Summit is quick and worthwhile.

My iPhone apps tell me that my route was 7km from the car to the summit (which included a bit of meandering on the Shoulder and Plateau) with 2425 feet/739 meters elevation gain. It took 2 hours, 20 minutes to reach the Plateau including all rest stops. I was at the Summit at 3 hours, which included a good 15 minutes of hanging around on the Plateau.

2 notes: First, there is a shortcut that you can take during the down-climb that significantly speeds up your descent provided you’re comfortable “boot-skiing” on scree and dirt. I recommend it. Details below. Second, there are ticks in this area so check yourself and your partners. We had one that hitched a ride down the mountain with us, but we found it before it bit.

Click on the pictures in the gallery to access full size images.

FullSizeRender 9
The view from Highway 774. S = summit, Pl = plateau
FullSizeRender 10.jpg
The route up and back. Note the North-South vertical cut-off line between the Plateau and Shelf. This is the quick descent route down the scree slope. Definitely don’t think to climb up this way. The ascent route heads first West to the Shoulder, then up to the Plateau. Sh = Shelf, Shld = Shoulder, Pl = Plateau, S = Summit
IMG_6119.JPG
This is what you’ll see at the parking area. Head right to start your ascent.
IMG_6121.JPG
The initial portion (roughly 2km) of the trail is through some forest, skirting a creek that’s to your right during the ascent.
IMG_6123.JPG
Eventually, the trail leaves the area that’s designated Wildland Provincial Park.
IMG_6126.JPG
It doesn’t take too long before you can look over your shoulder and start seeing the peaks of the Flathead Range, marking the Continental Divide.
IMG_6128.JPG
The trail is marked all the way to the Plateau with these nice orange circles.
IMG_6134.JPG
Soon after clearing the trees, you reach a gully with distinctive black rocks. Part way up, you’ll encounter a shallow stream making its way down.
IMG_6135.JPG
Looking up and left from the gully, you see this prominence. This is the Shelf as seen from below. The more intense climbing starts around here.
IMG_6145.JPG
This is the view from the Shelf, looking back down the gully.
IMG_6143.JPG
If you turn around and look up from the Shelf, you can see the quick descent route from the Plateau. Don’t climb up this way. Continue following the orange circles and proceed left toward the Shoulder.
IMG_6148.JPG
Once you reach the shoulder, you’ll see this cairn at its western-most extent. It’s a good place to take a rest.
IMG_6151.JPG
Panorama from the Shoulder.
IMG_6155.JPG
From the Shoulder, this is the view up toward the Plateau. Keep following the orange circles.
IMG_6159.JPG
This is the final trail marker with its little cairn, right before you reach the Plateau.
IMG_6164.JPG
The view down to Beaver Mines Lake from the Plateau.
IMG_6166.JPG
The view back down to the Shoulder from the Plateau.
IMG_6169.JPG
The view to the Summit from the Plateau. If you’ve made it this far, all the tough climbing is behind you. Go for the summit.
IMG_6171.JPG
Wildflowers litter the final slope before the Summit.
IMG_6174.JPG
Summit panorama, looking back towards the Plateau, with Beaver Mines Lake below, and the peaks of the Continental Divide beyond.
IMG_6172.JPG
The Summit marker.
IMG_6182
Me at the Summit. It really was a perfect day for this hike.
IMG_6157.JPG
On the way down from the Plateau, watch for the trail to split between a trail marker and a distinctive tree. The shortcut down is to the left.
IMG_6207.JPG
Walking back to the trailhead. Excellent views on the way down are a great feature of this hike.

4 thoughts on “Table Mountain

Leave a Reply

Fill in your details below or click an icon to log in:

WordPress.com Logo

You are commenting using your WordPress.com account. Log Out /  Change )

Twitter picture

You are commenting using your Twitter account. Log Out /  Change )

Facebook photo

You are commenting using your Facebook account. Log Out /  Change )

Connecting to %s