April 17, 2021. A ridge walk to a summit, featuring epic views of the Crowsnest Pass.
- Region: Crowsnest Pass. Traditional Territory of the Blackfoot, Tsuu T’ina and Ktunaxa First Nations
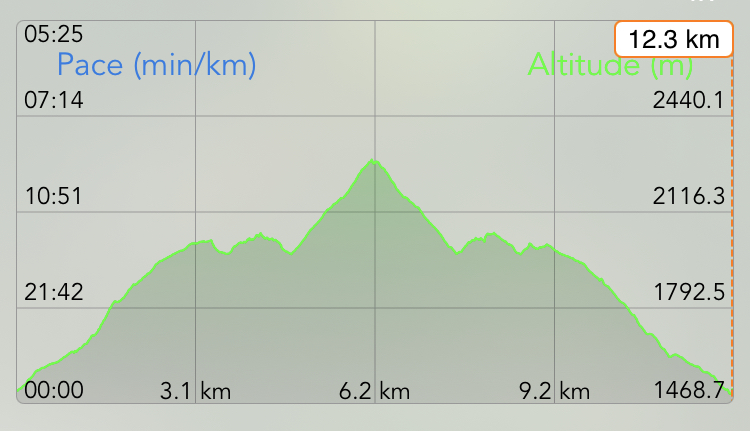
- Distance: 12.3 km round-trip
- Total Ascent: 1042 m
- Elevation of Objective: 2294 m
- Total Time: 5h 15m
- Safety and Disclaimer
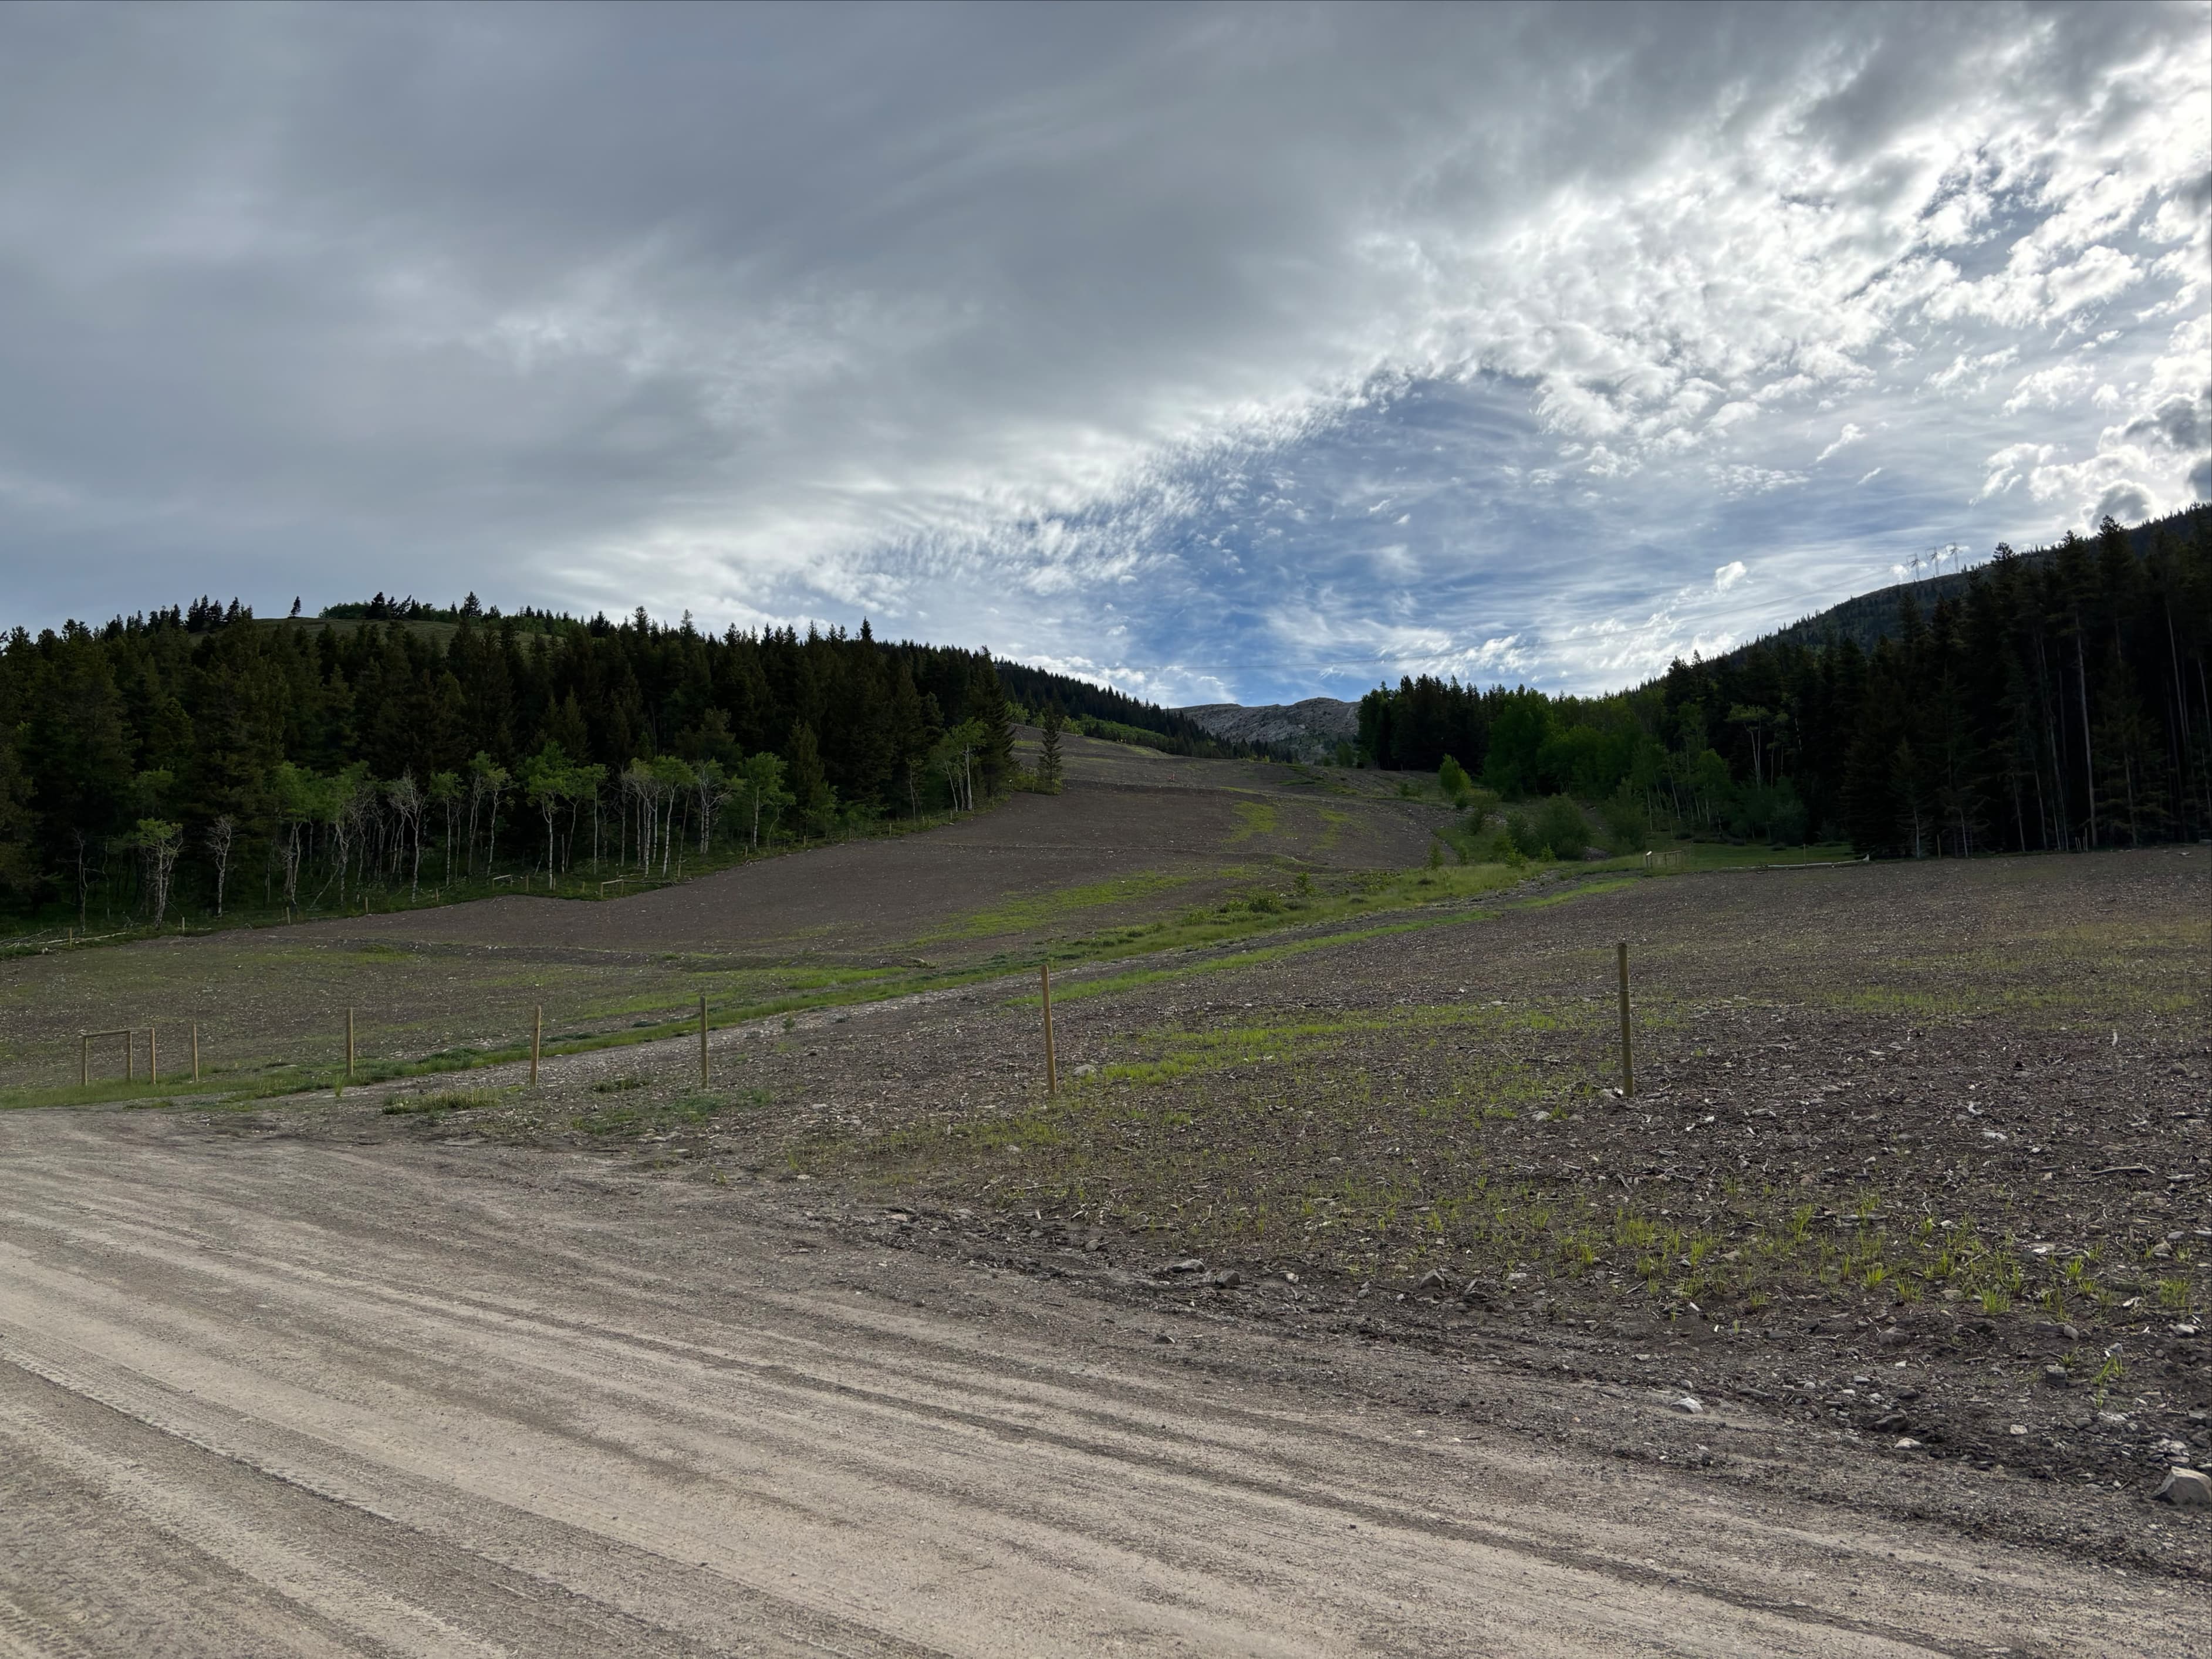
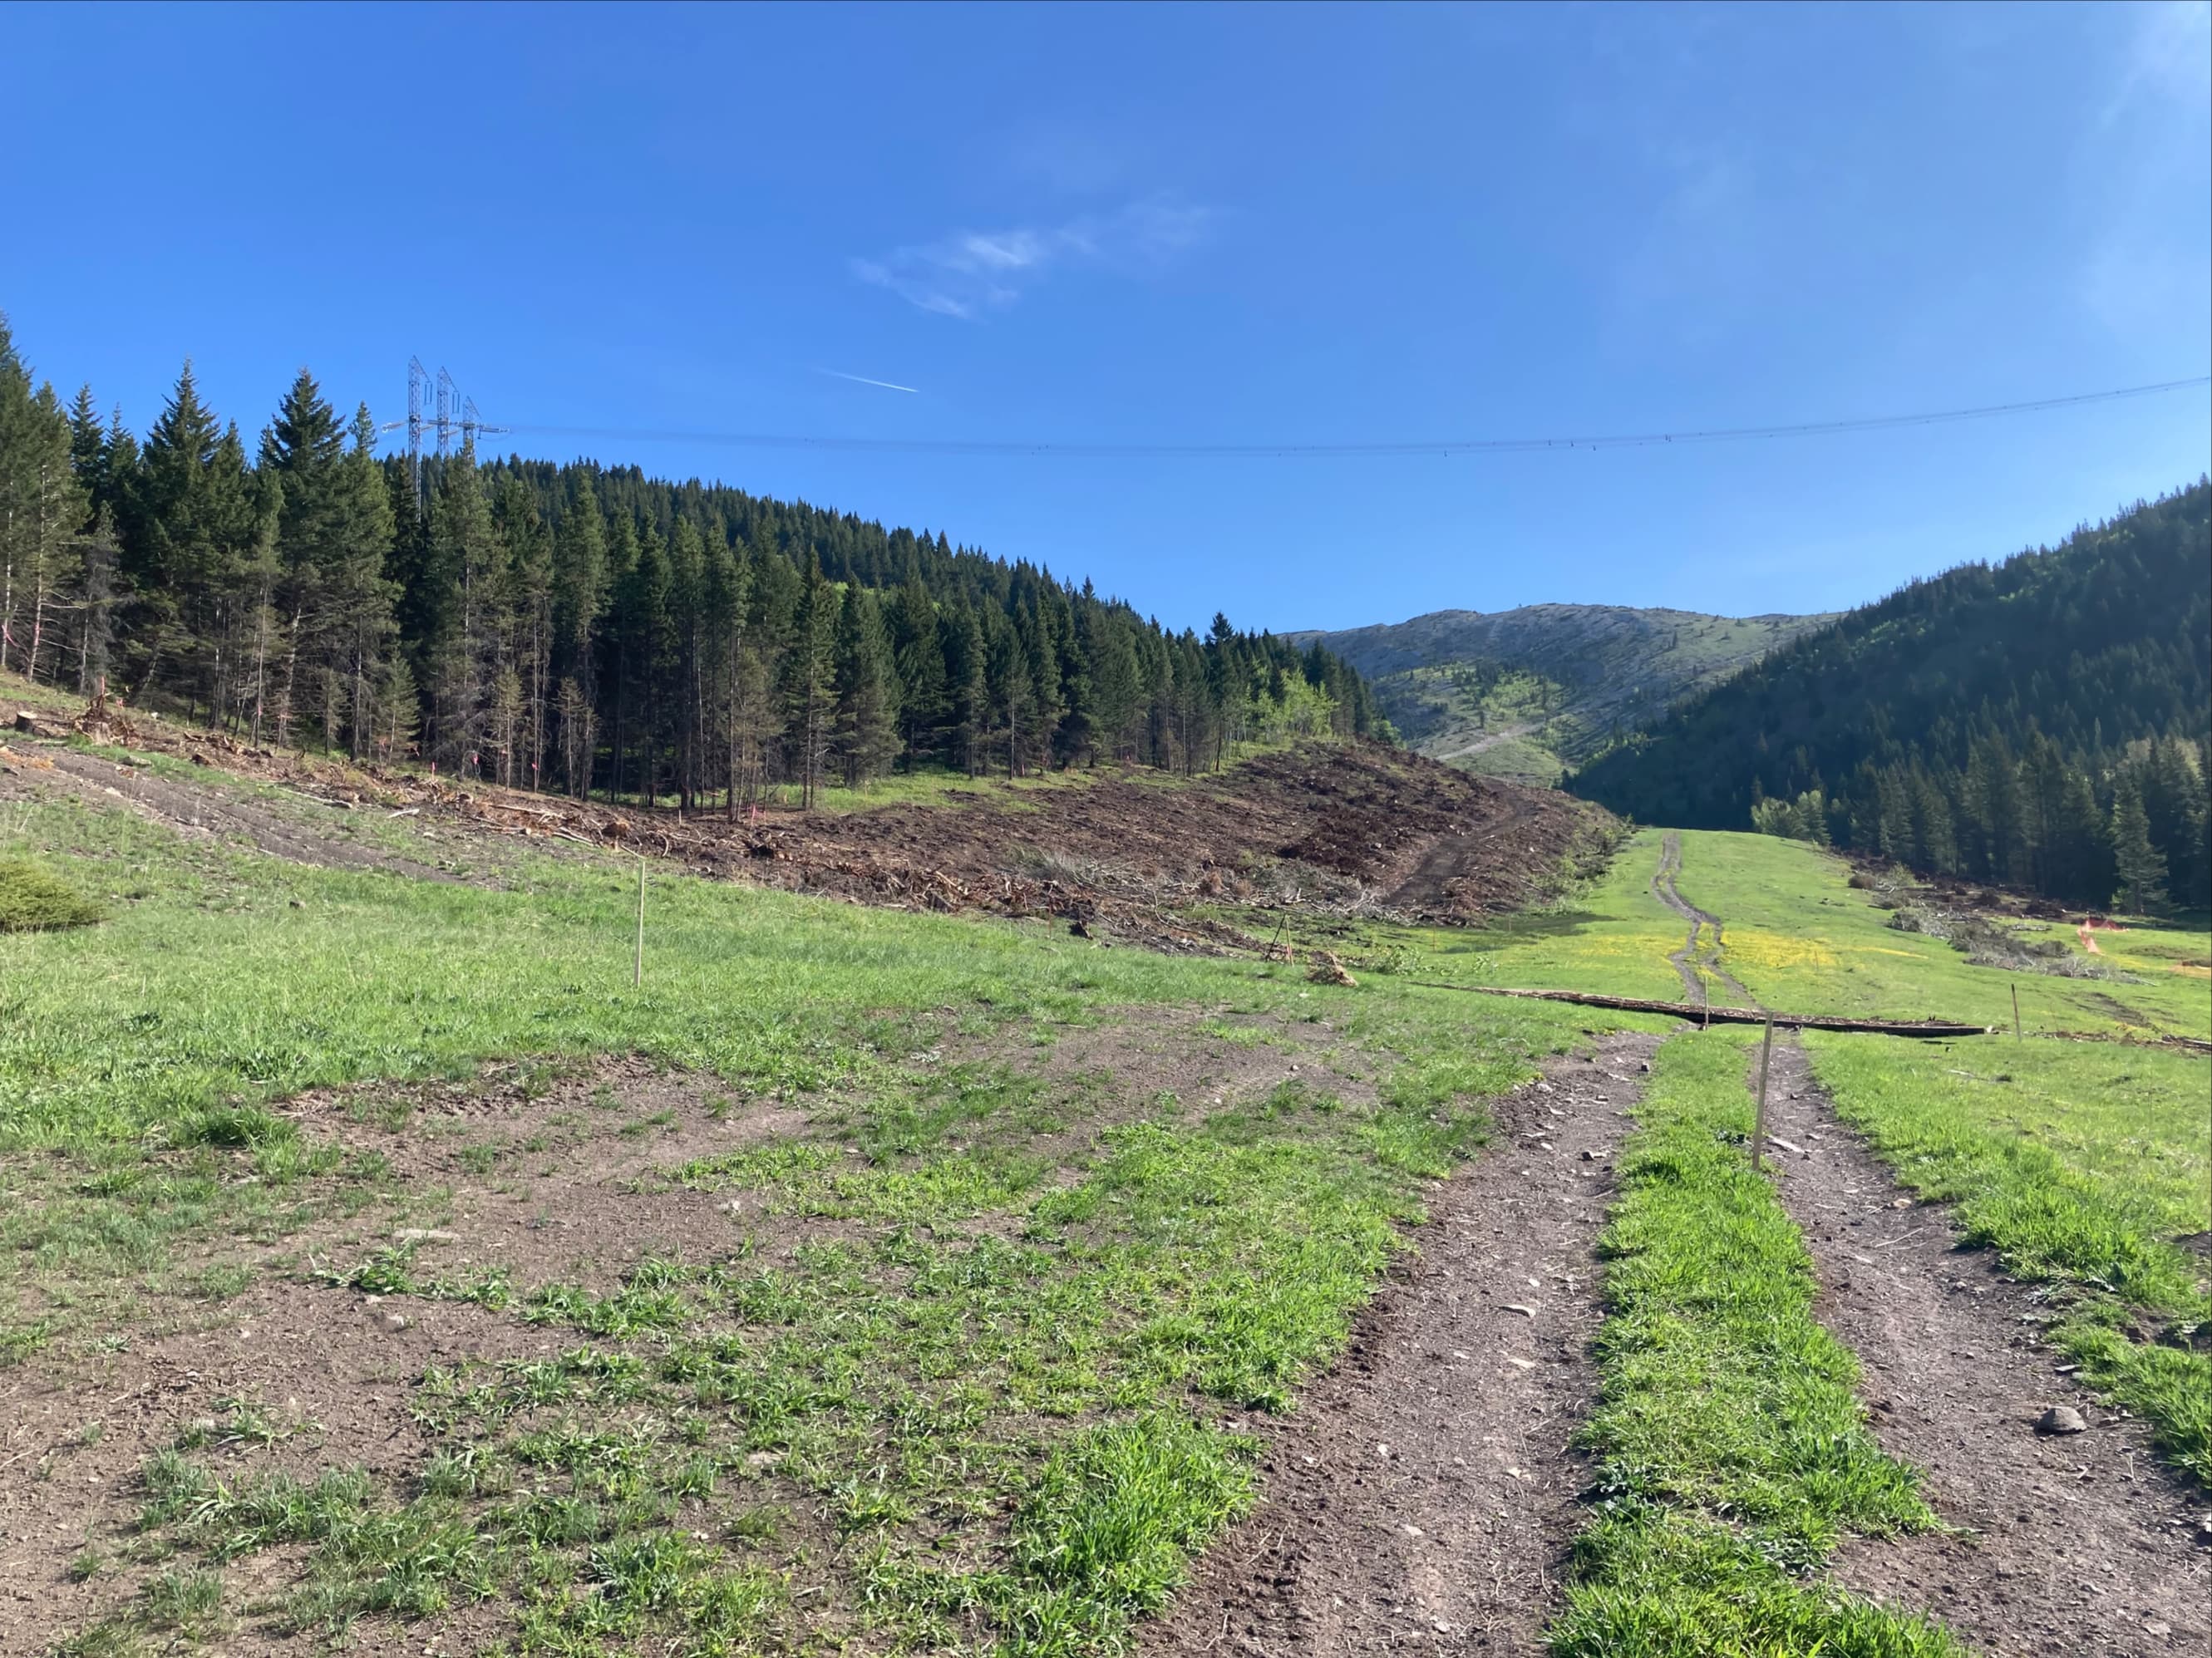
June 2025 Update: Since this post was originally published, a natural gas pipeline project altered the terrain in the area of the trailhead. As of June 2025 the project is complete but the initial part of the hike requires passing over/under/through some barbed wire fencing (or going around it). I spoke with a survey crew and the fencing is to keep grazing animals out of the area until natural grasses can re-grow. People are not barred from the area, and eventually the fencing will come down.
Original Post:
Livingstone South Peak is an objective that isn’t well covered in guide books. Ambrosi’s Southern Rockies Trail Guide only mentions it in a supplementary paragraph in his description of the Livingstone Range Chert Quarries. Bob Spirko’s trip report form 2019 says that the route is described in the old Hiking the Historic Crowsnest Pass book, which is out of print. Although this trip has elements that would qualify it as an easy scramble, with an avoidable moderate section, neither Nugara nor Kane cover it in their books. Based on internet chatter, though, lots of people have discovered this gem of late and it has been getting more and more visitors. Last fall All Stone Adventures posted a video trip report that put it on my radar. I took advantage of a one-in-a-million warm, windless April day to check it out. (Update: since I first published this post, Nugara has covered this hike in his book Popular Day Hikes: The Castle and Crowsnest.)
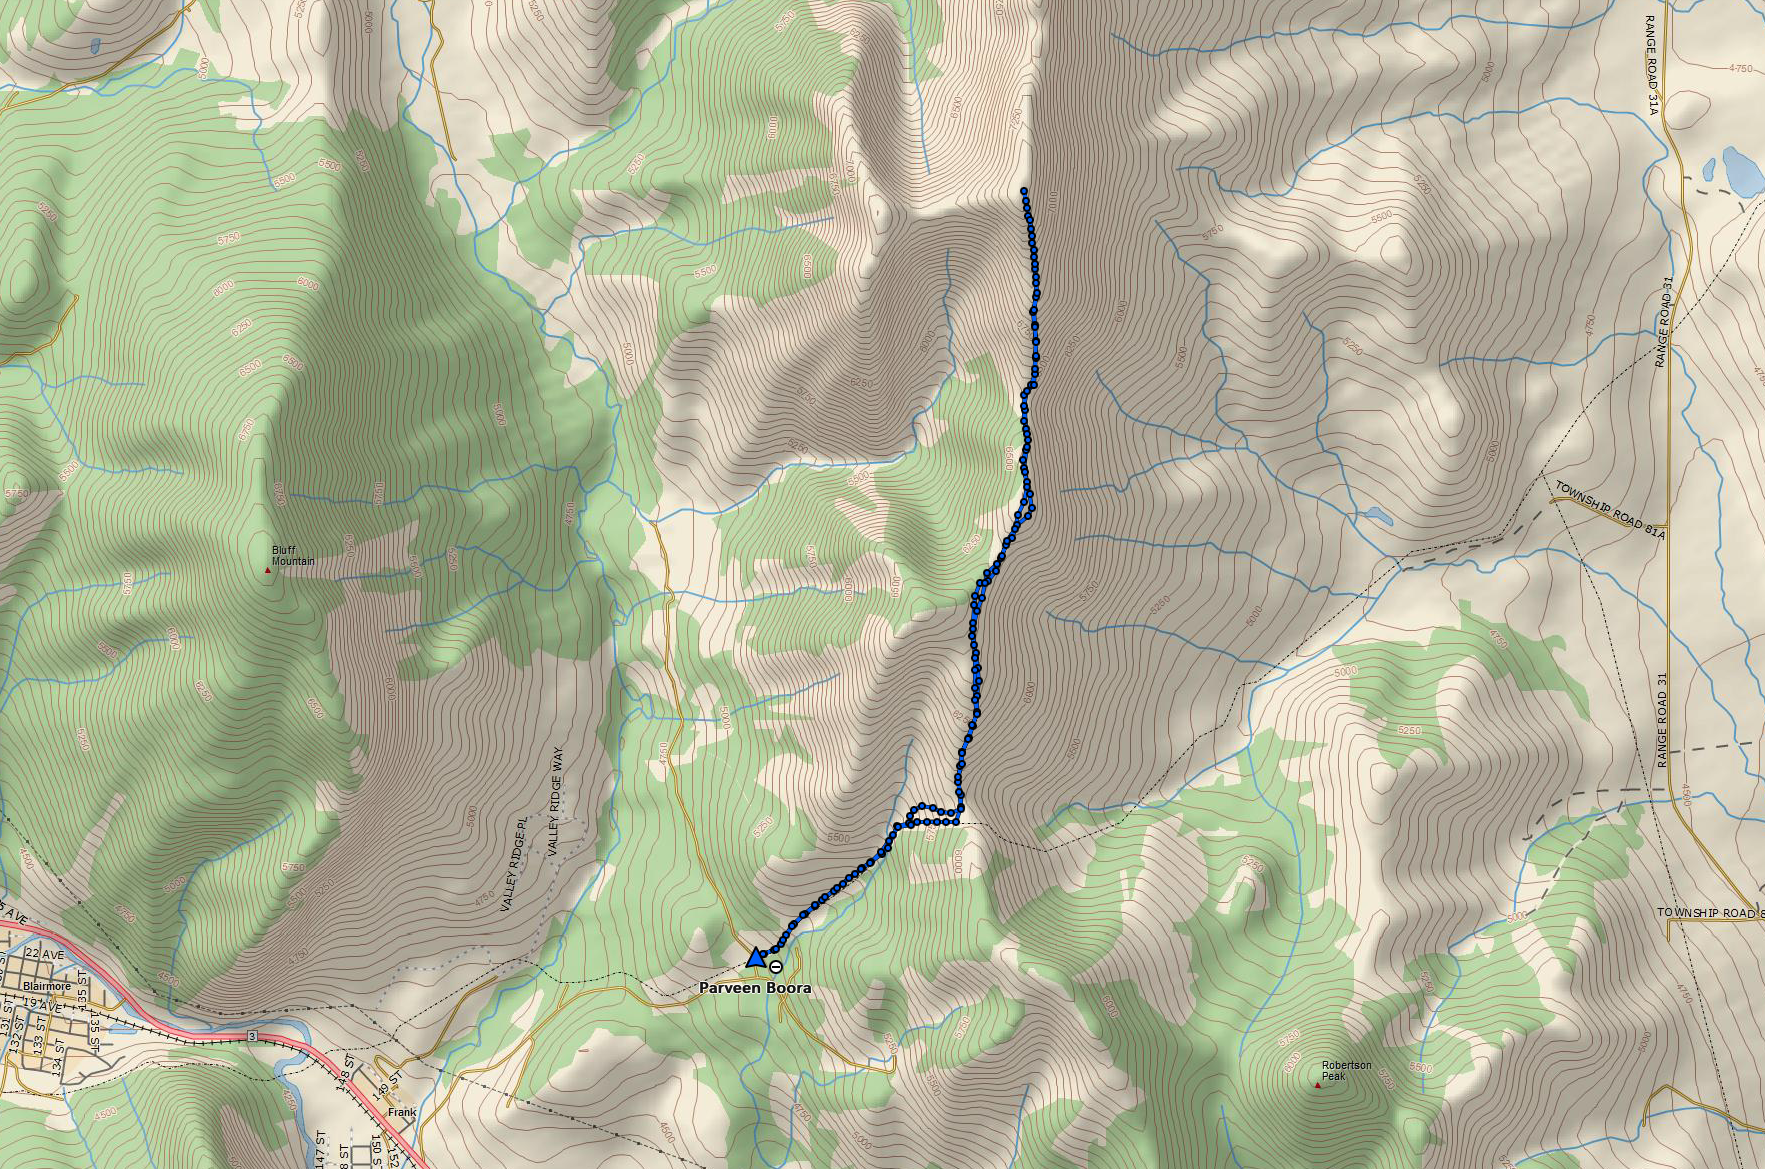
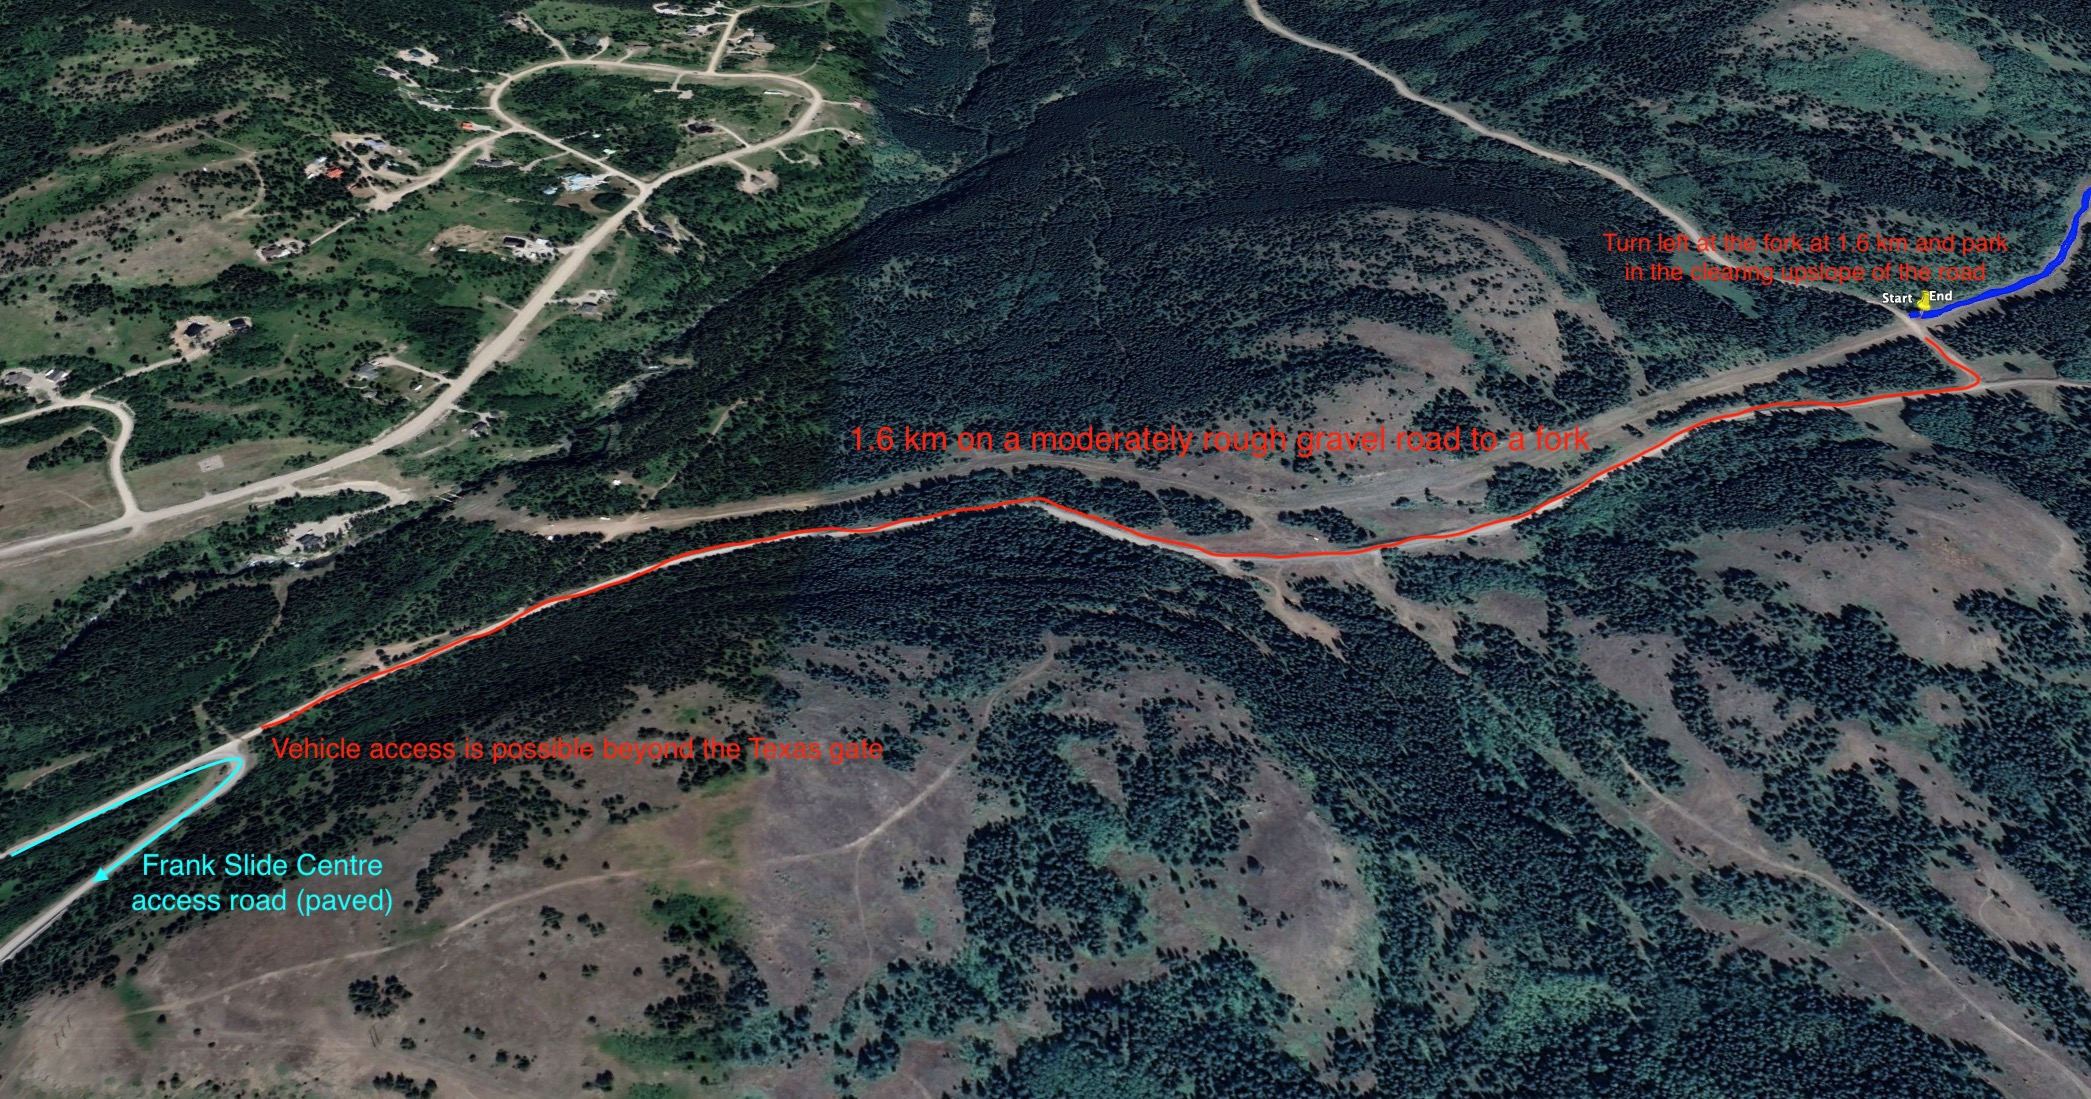
Access is straightforward. From highway 3, turn north onto the access road to the Frank Slide Interpretive Centre. The paved road eventually turns abruptly, heading toward the Centre’s parking lot. A gravel road carries on straight ahead, across a Texas Gate. AllTrails’ route map has the hike starting just past the gate. However, thanks to Spirko’s report, I knew that it was possible to drive beyond here to a more convenient parking spot. Follow the gravel road 1.6 km beyond the gate to a fork in the road. Turn left at the fork and park in the clearing in the cutline uphill of the road. This road is rough and rutted in places, but not like the awful Atlas Road…hopefully it doesn’t deteriorate to that point. See the pic below (click to get a full size/zoomable image):
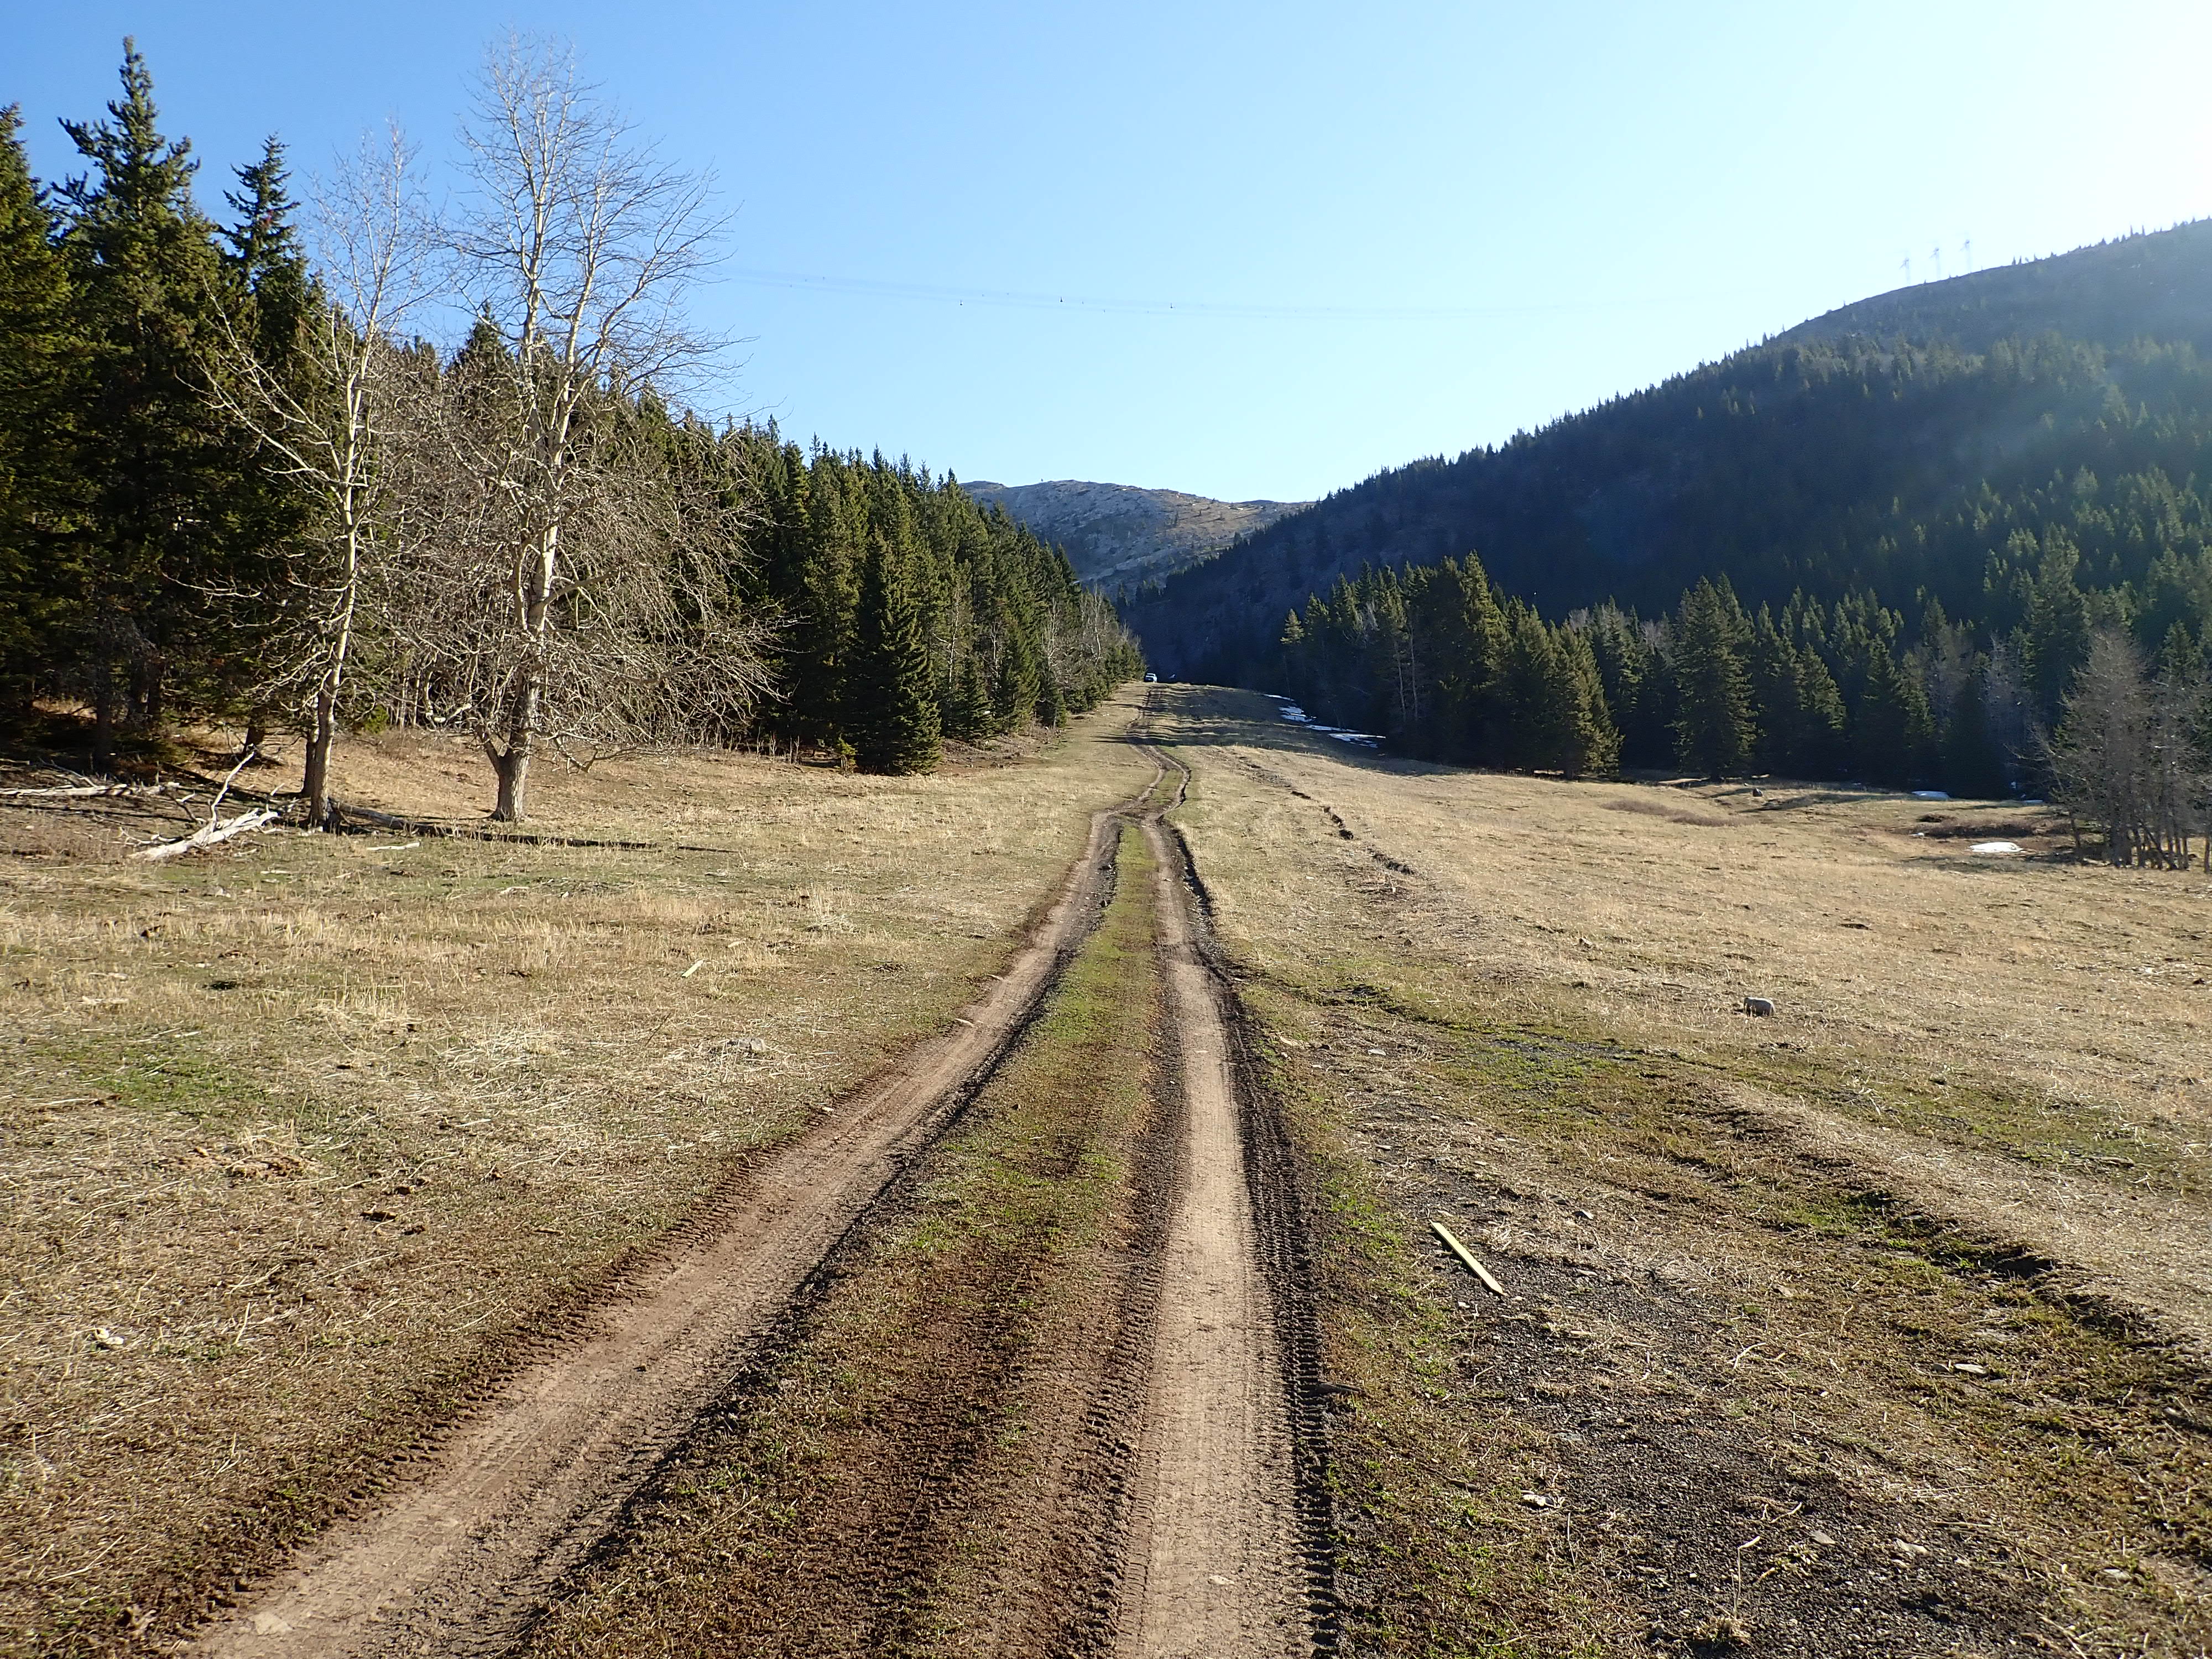
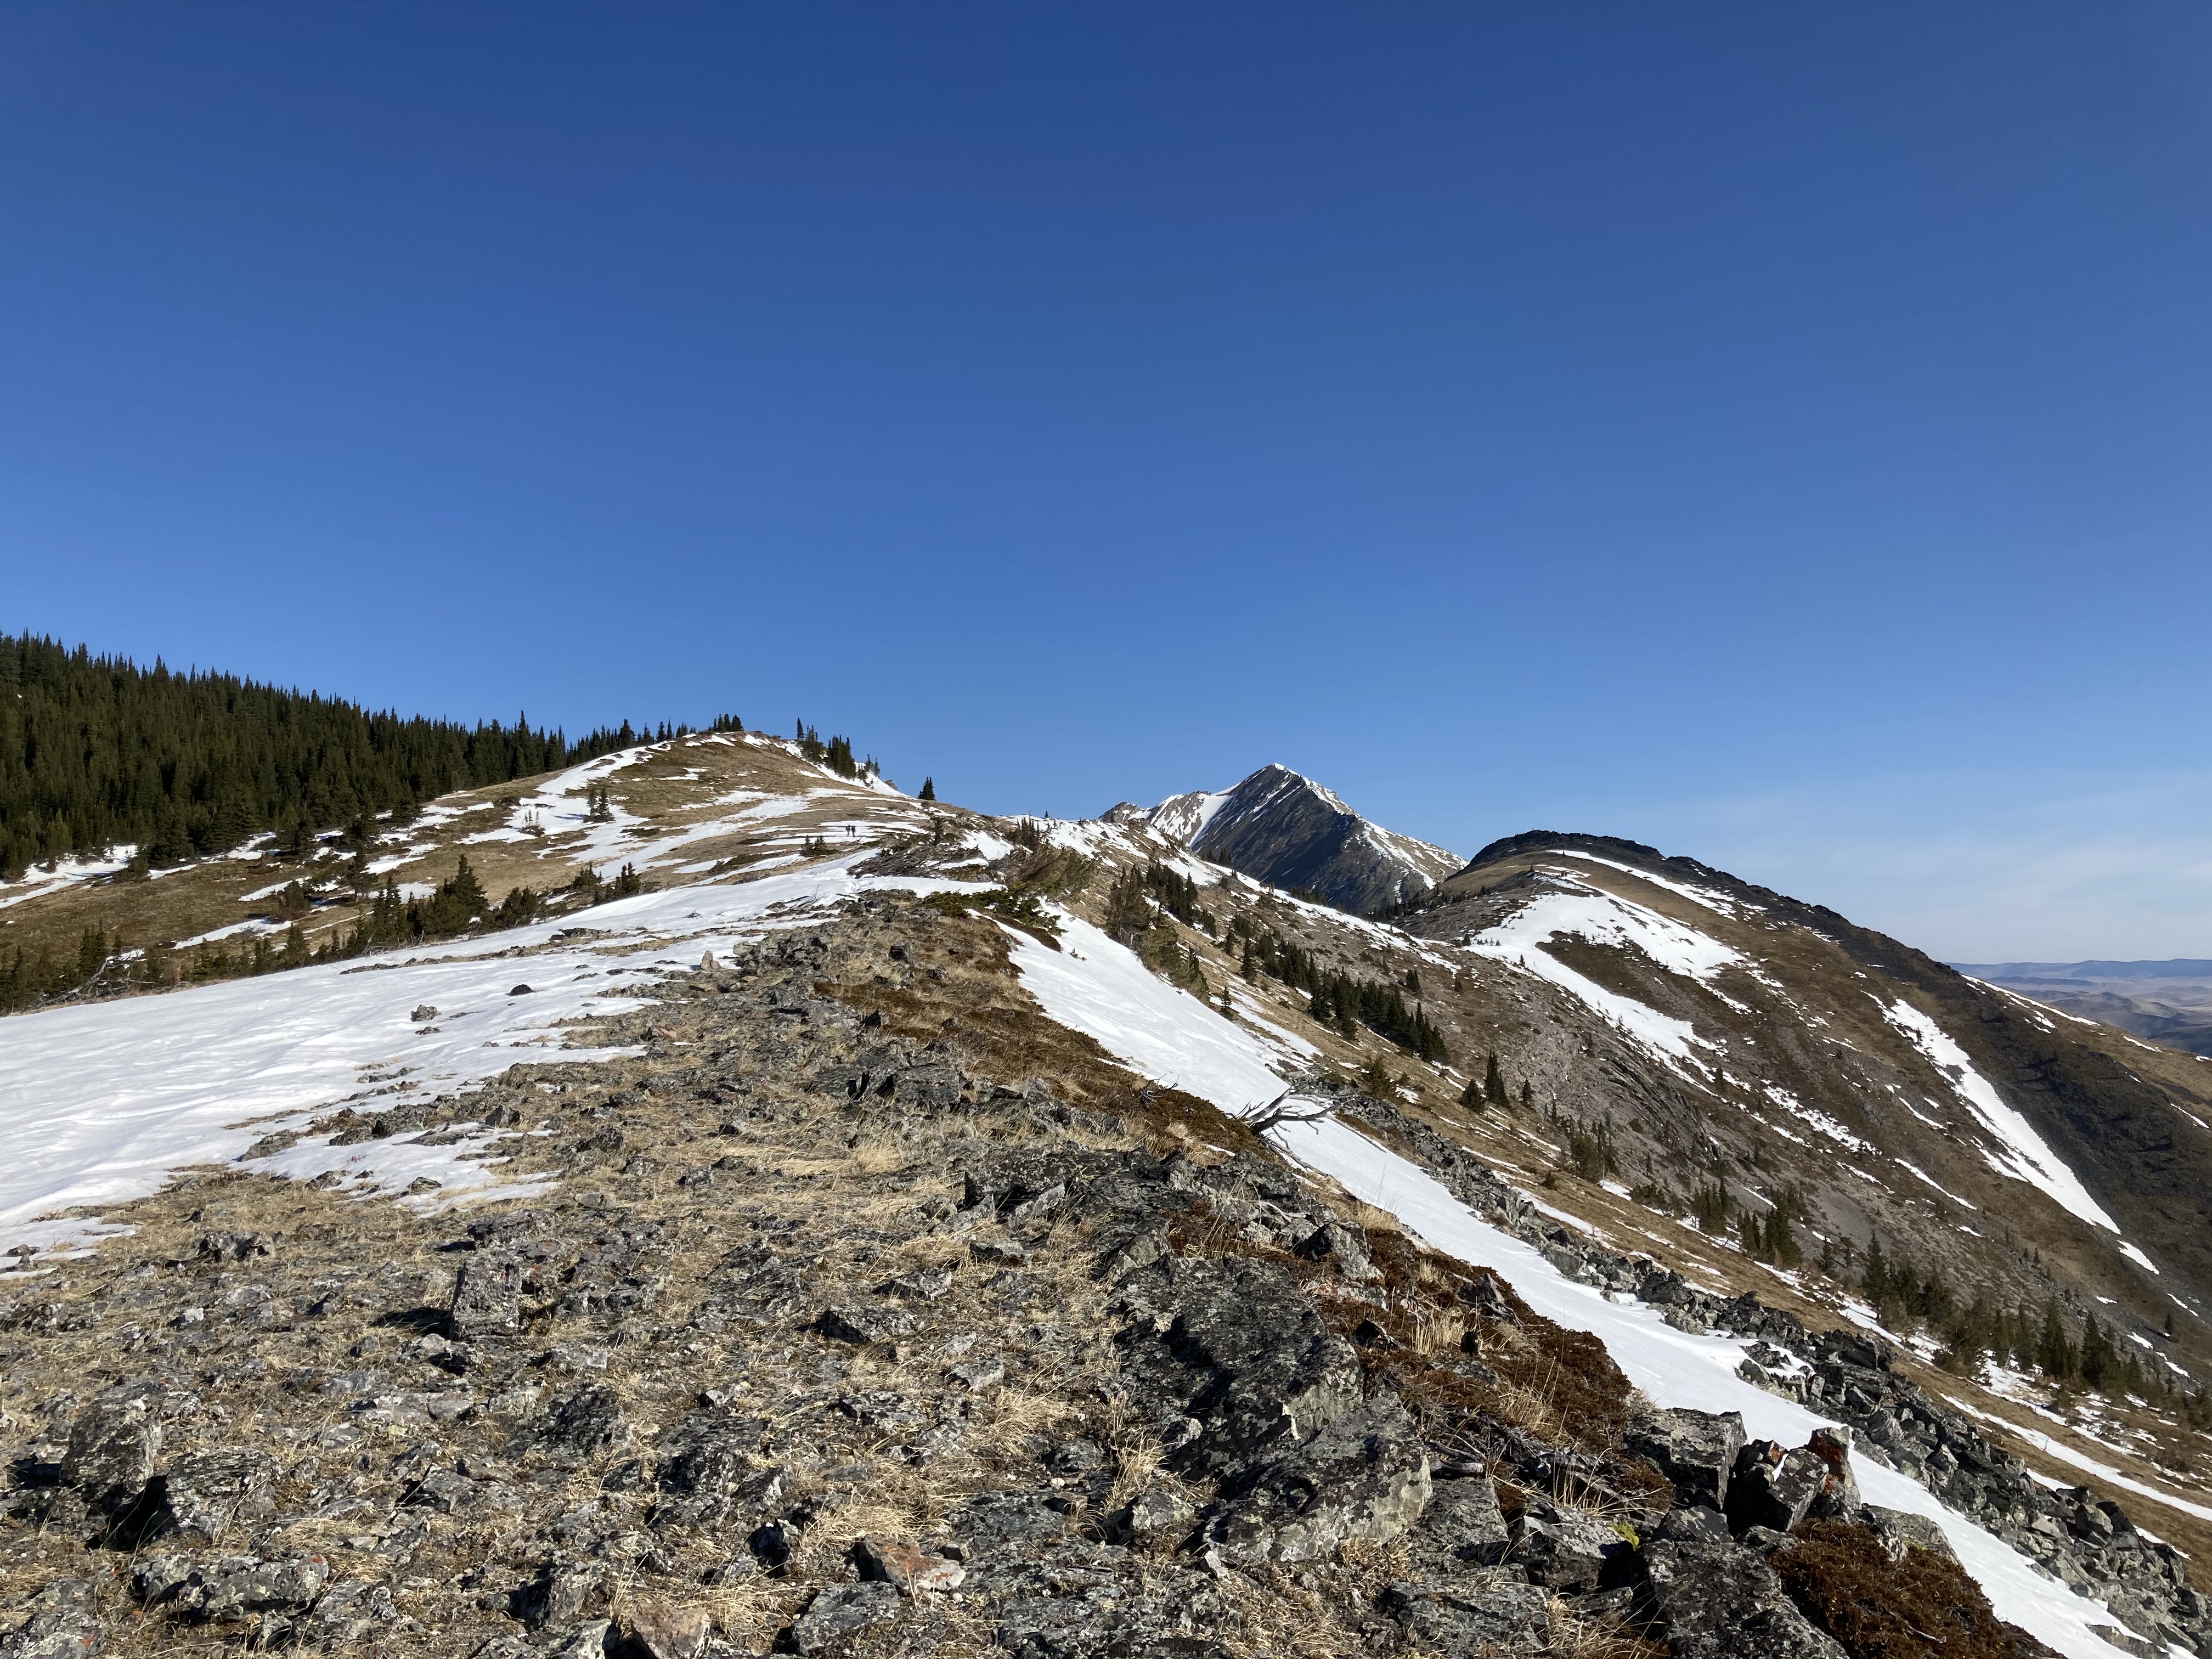
From the parking area, the route is very straightforward. A broad cutline with an ATV track proceeds northeast, ascending in a slow, steady manner. After 1 km, the route bends slightly north and enters a broad gravel-filled gully. It then bends back to the east, and ascends sharply to a saddle. At this point there’s the option of following a road that charges straight up the hill, or following a (slightly) more gently graded switchback road to the climber’s left.
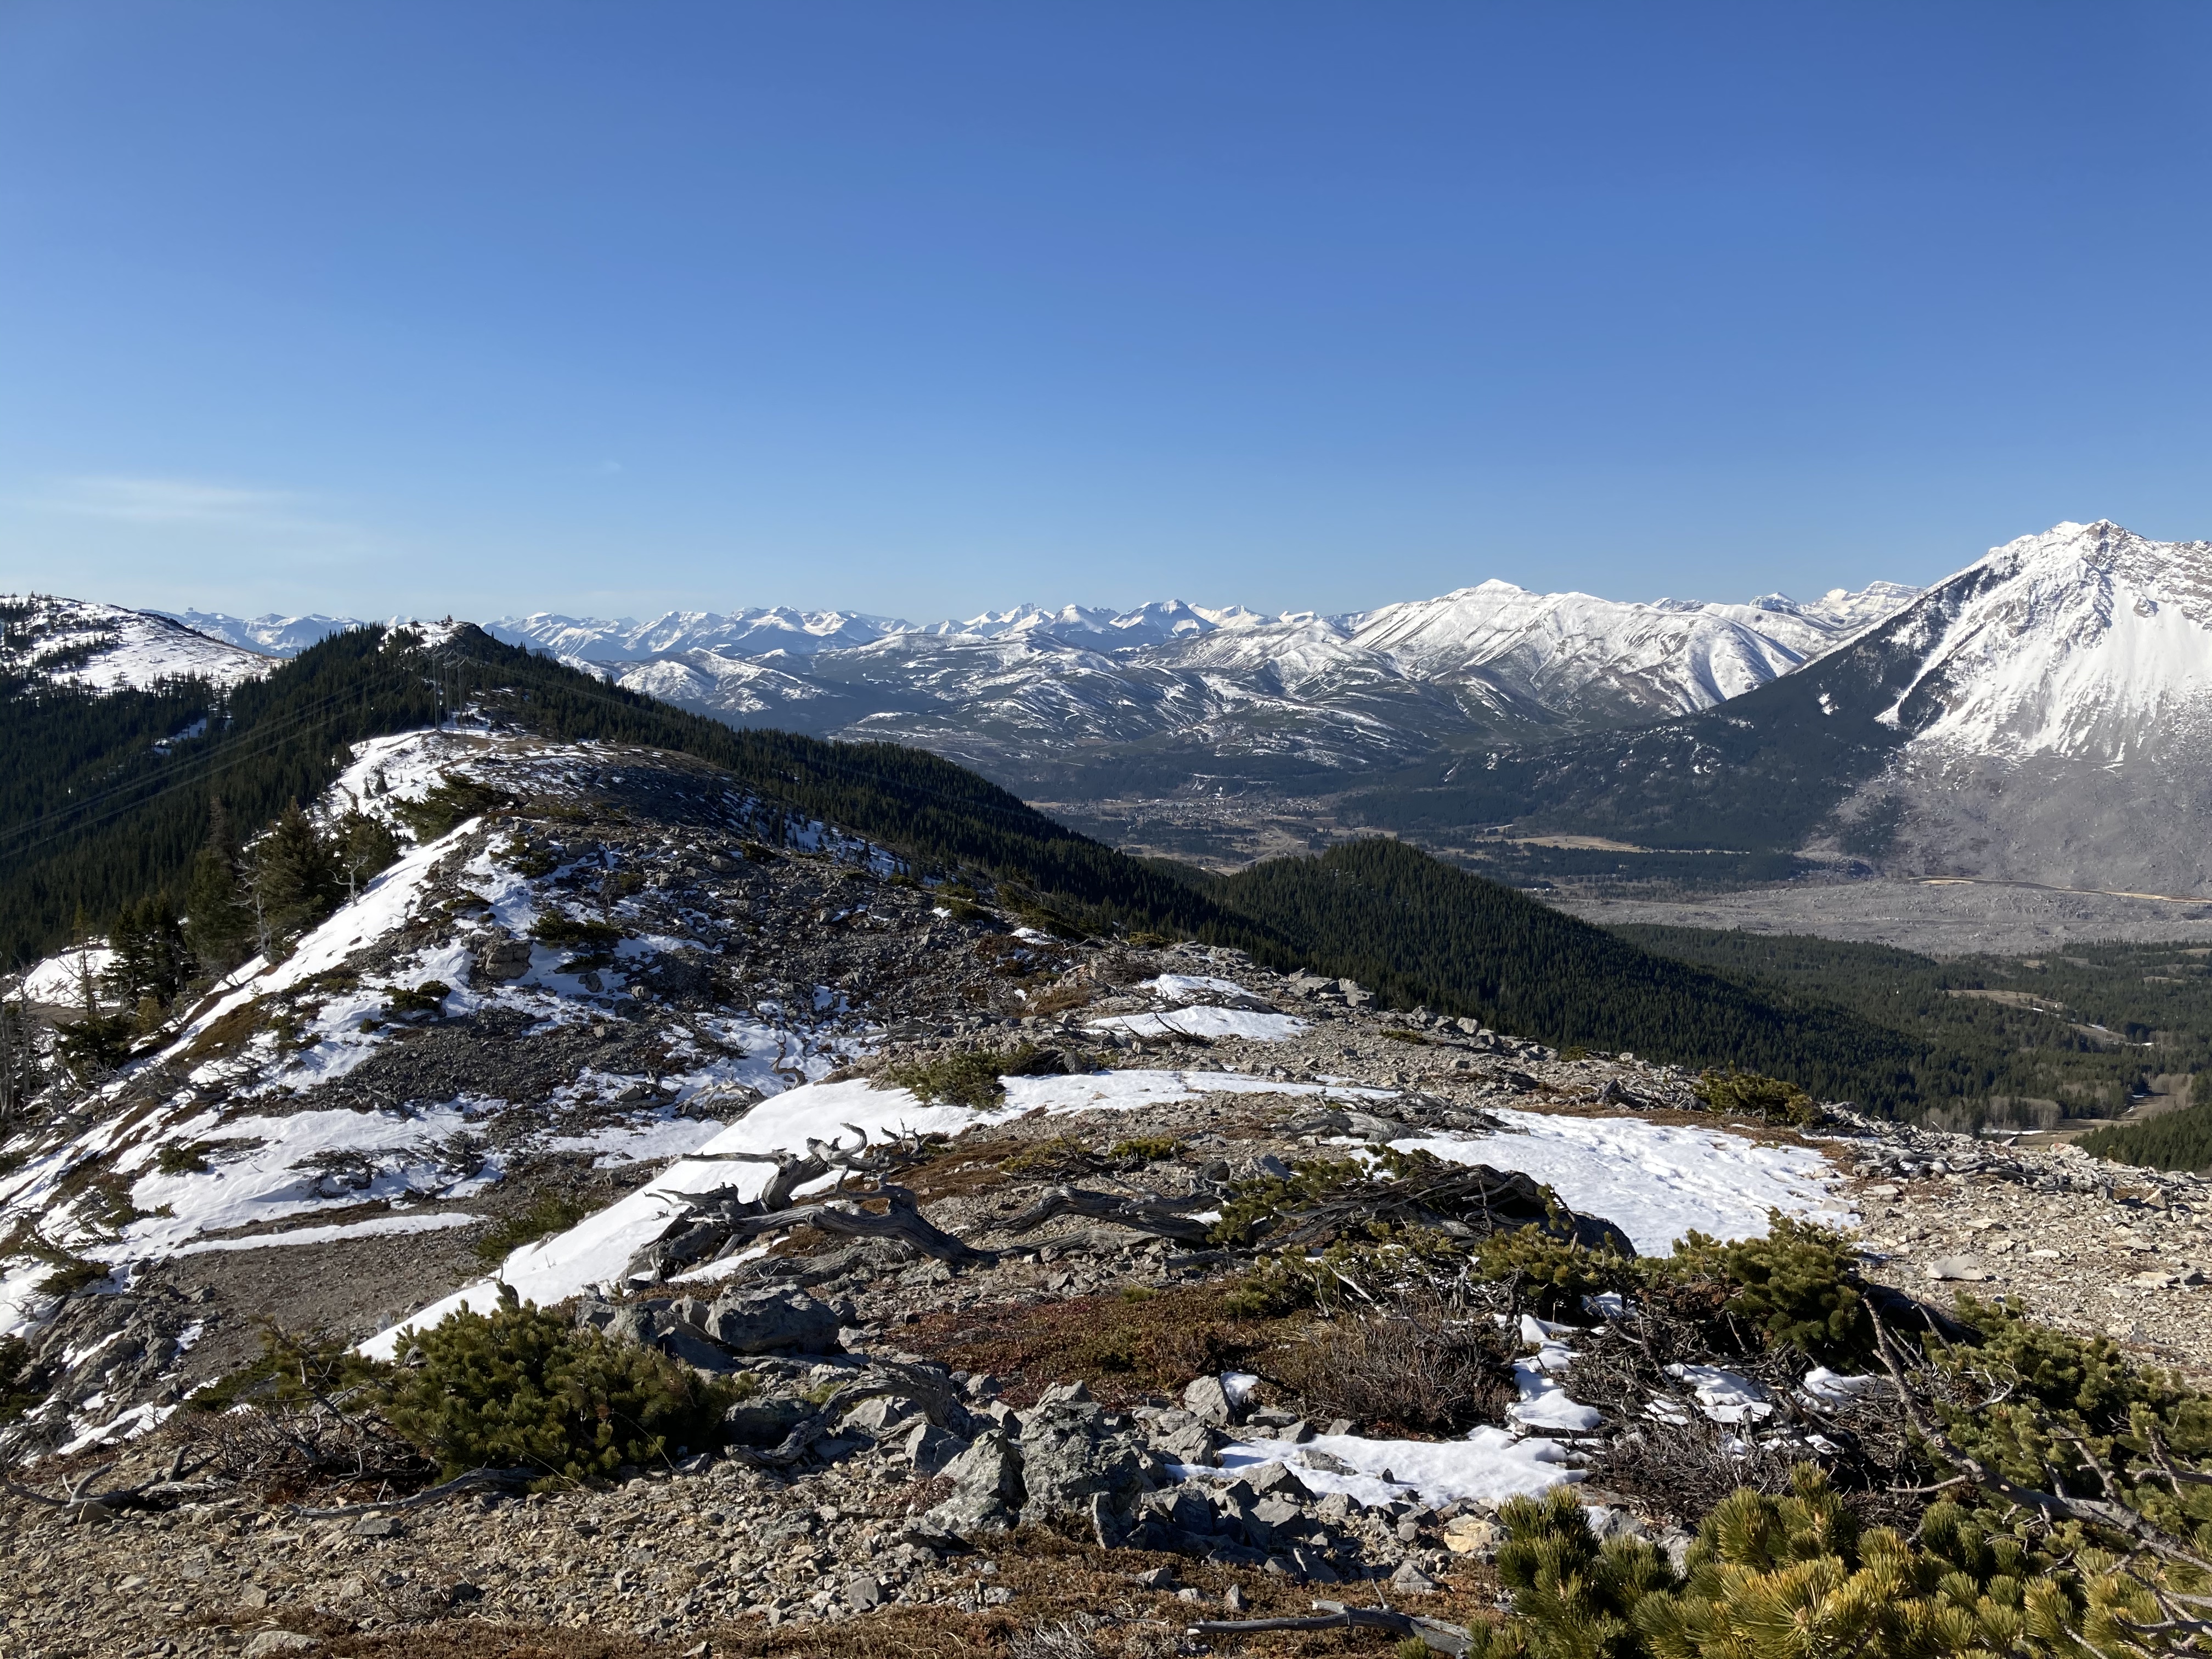
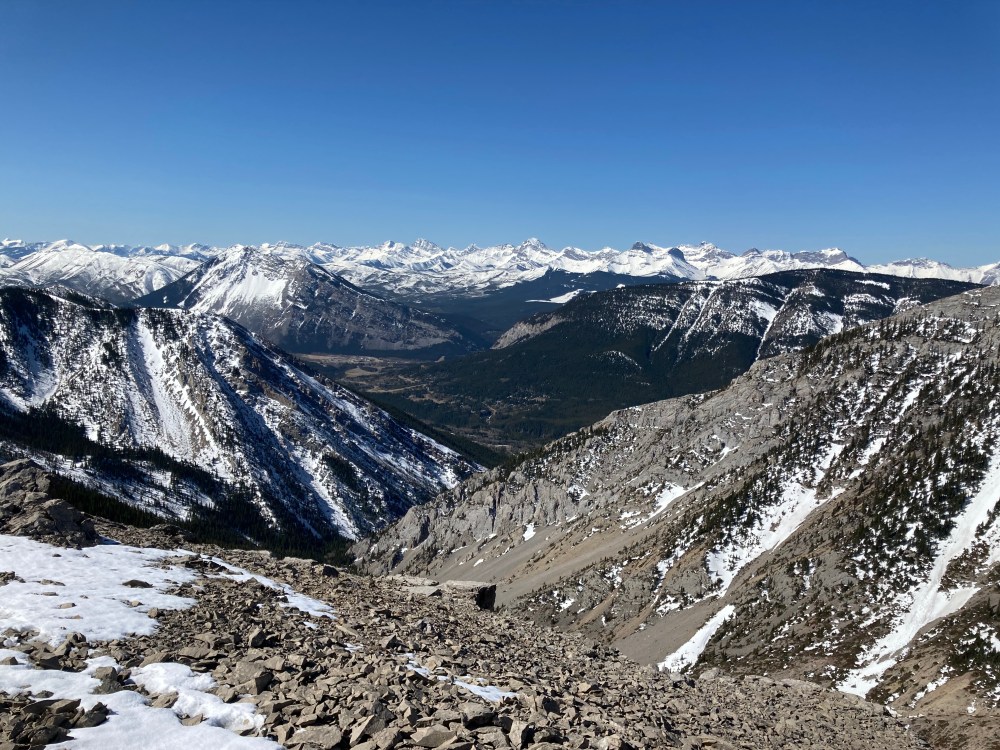
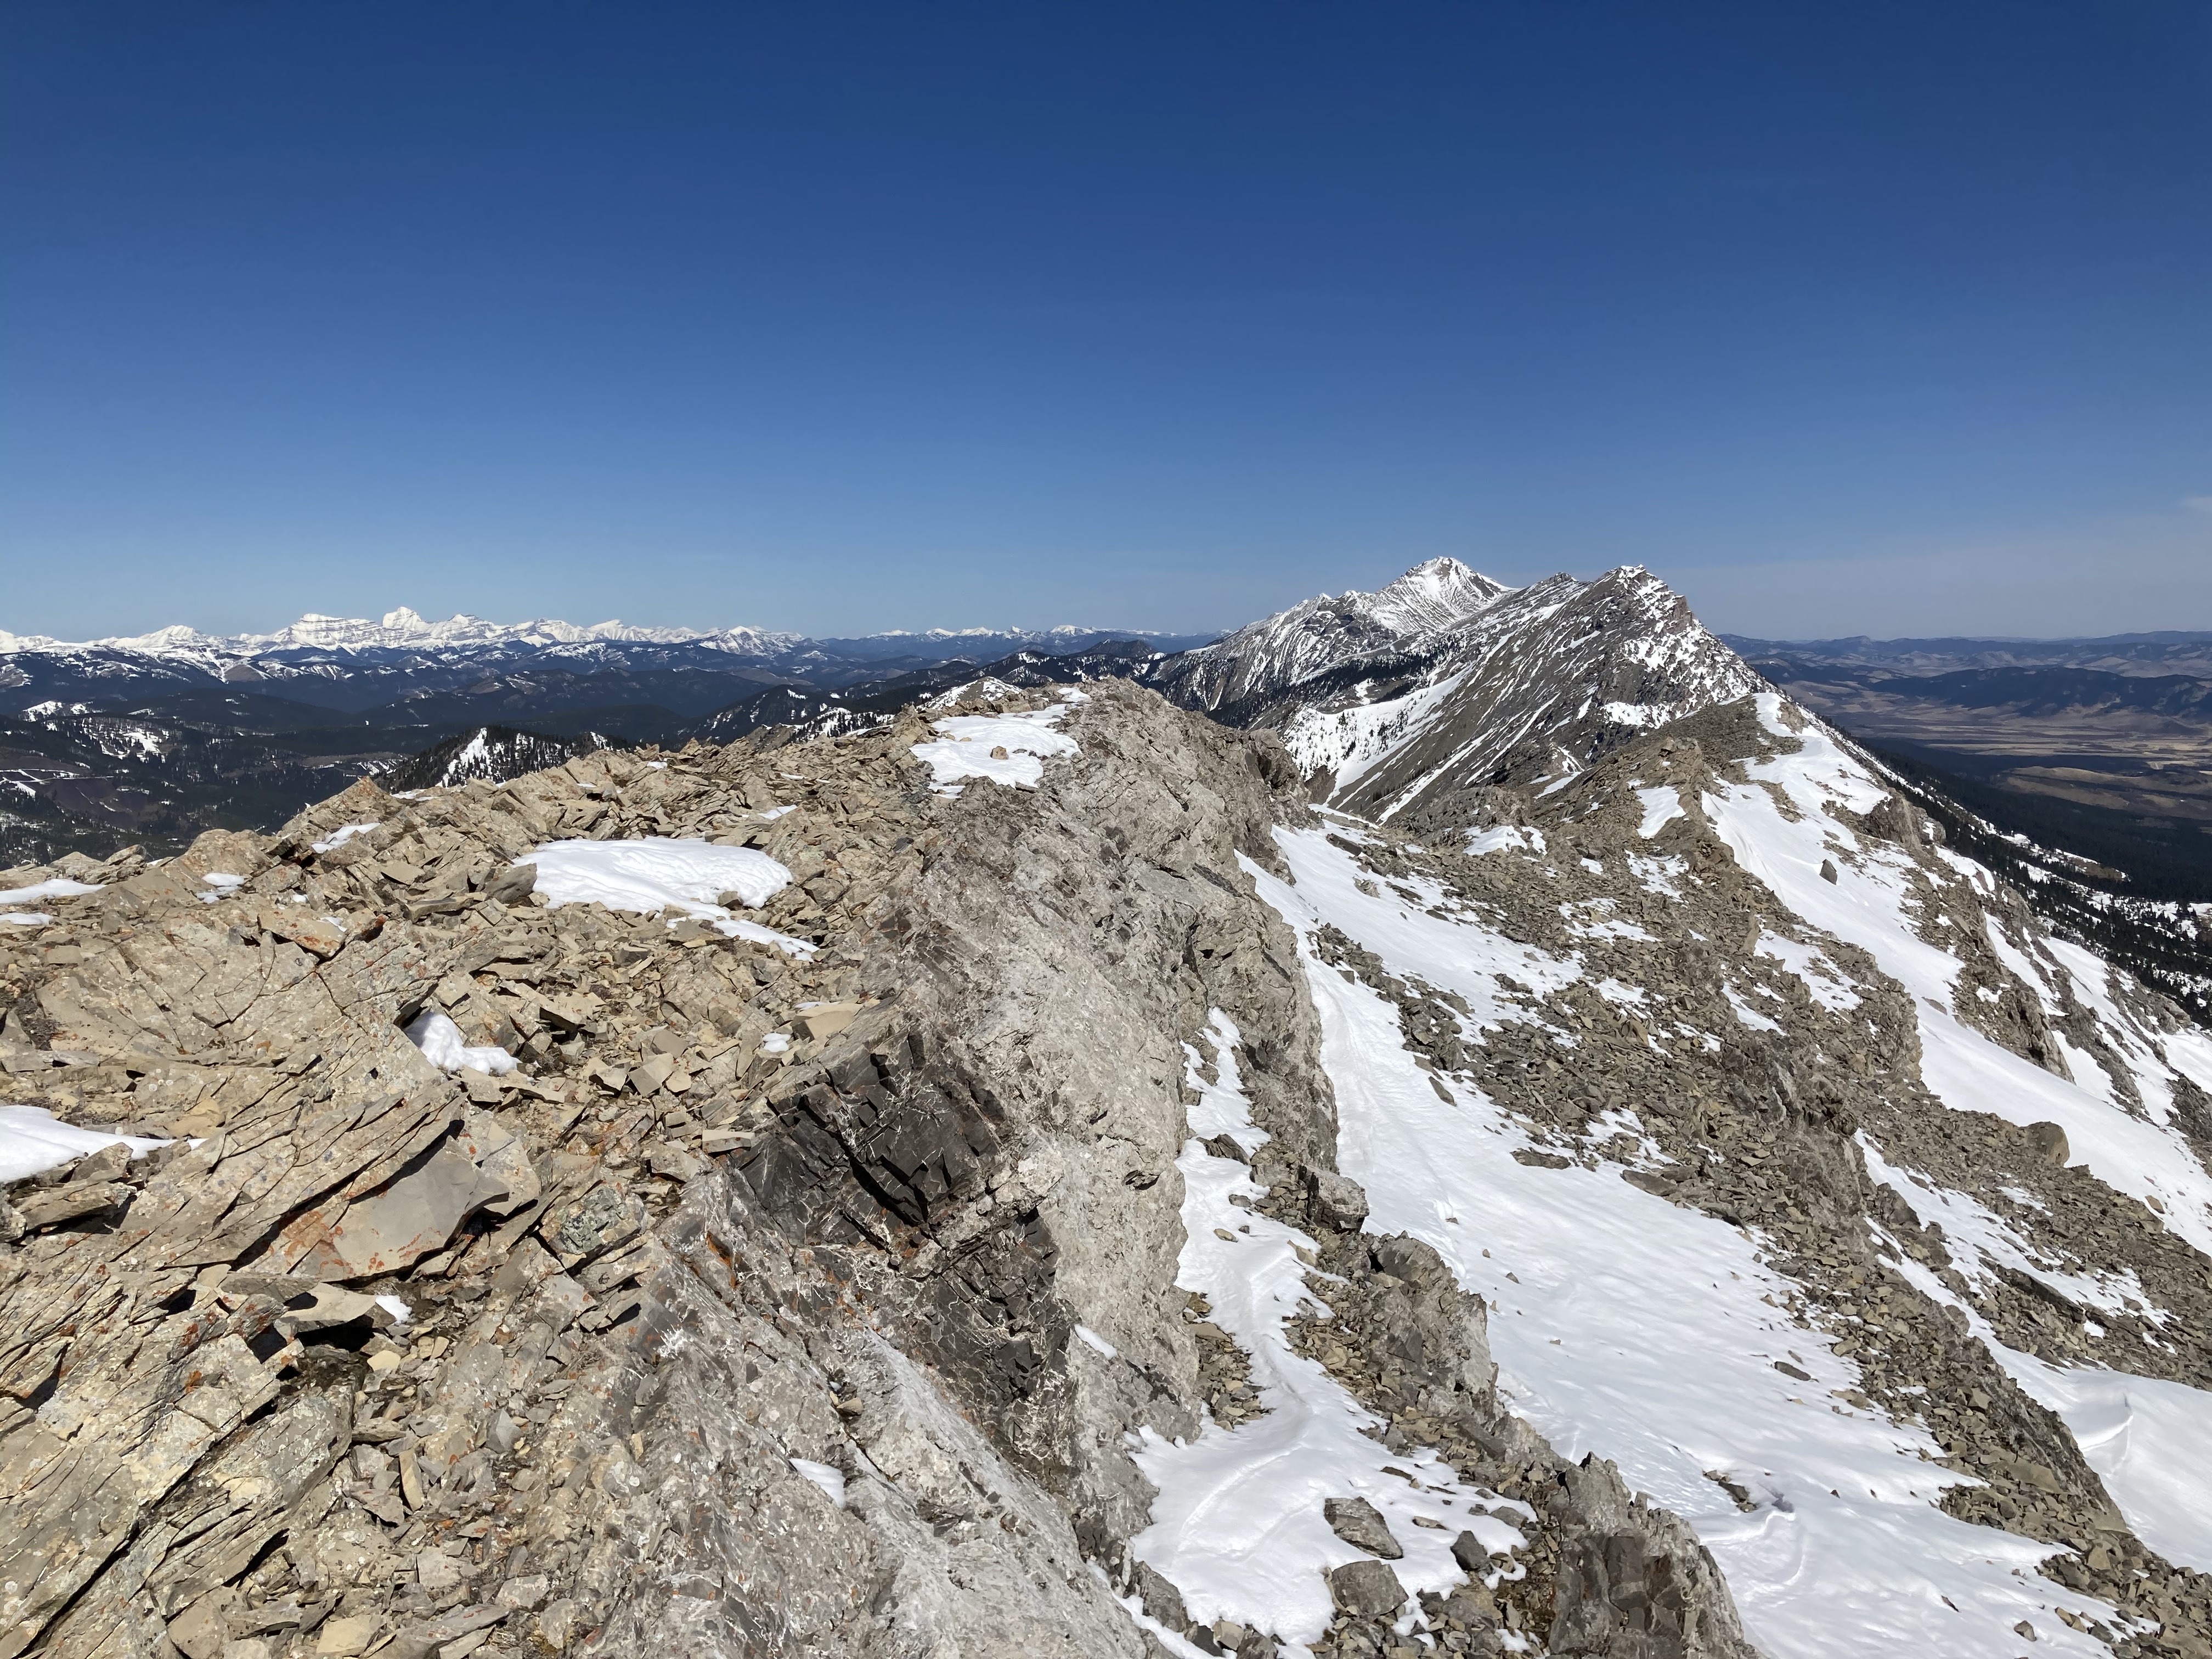
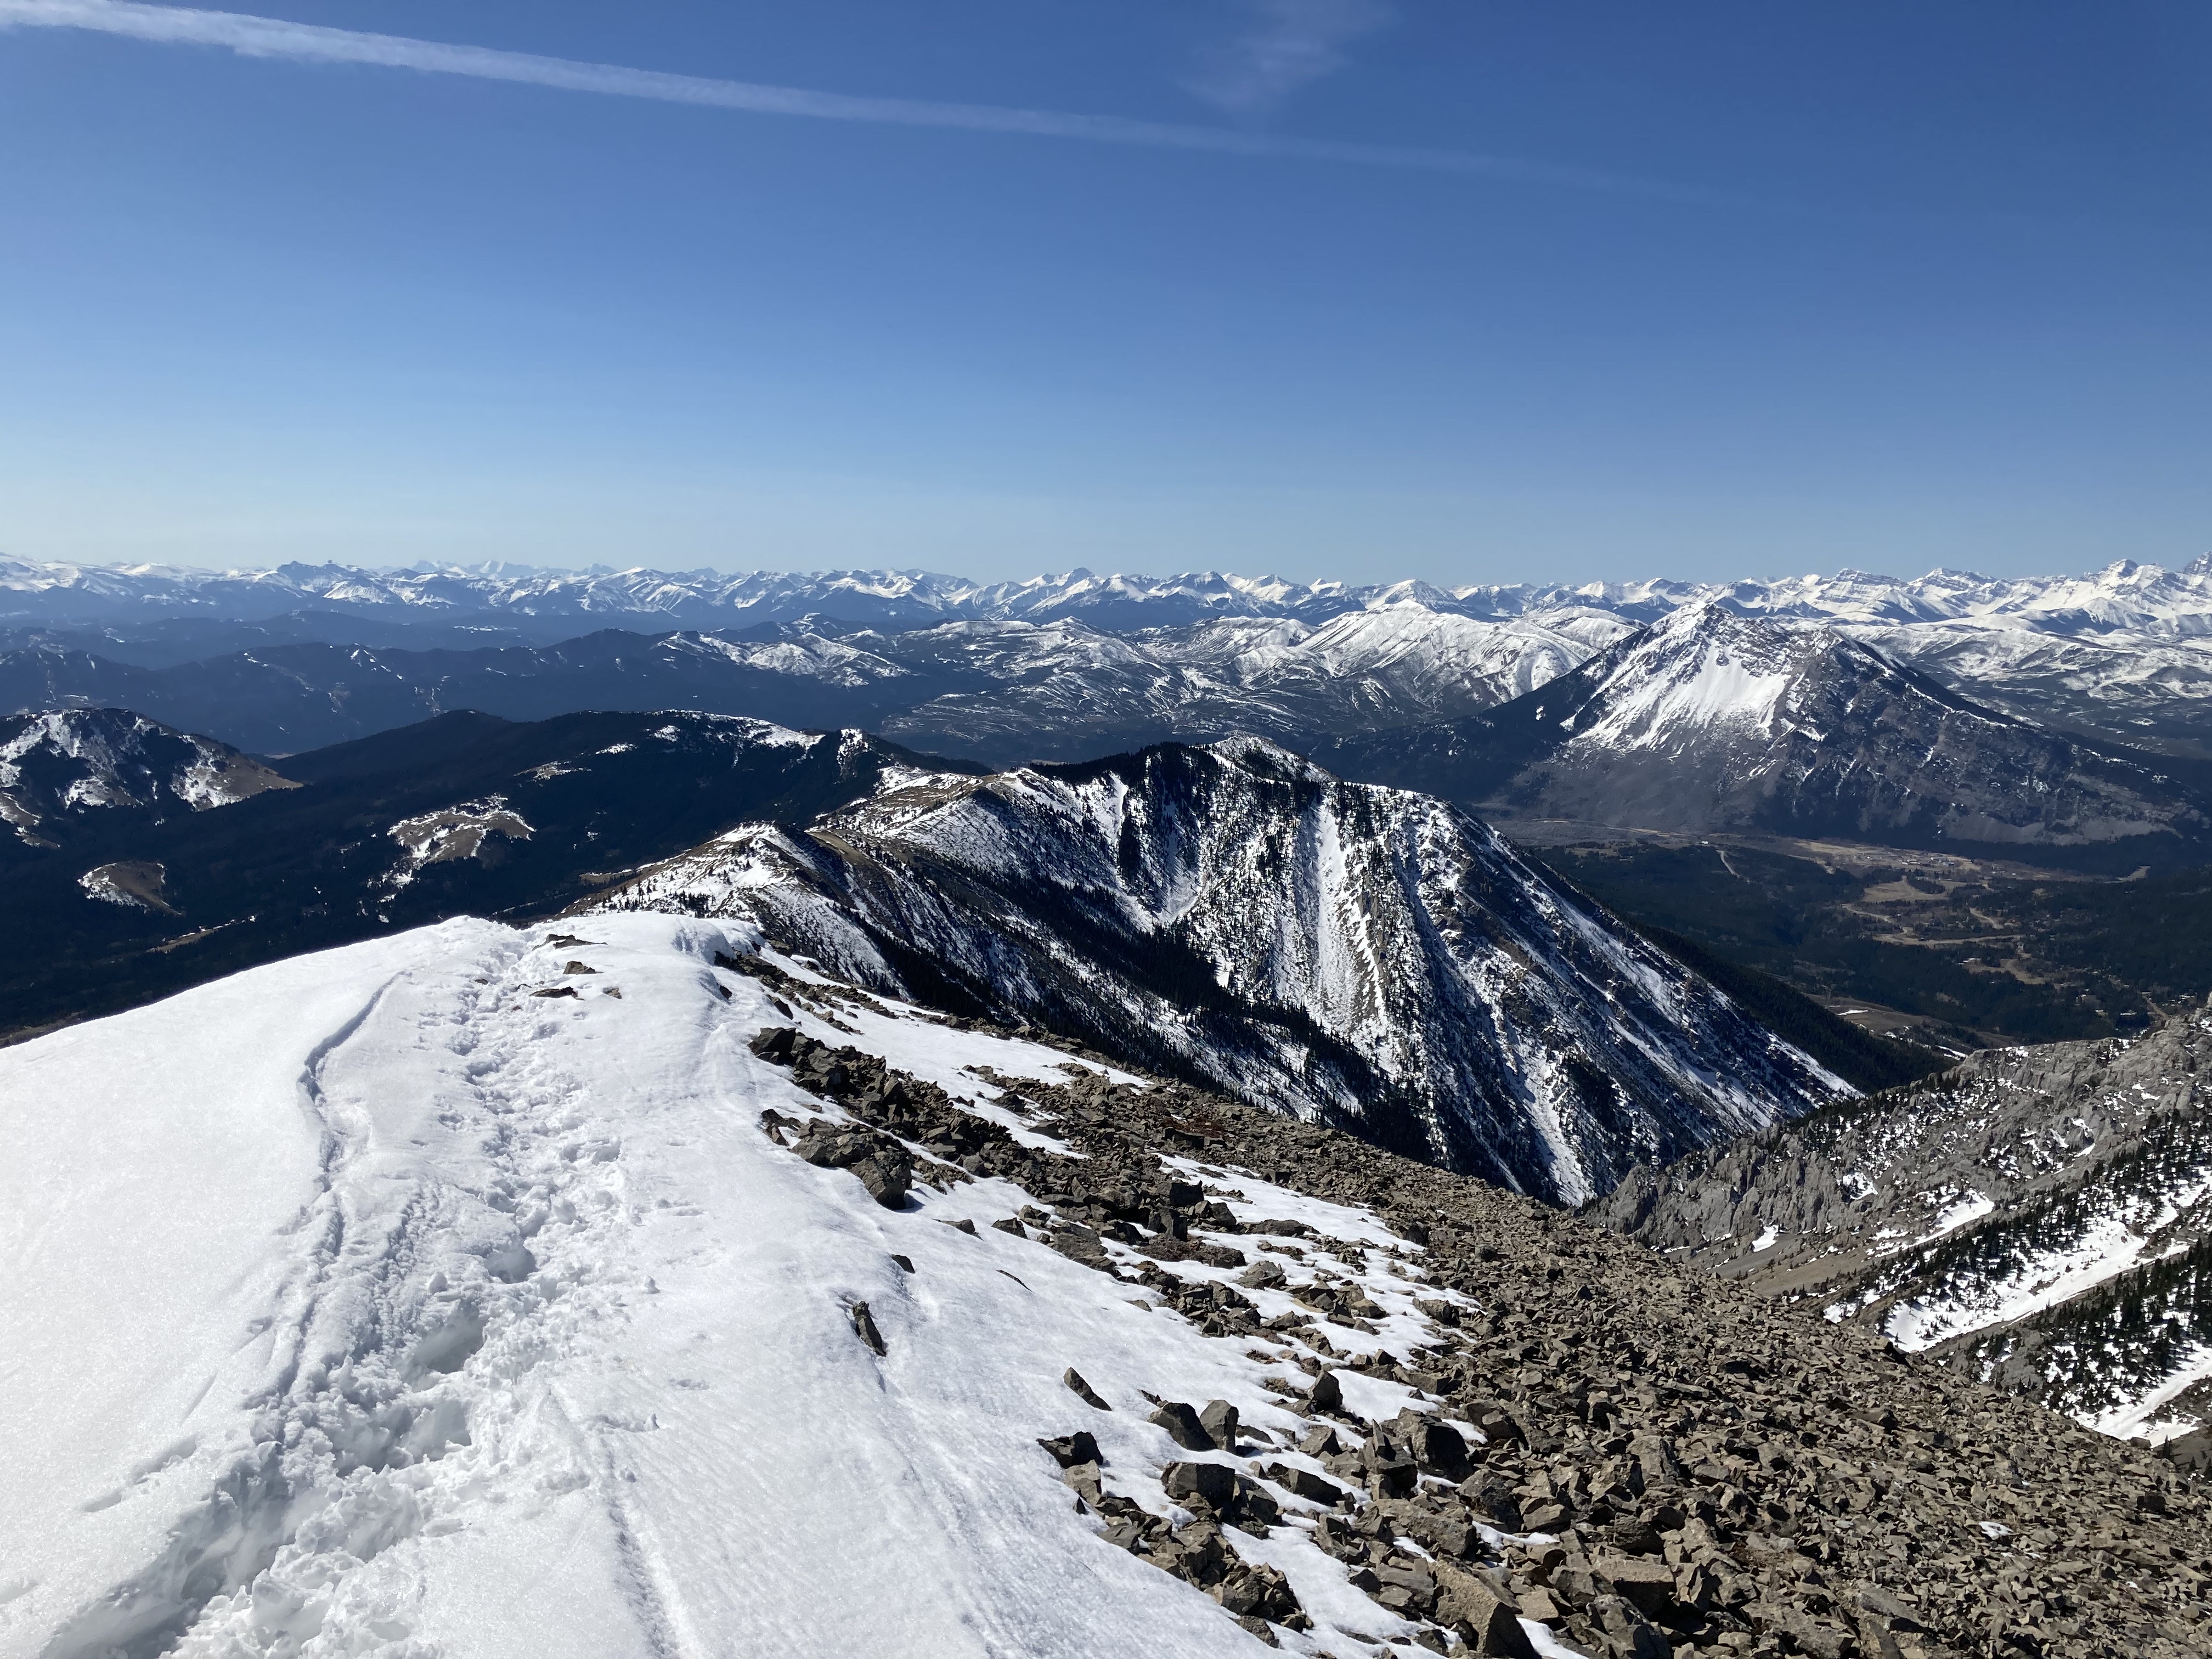
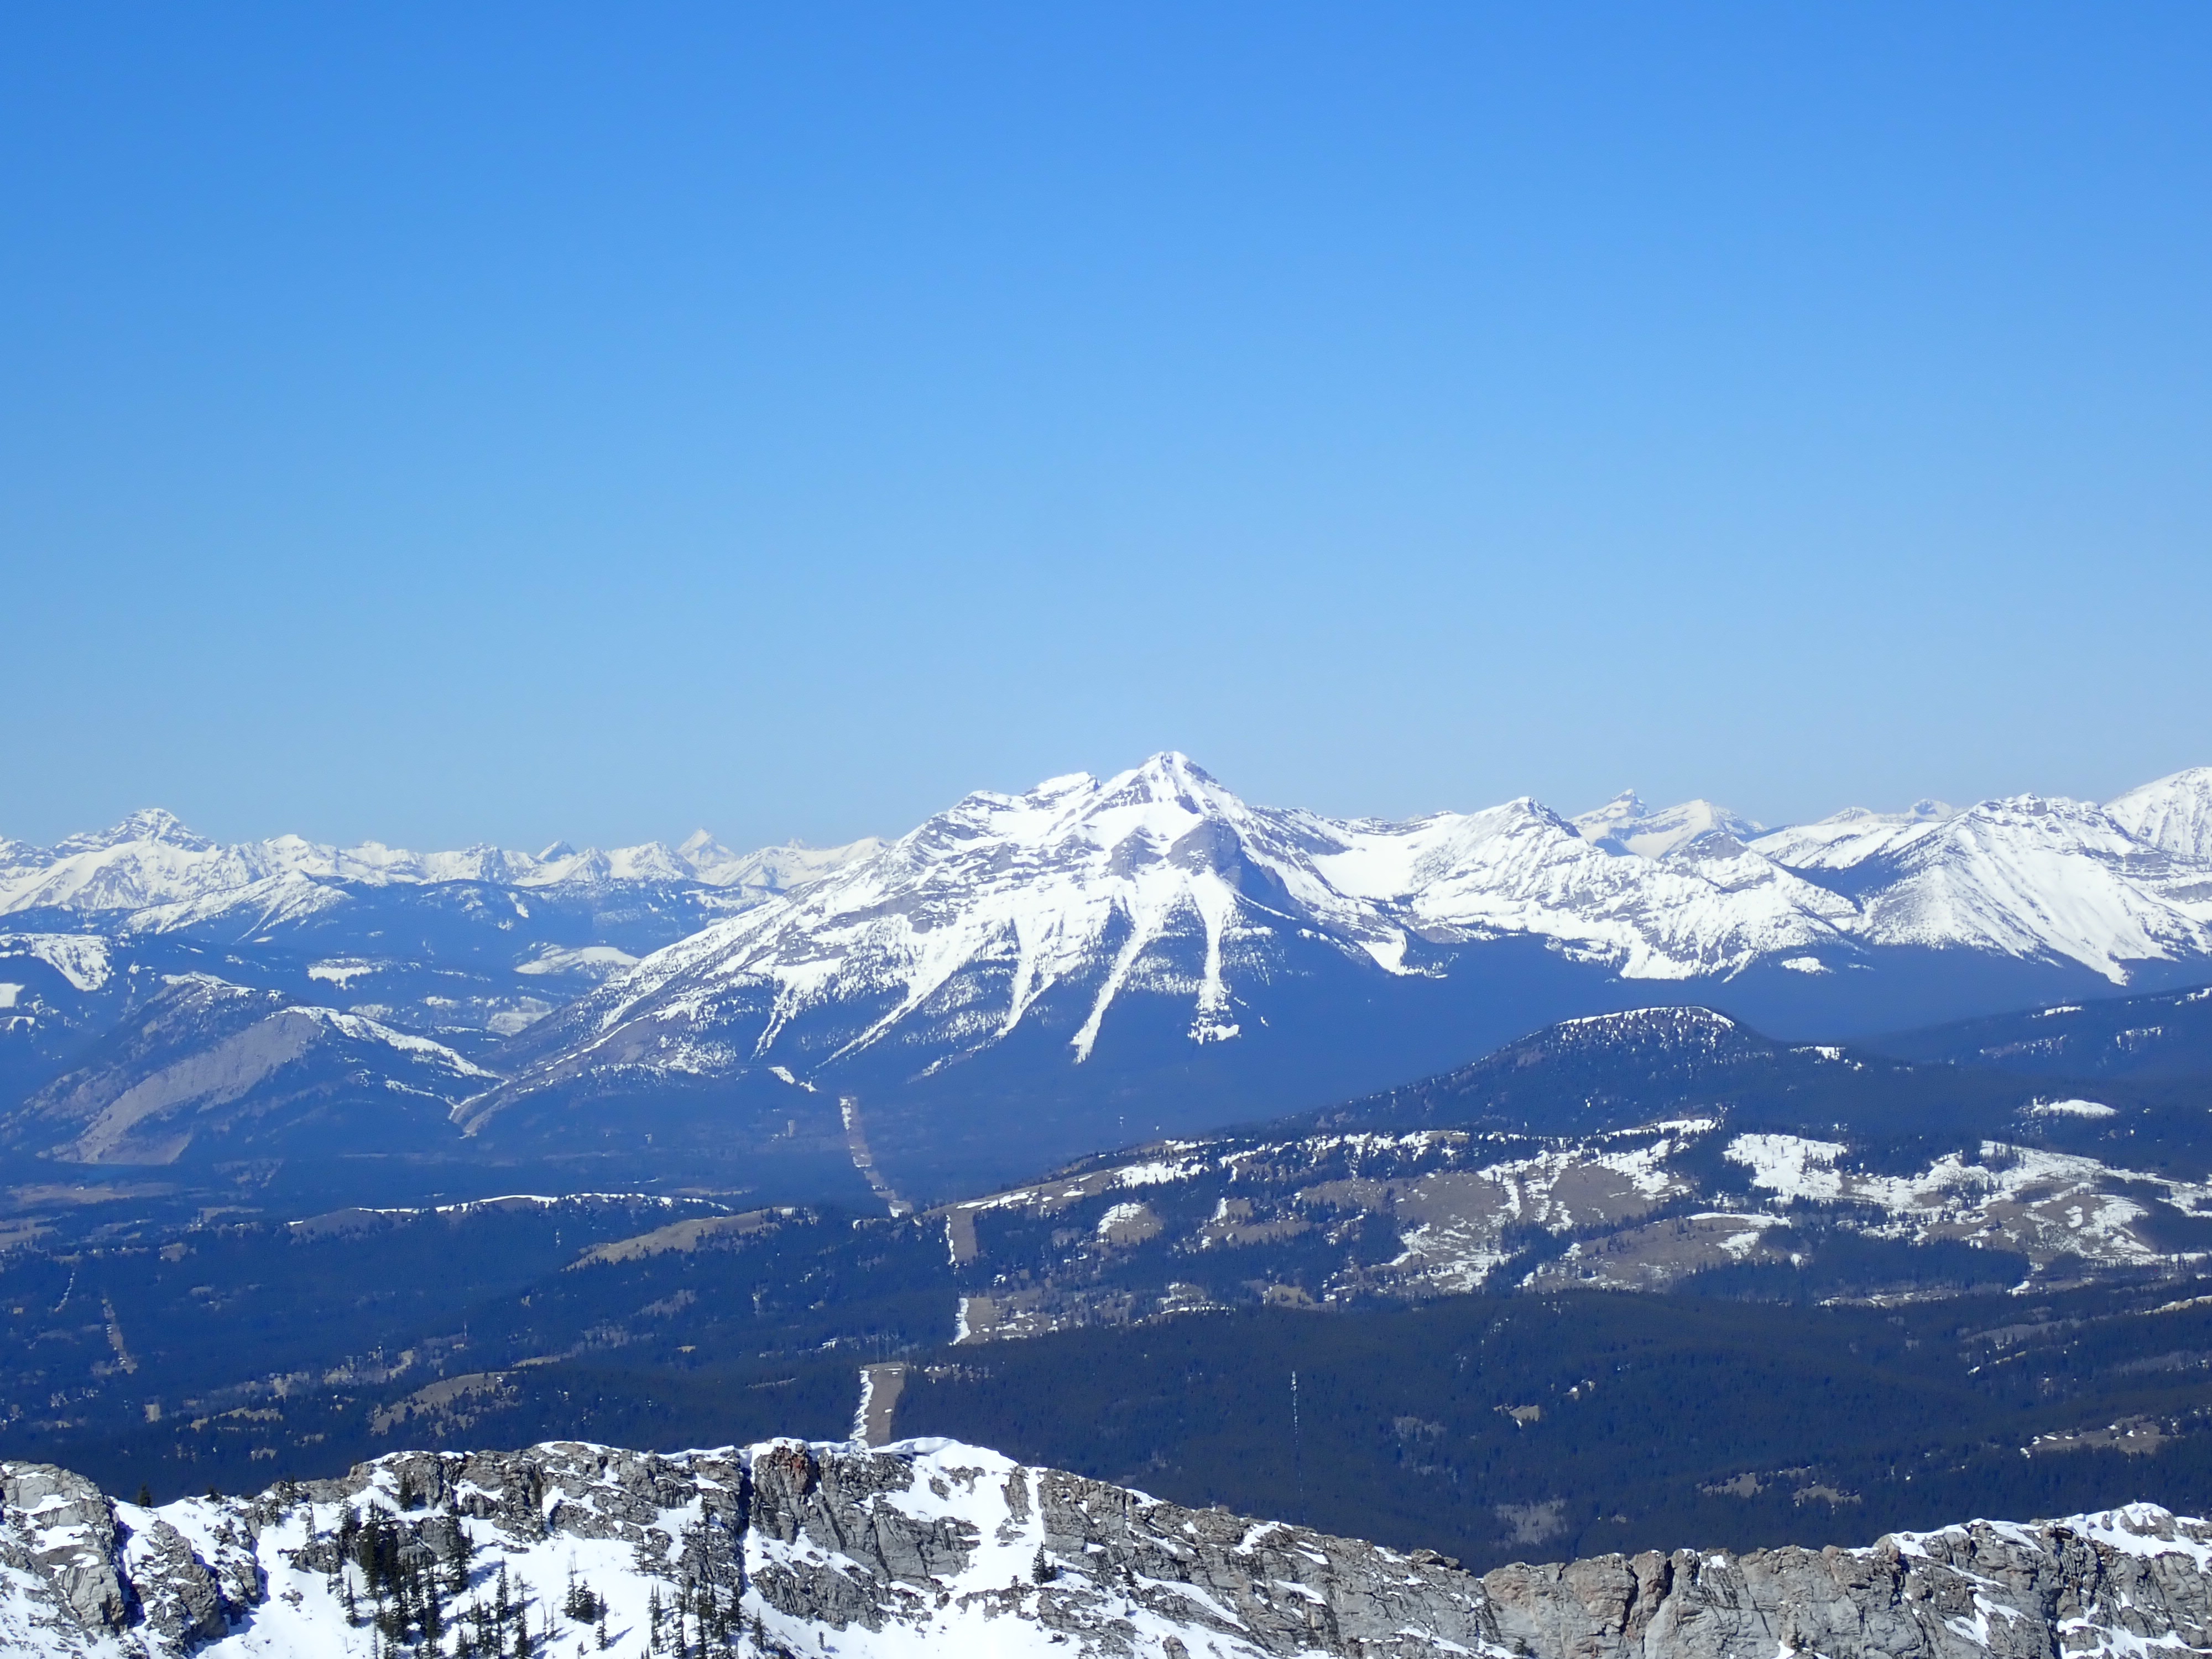
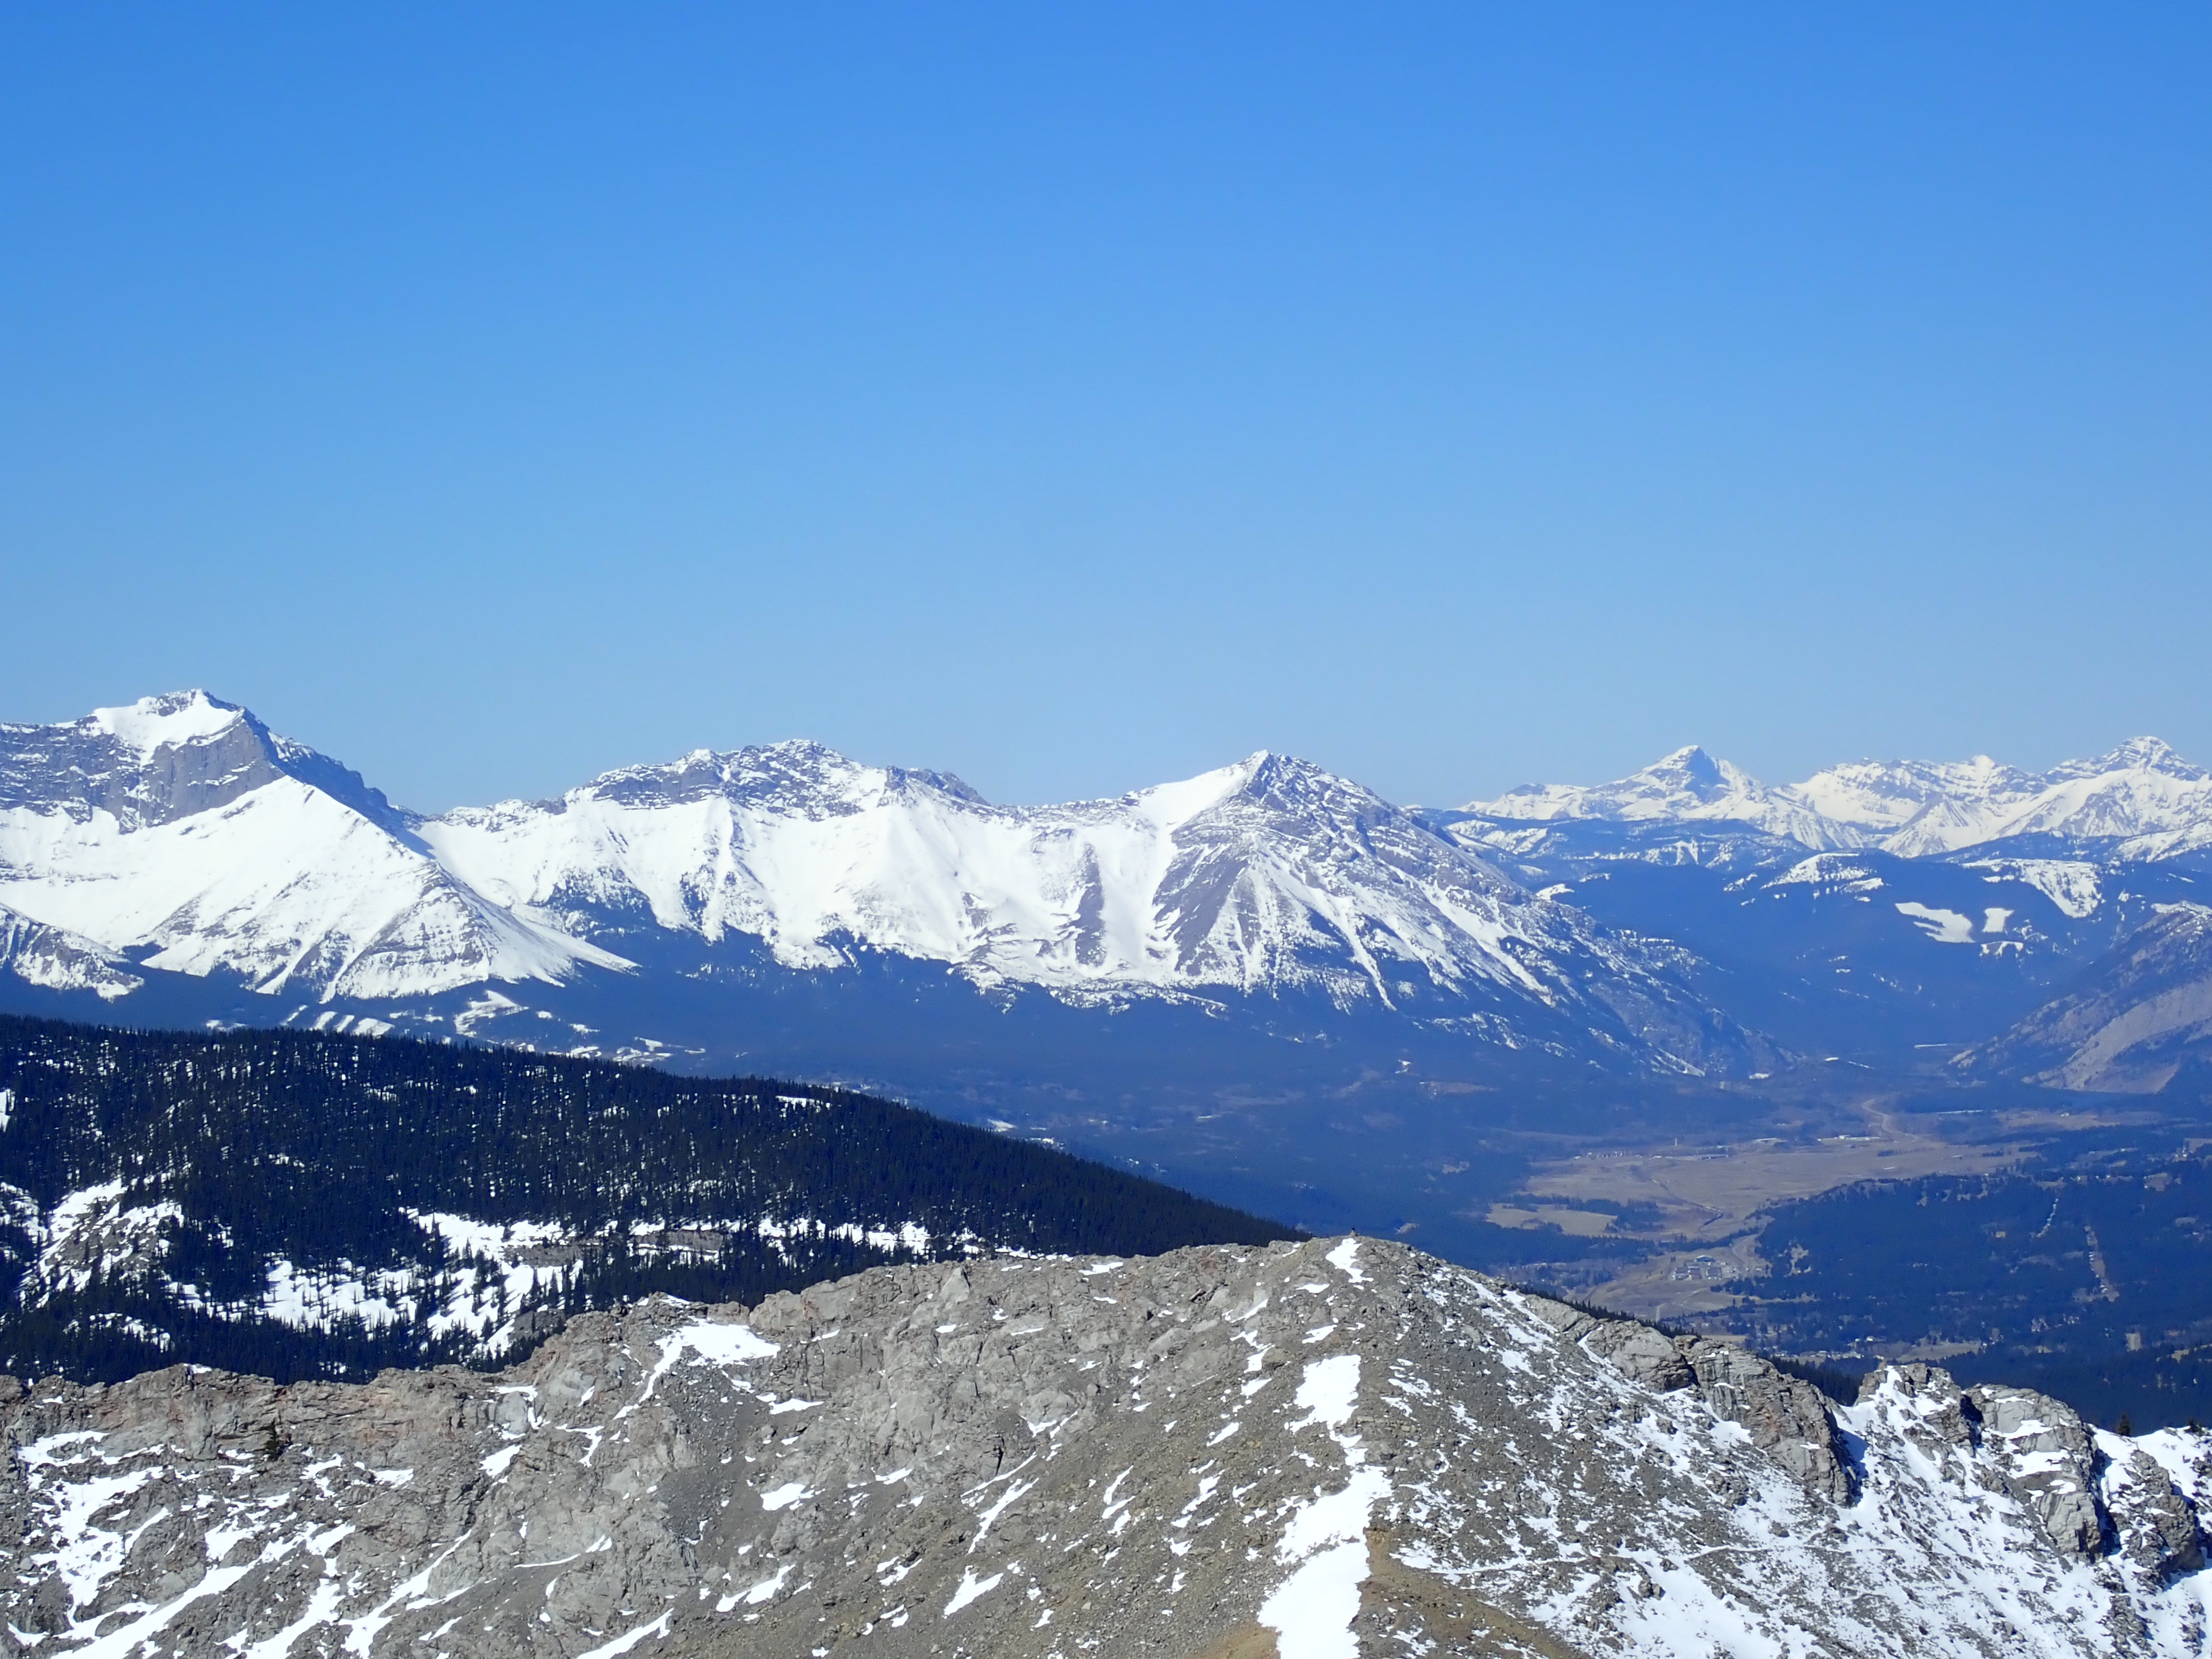
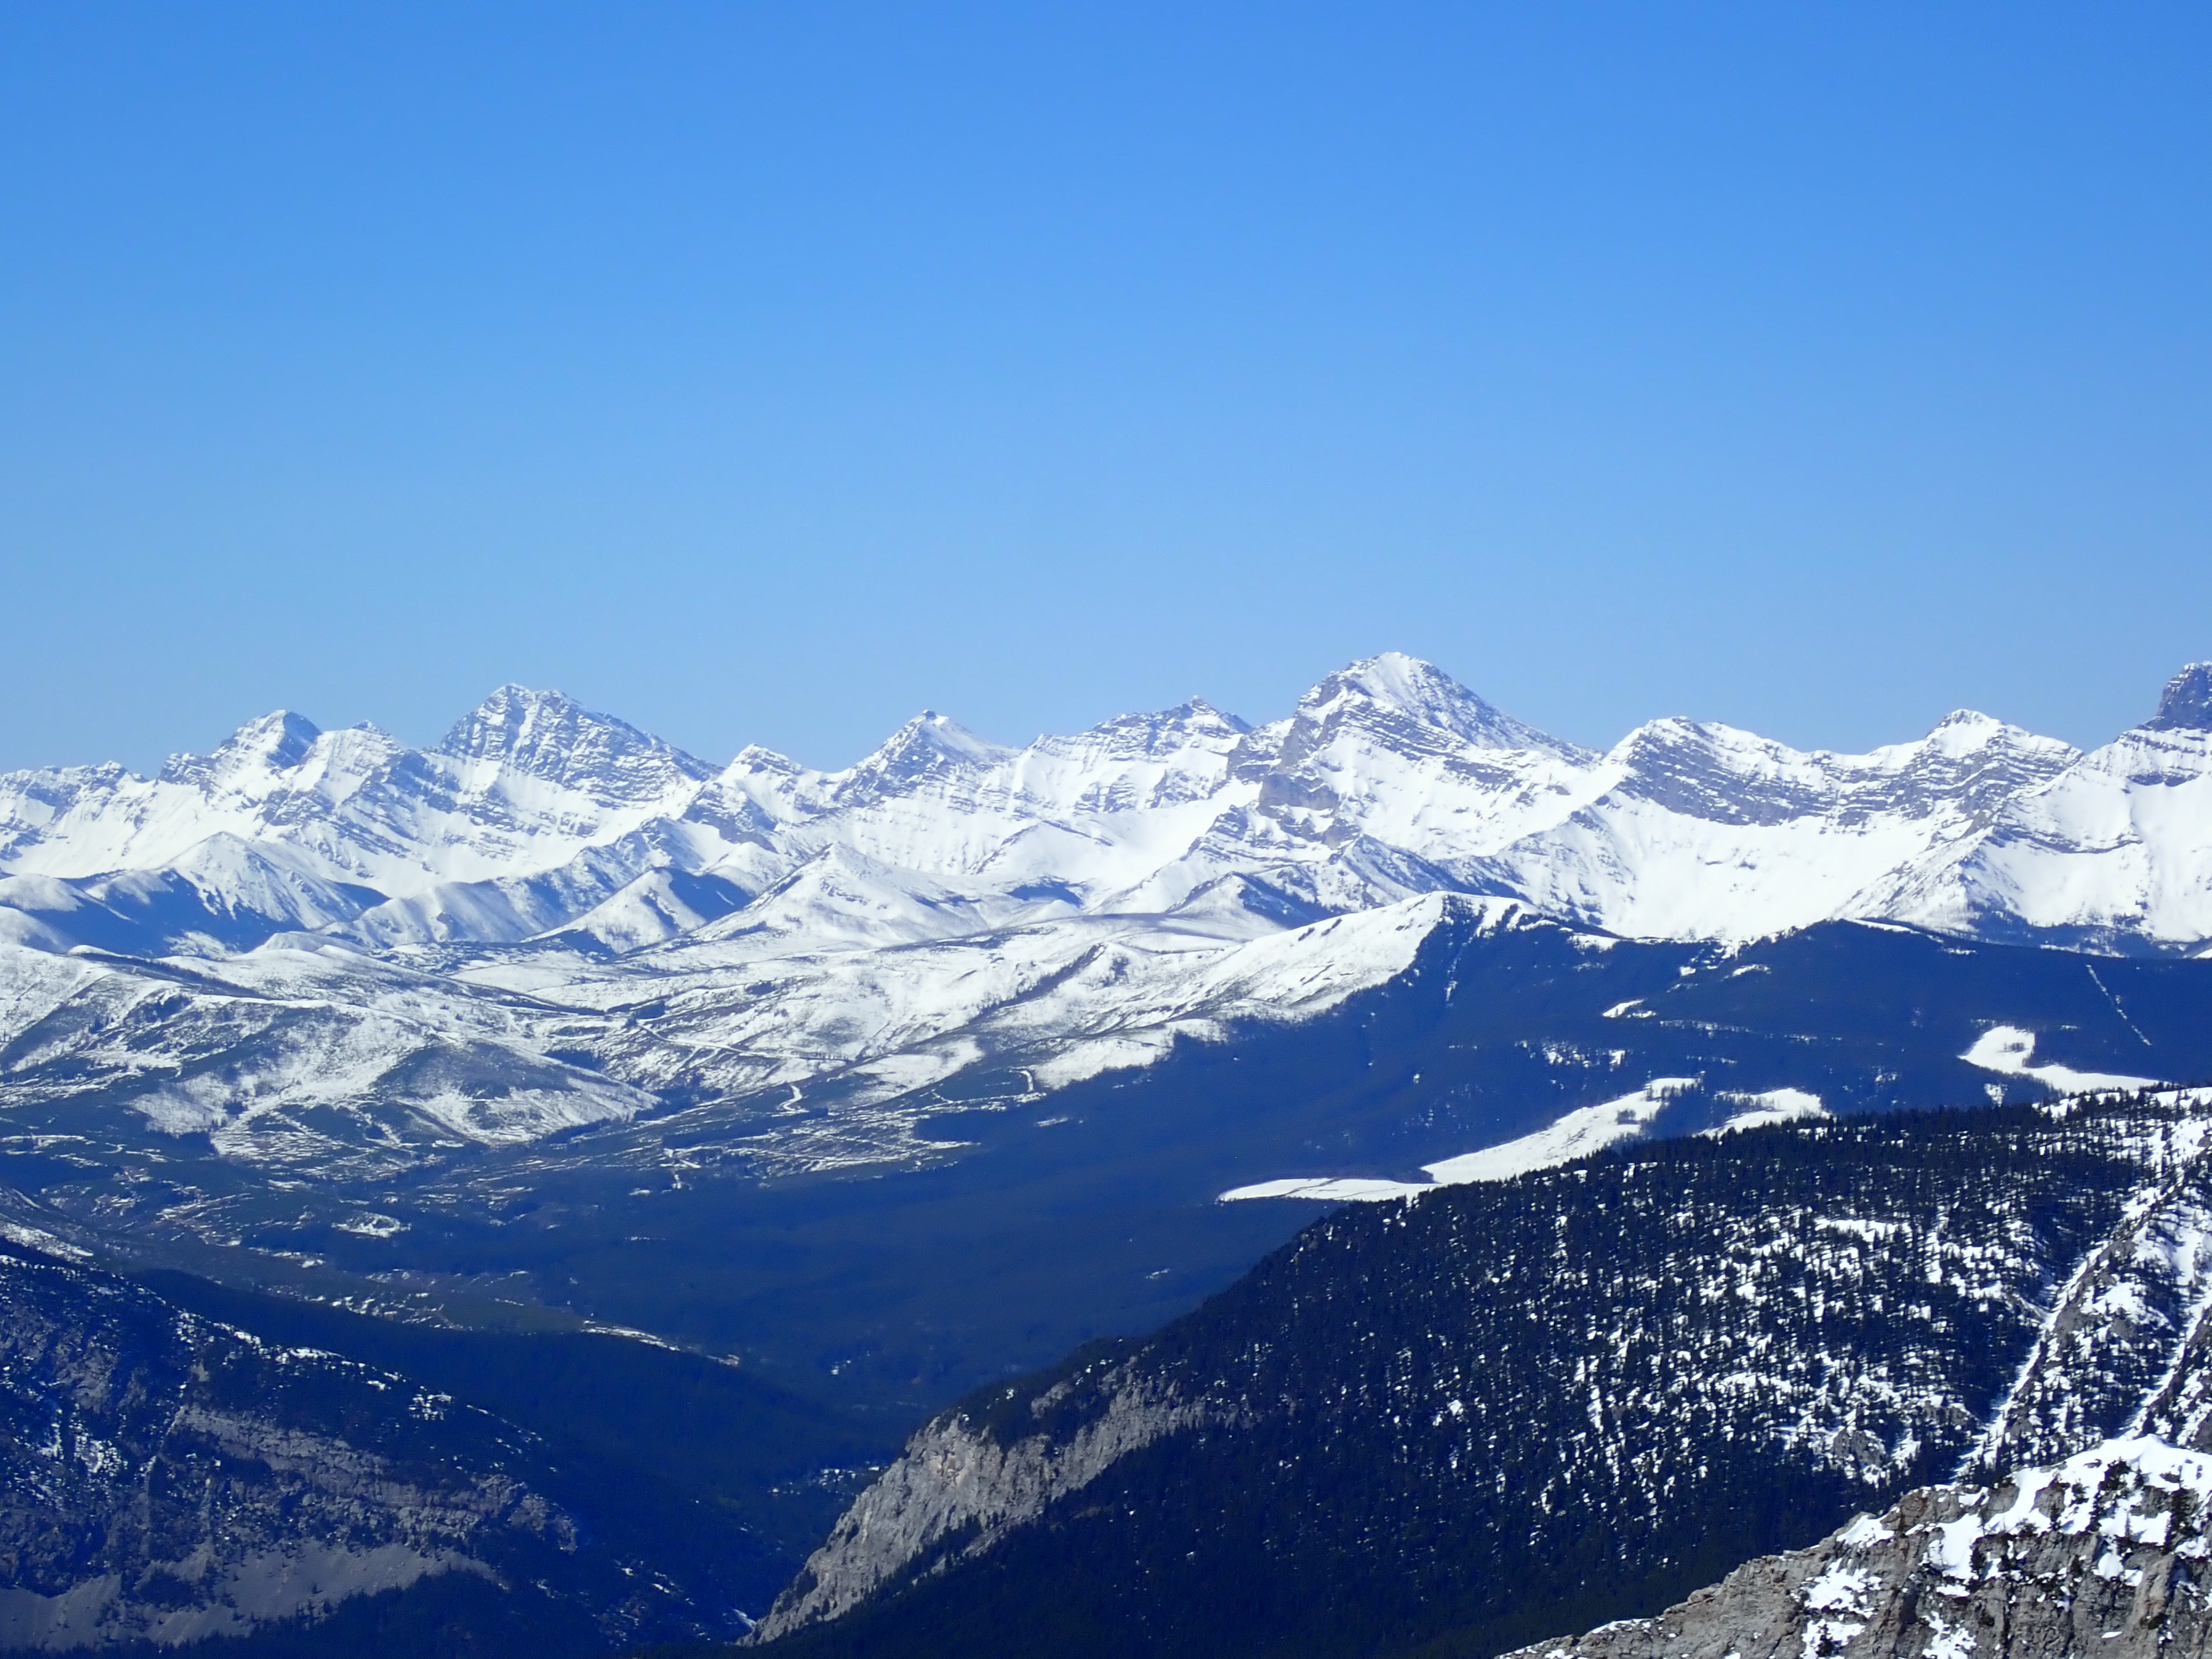
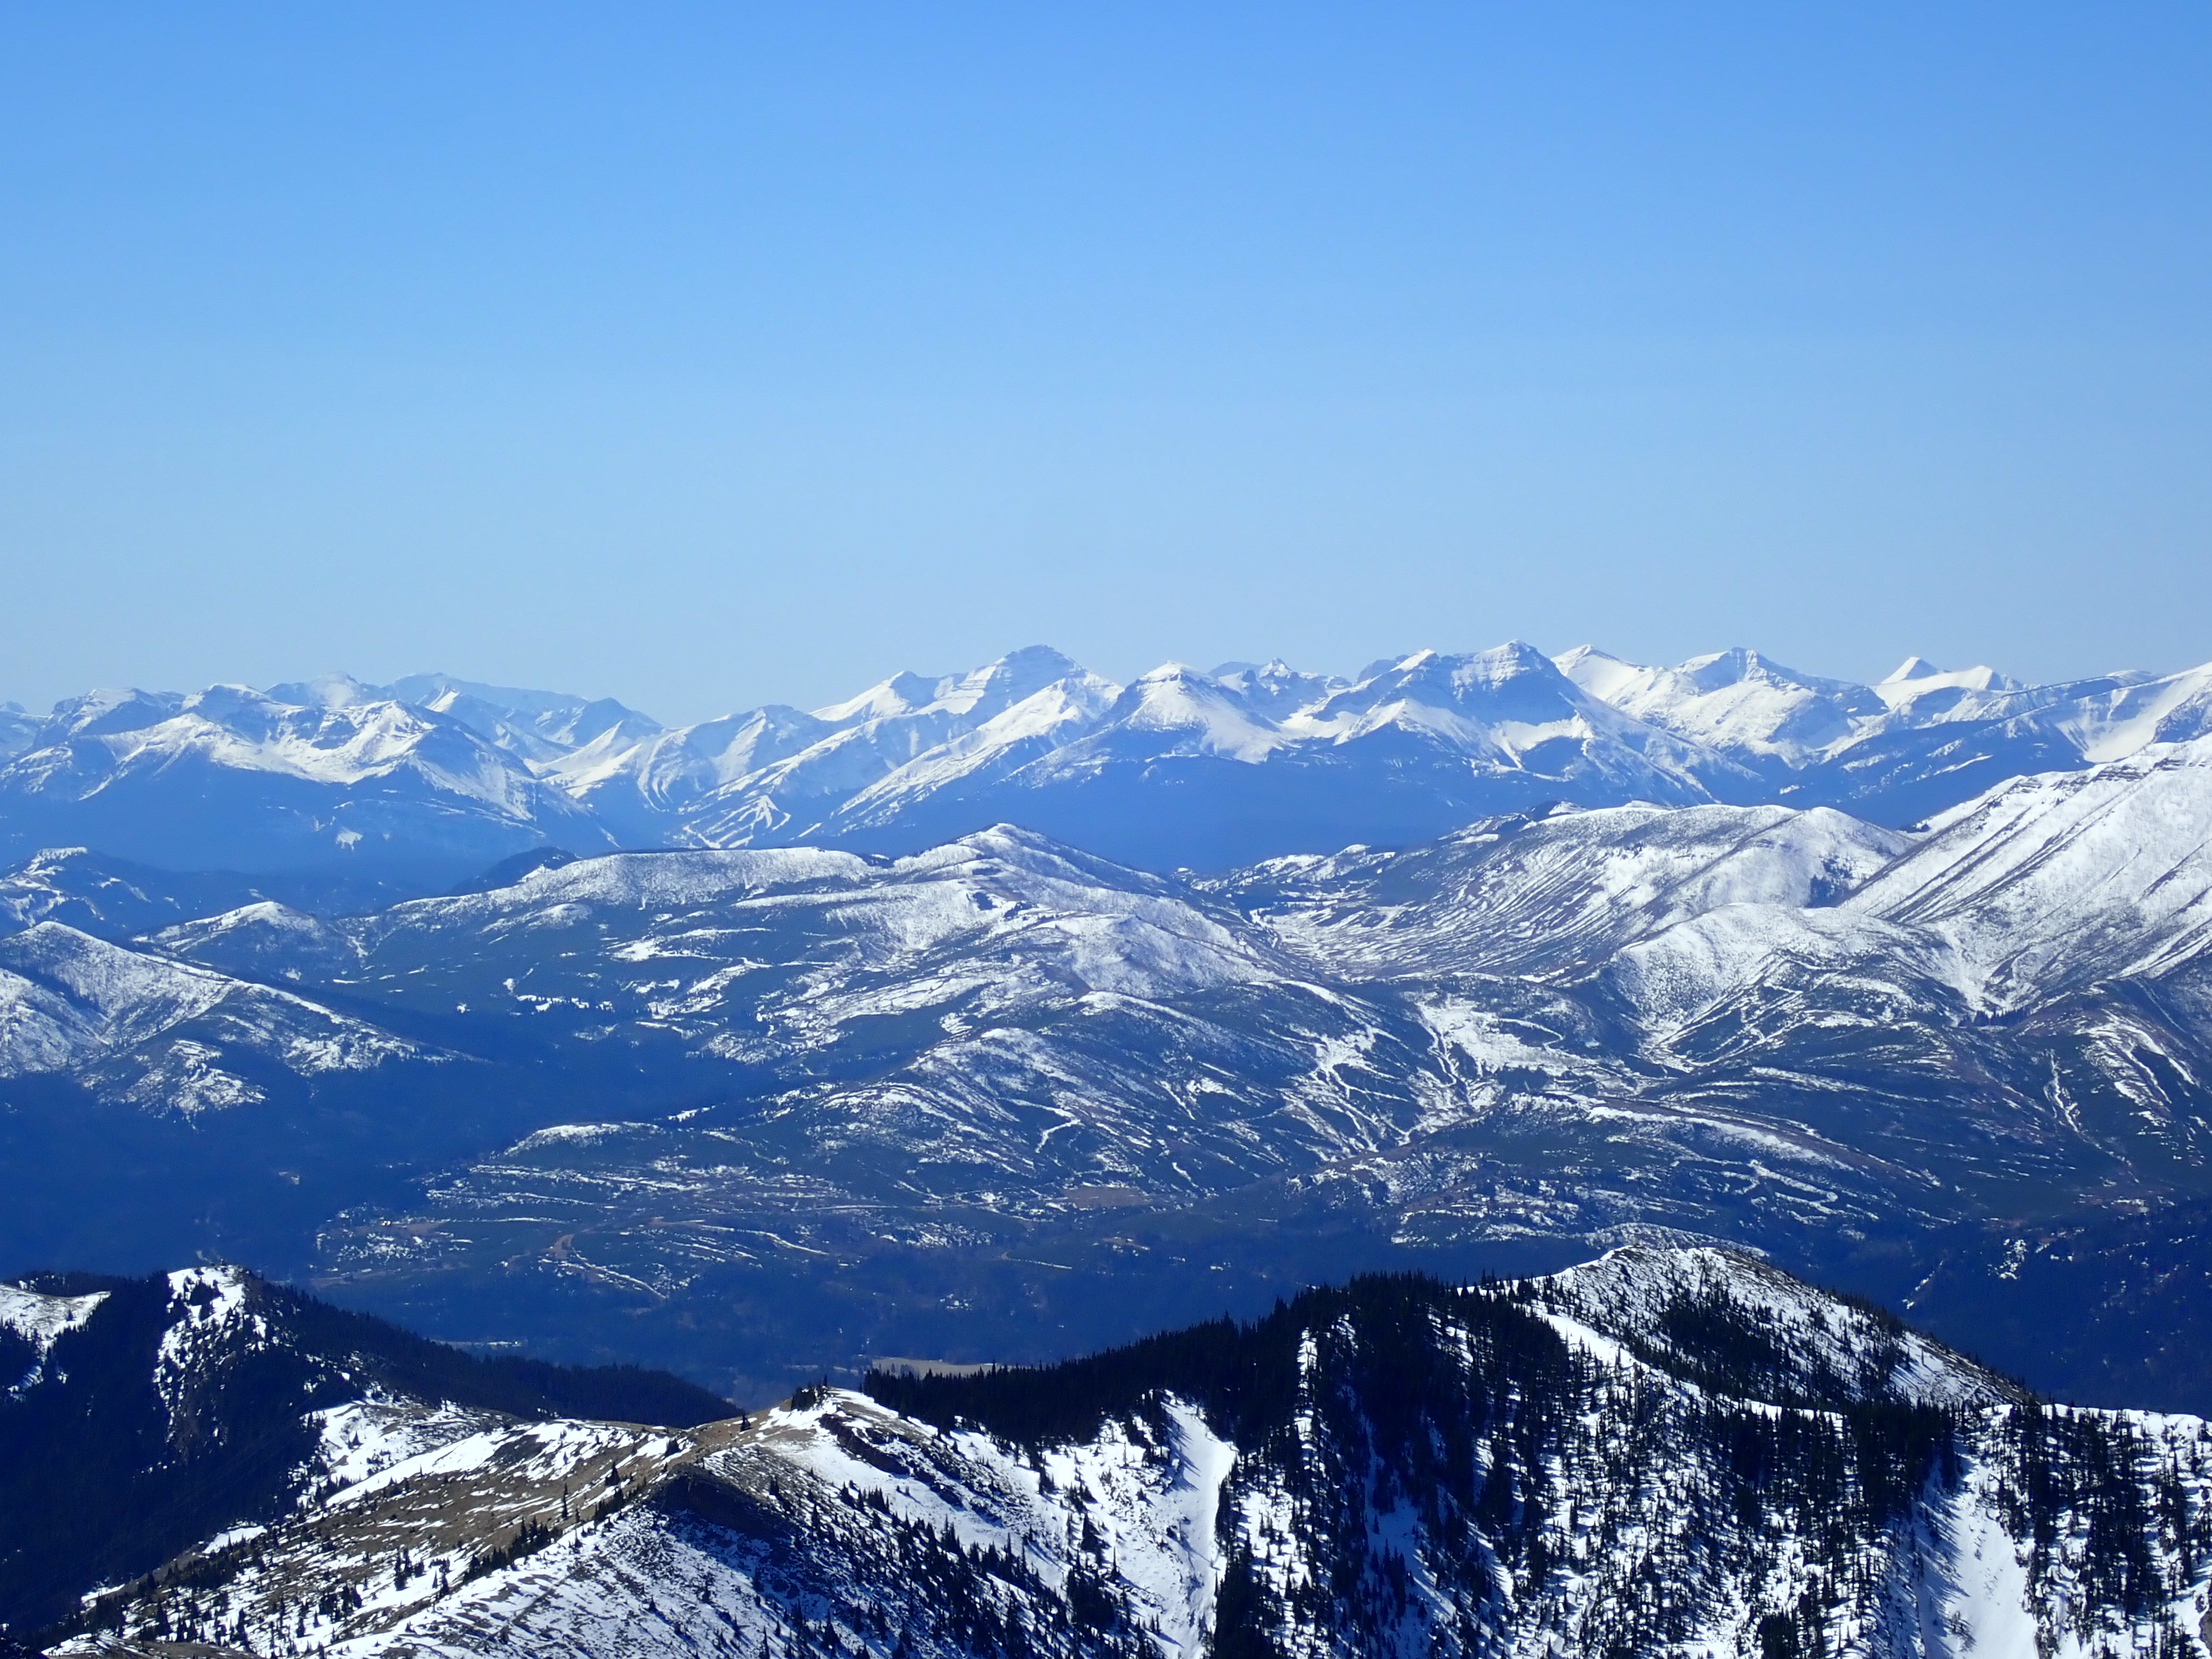
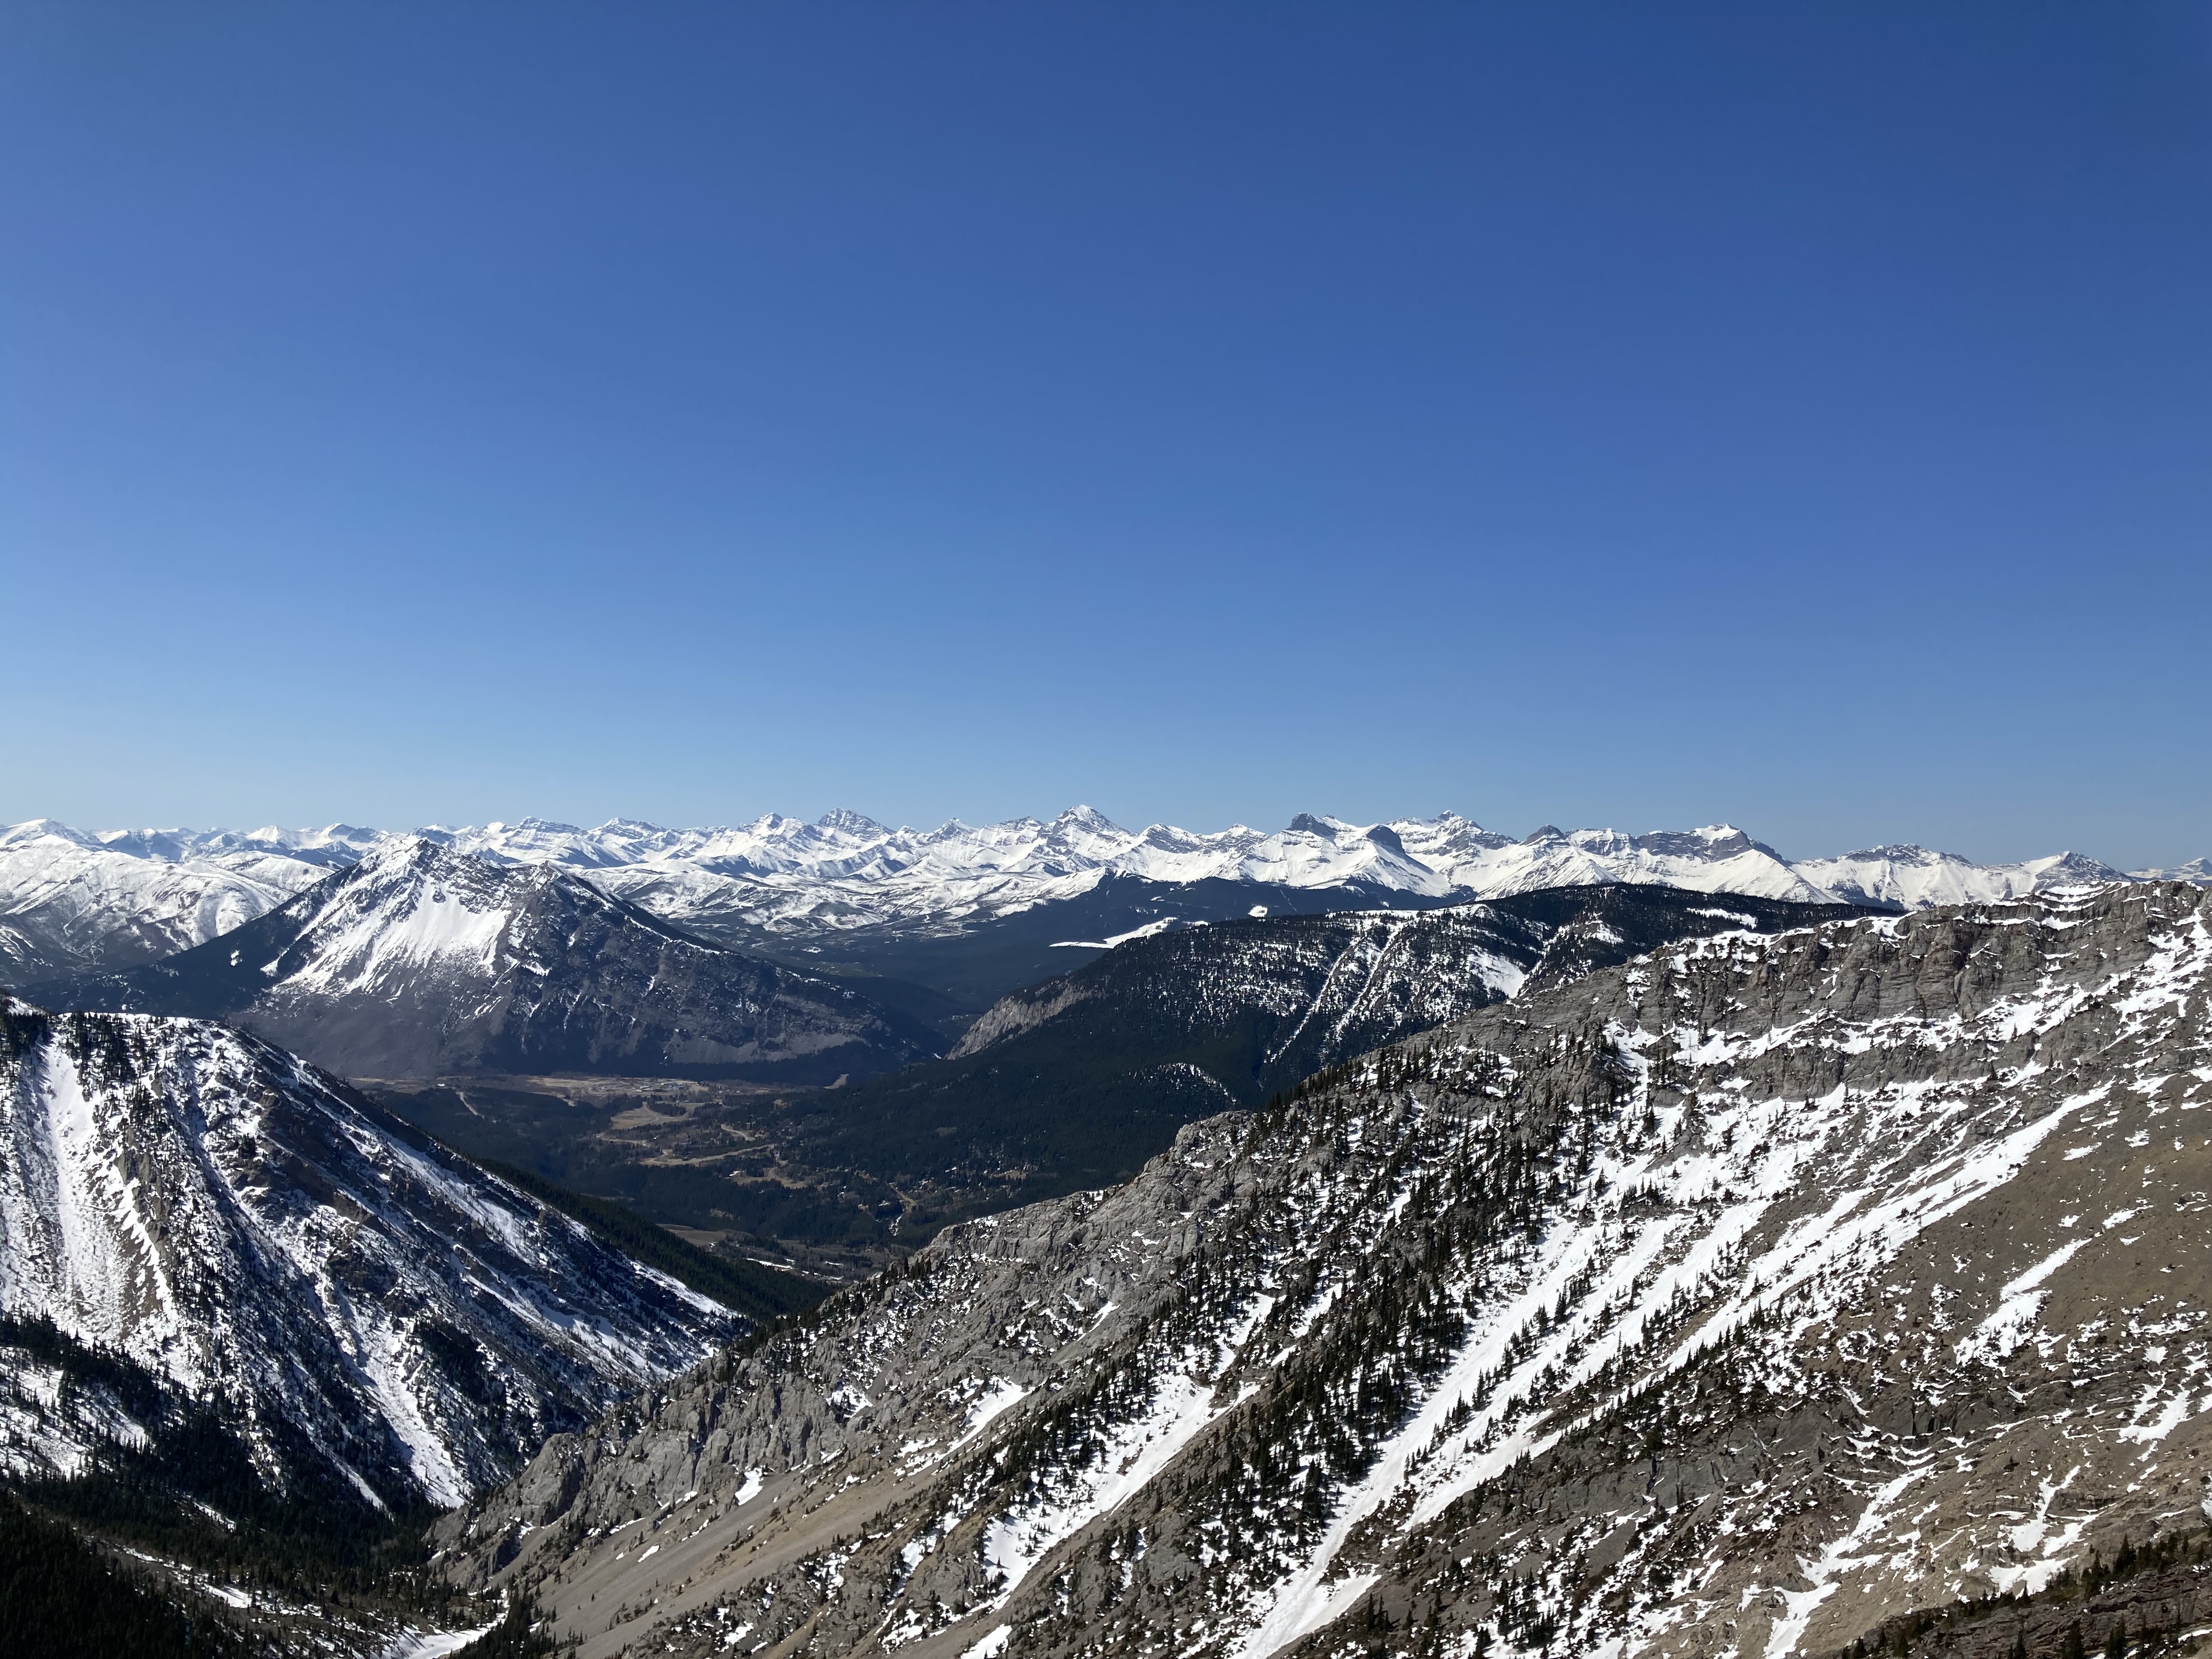
To this point, the trip isn’t unpleasant, but it is a bit of a sustained uphill slog. If you can make the climb up to the saddle, though, the views start to pay off your efforts in a big way. On a clear day, the rest of the trip is a non-stop feast of mountain scenery stretching north-to-south occupying the entire western horizon.
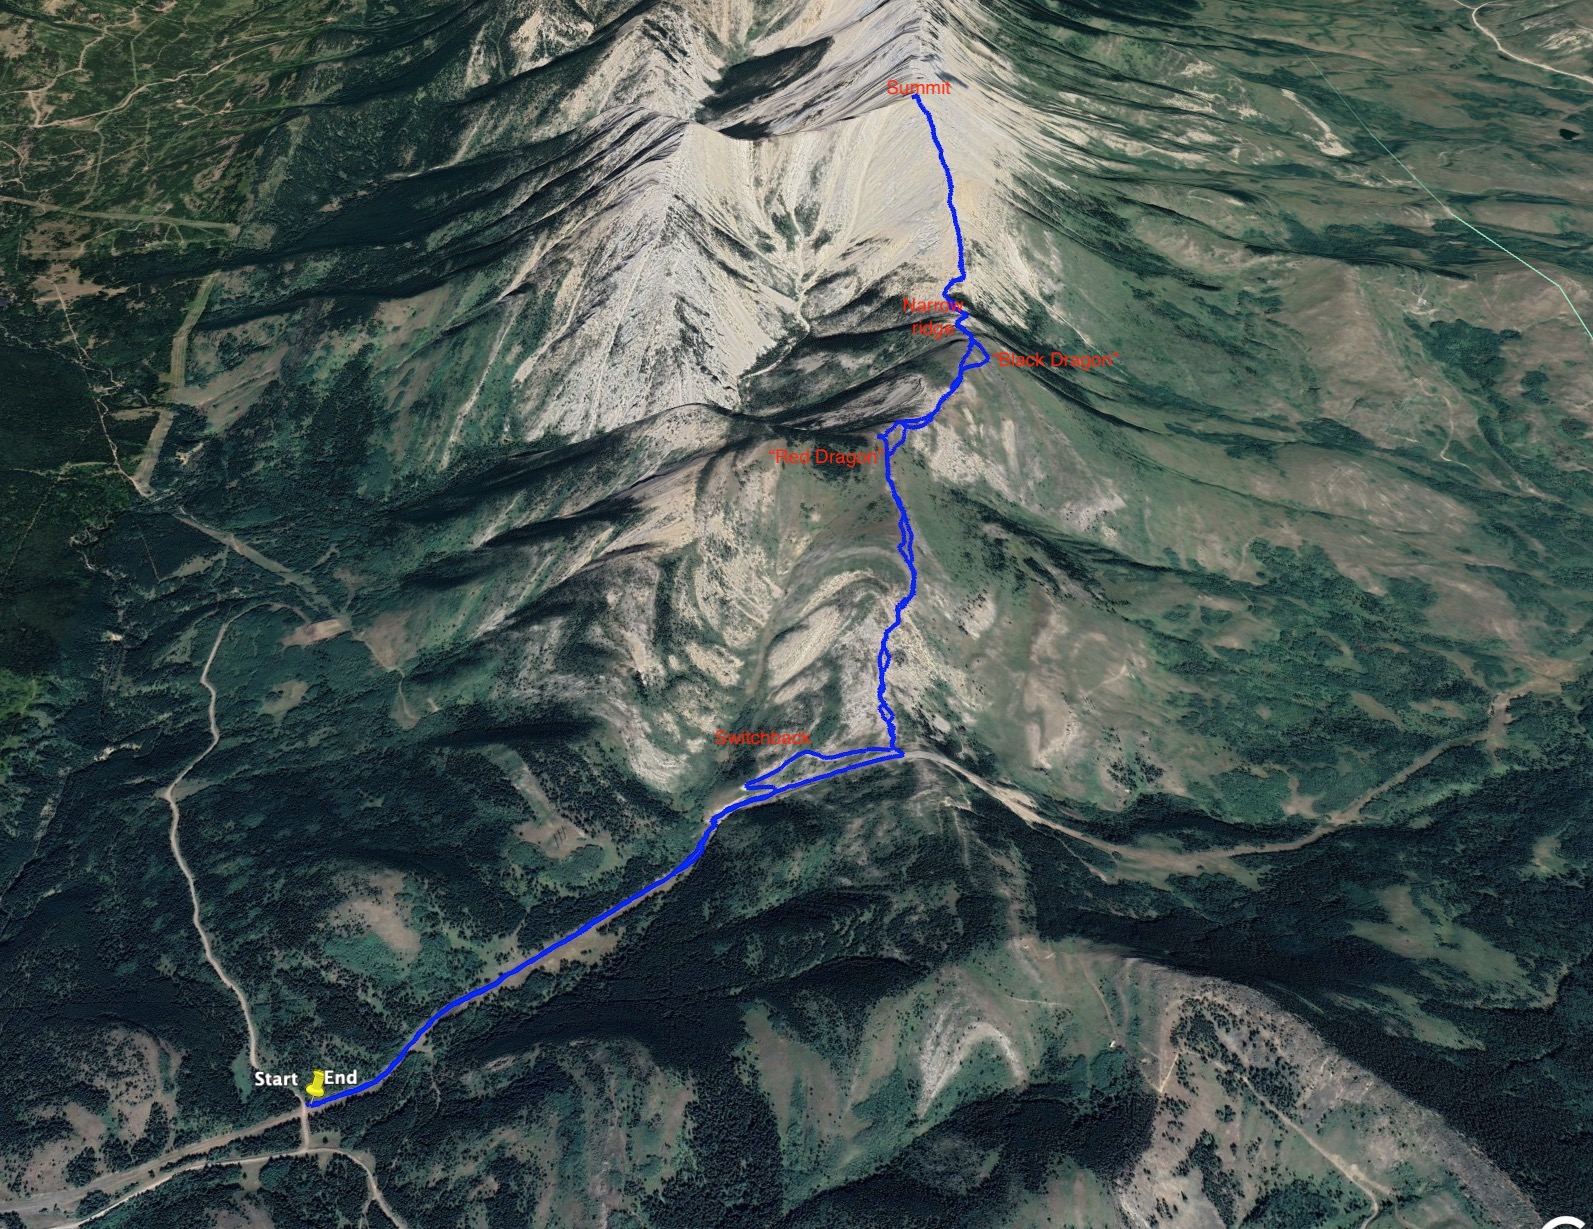
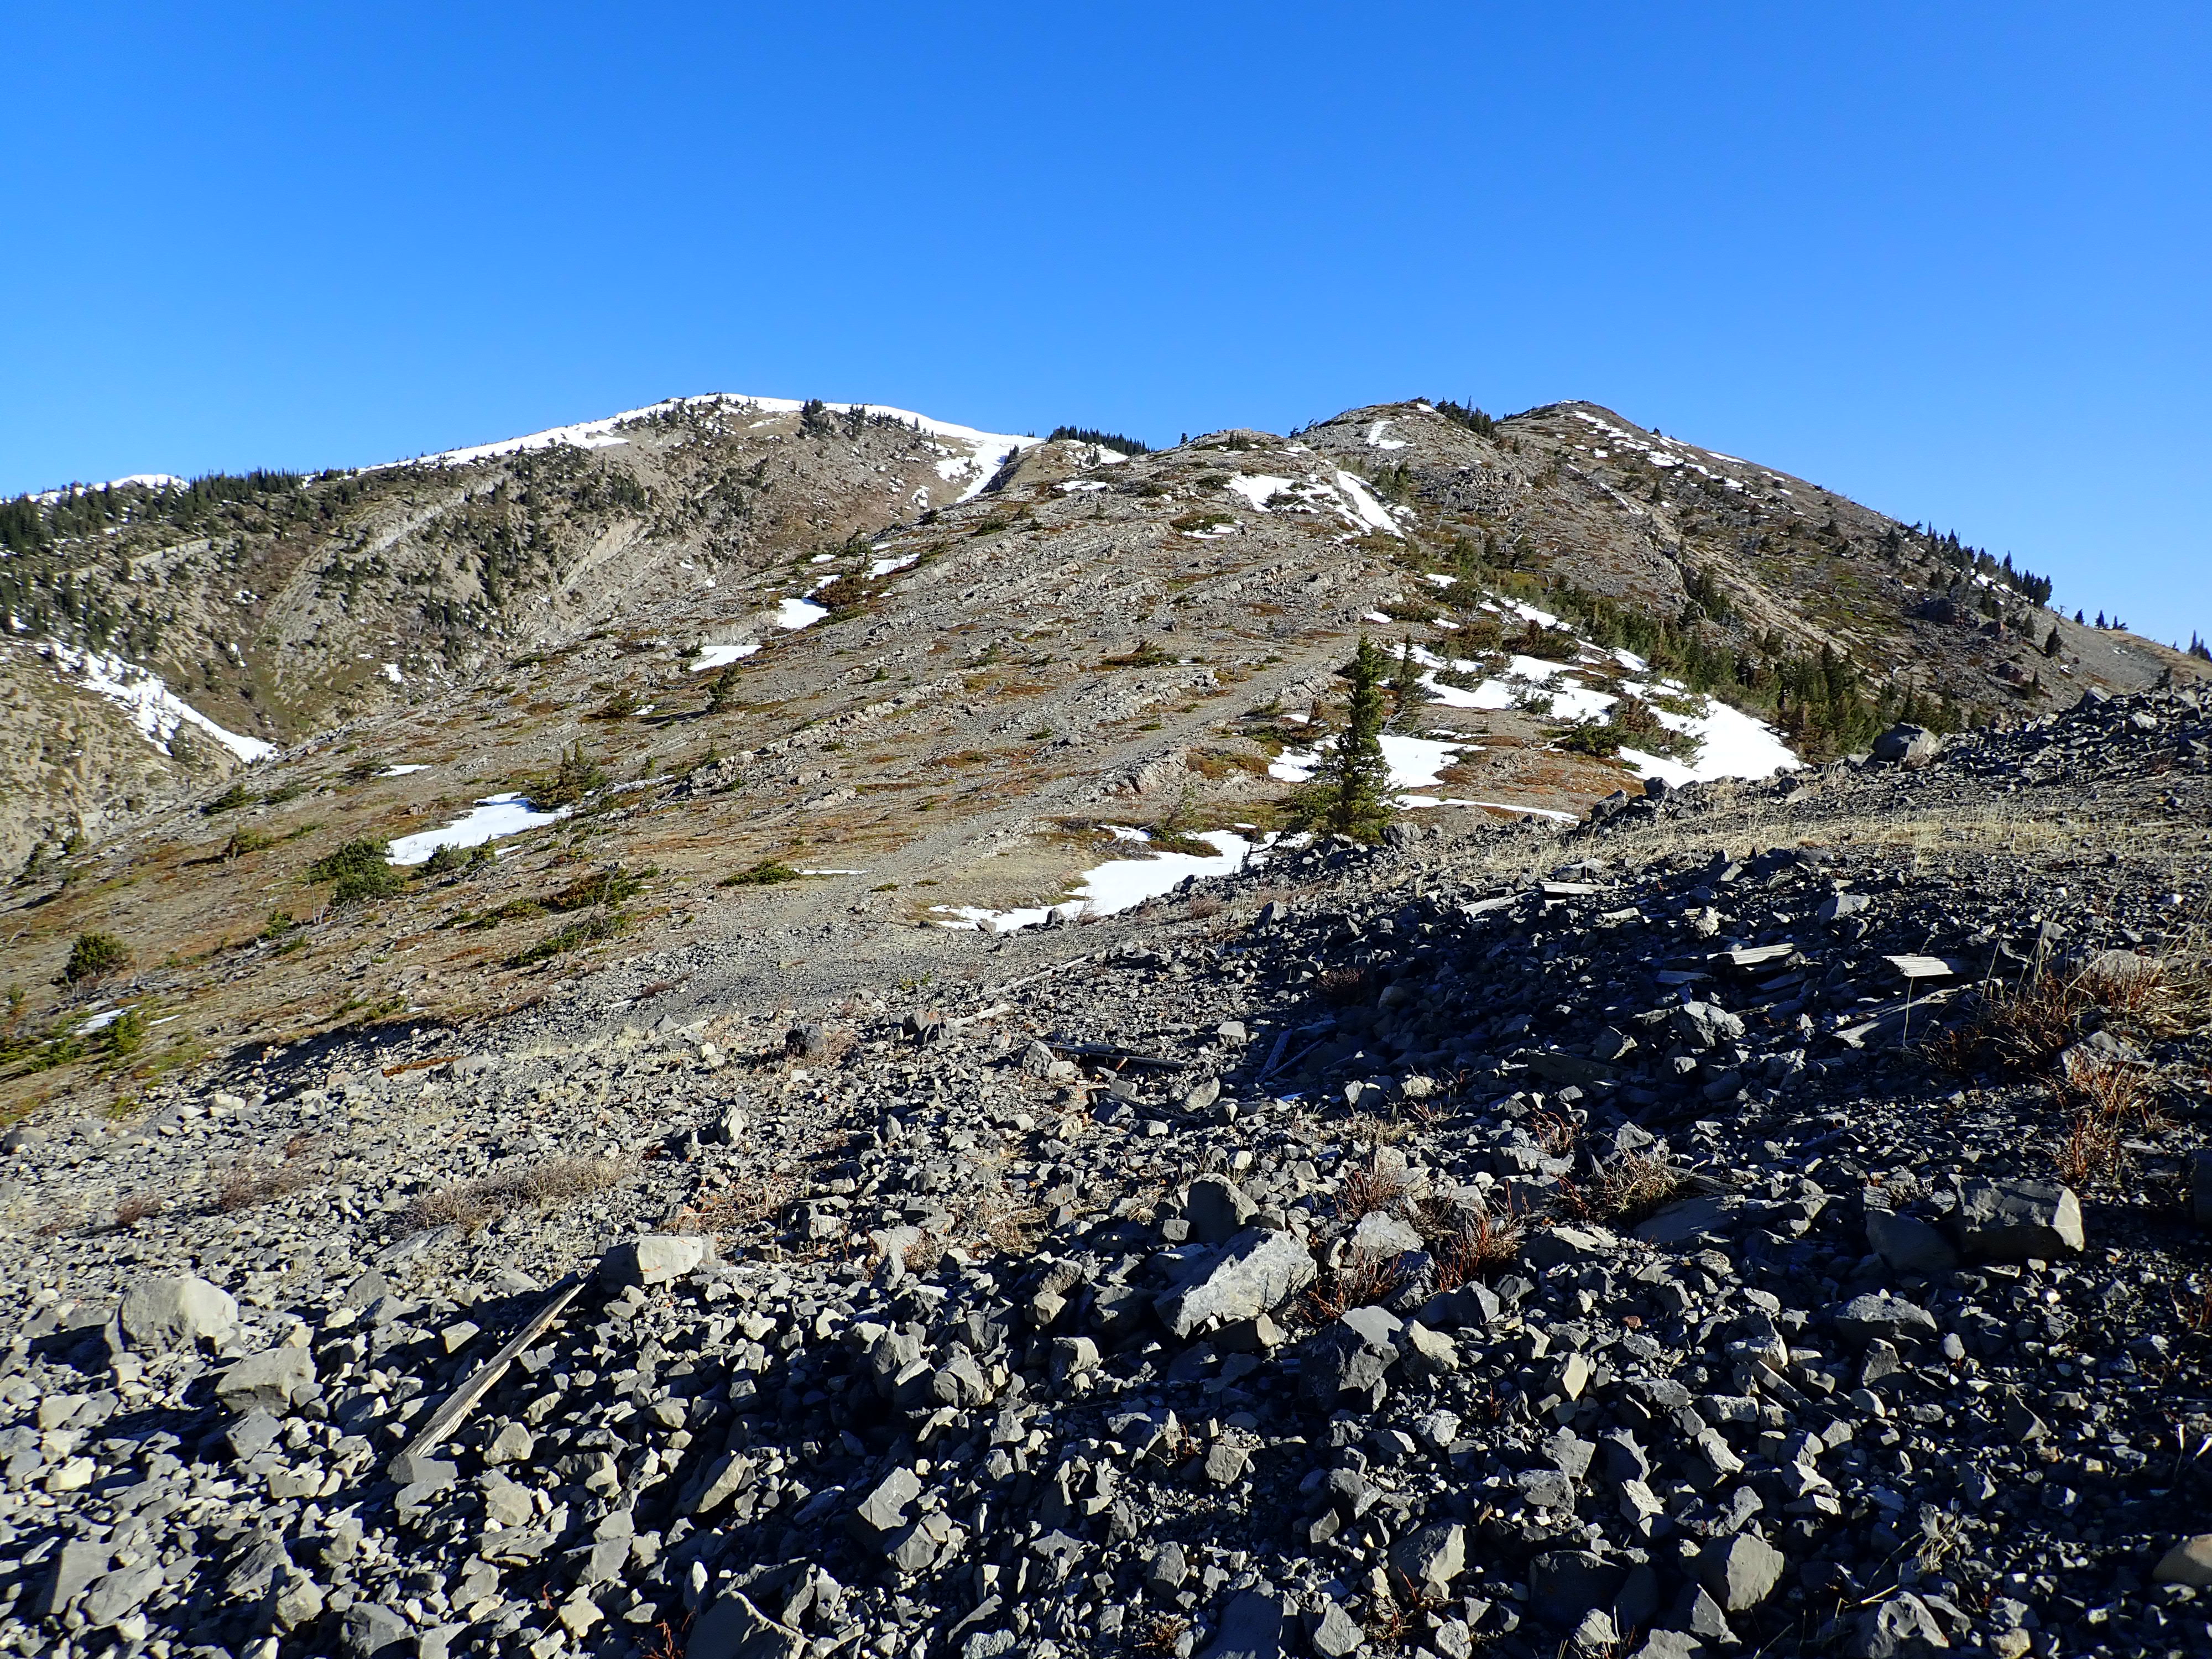
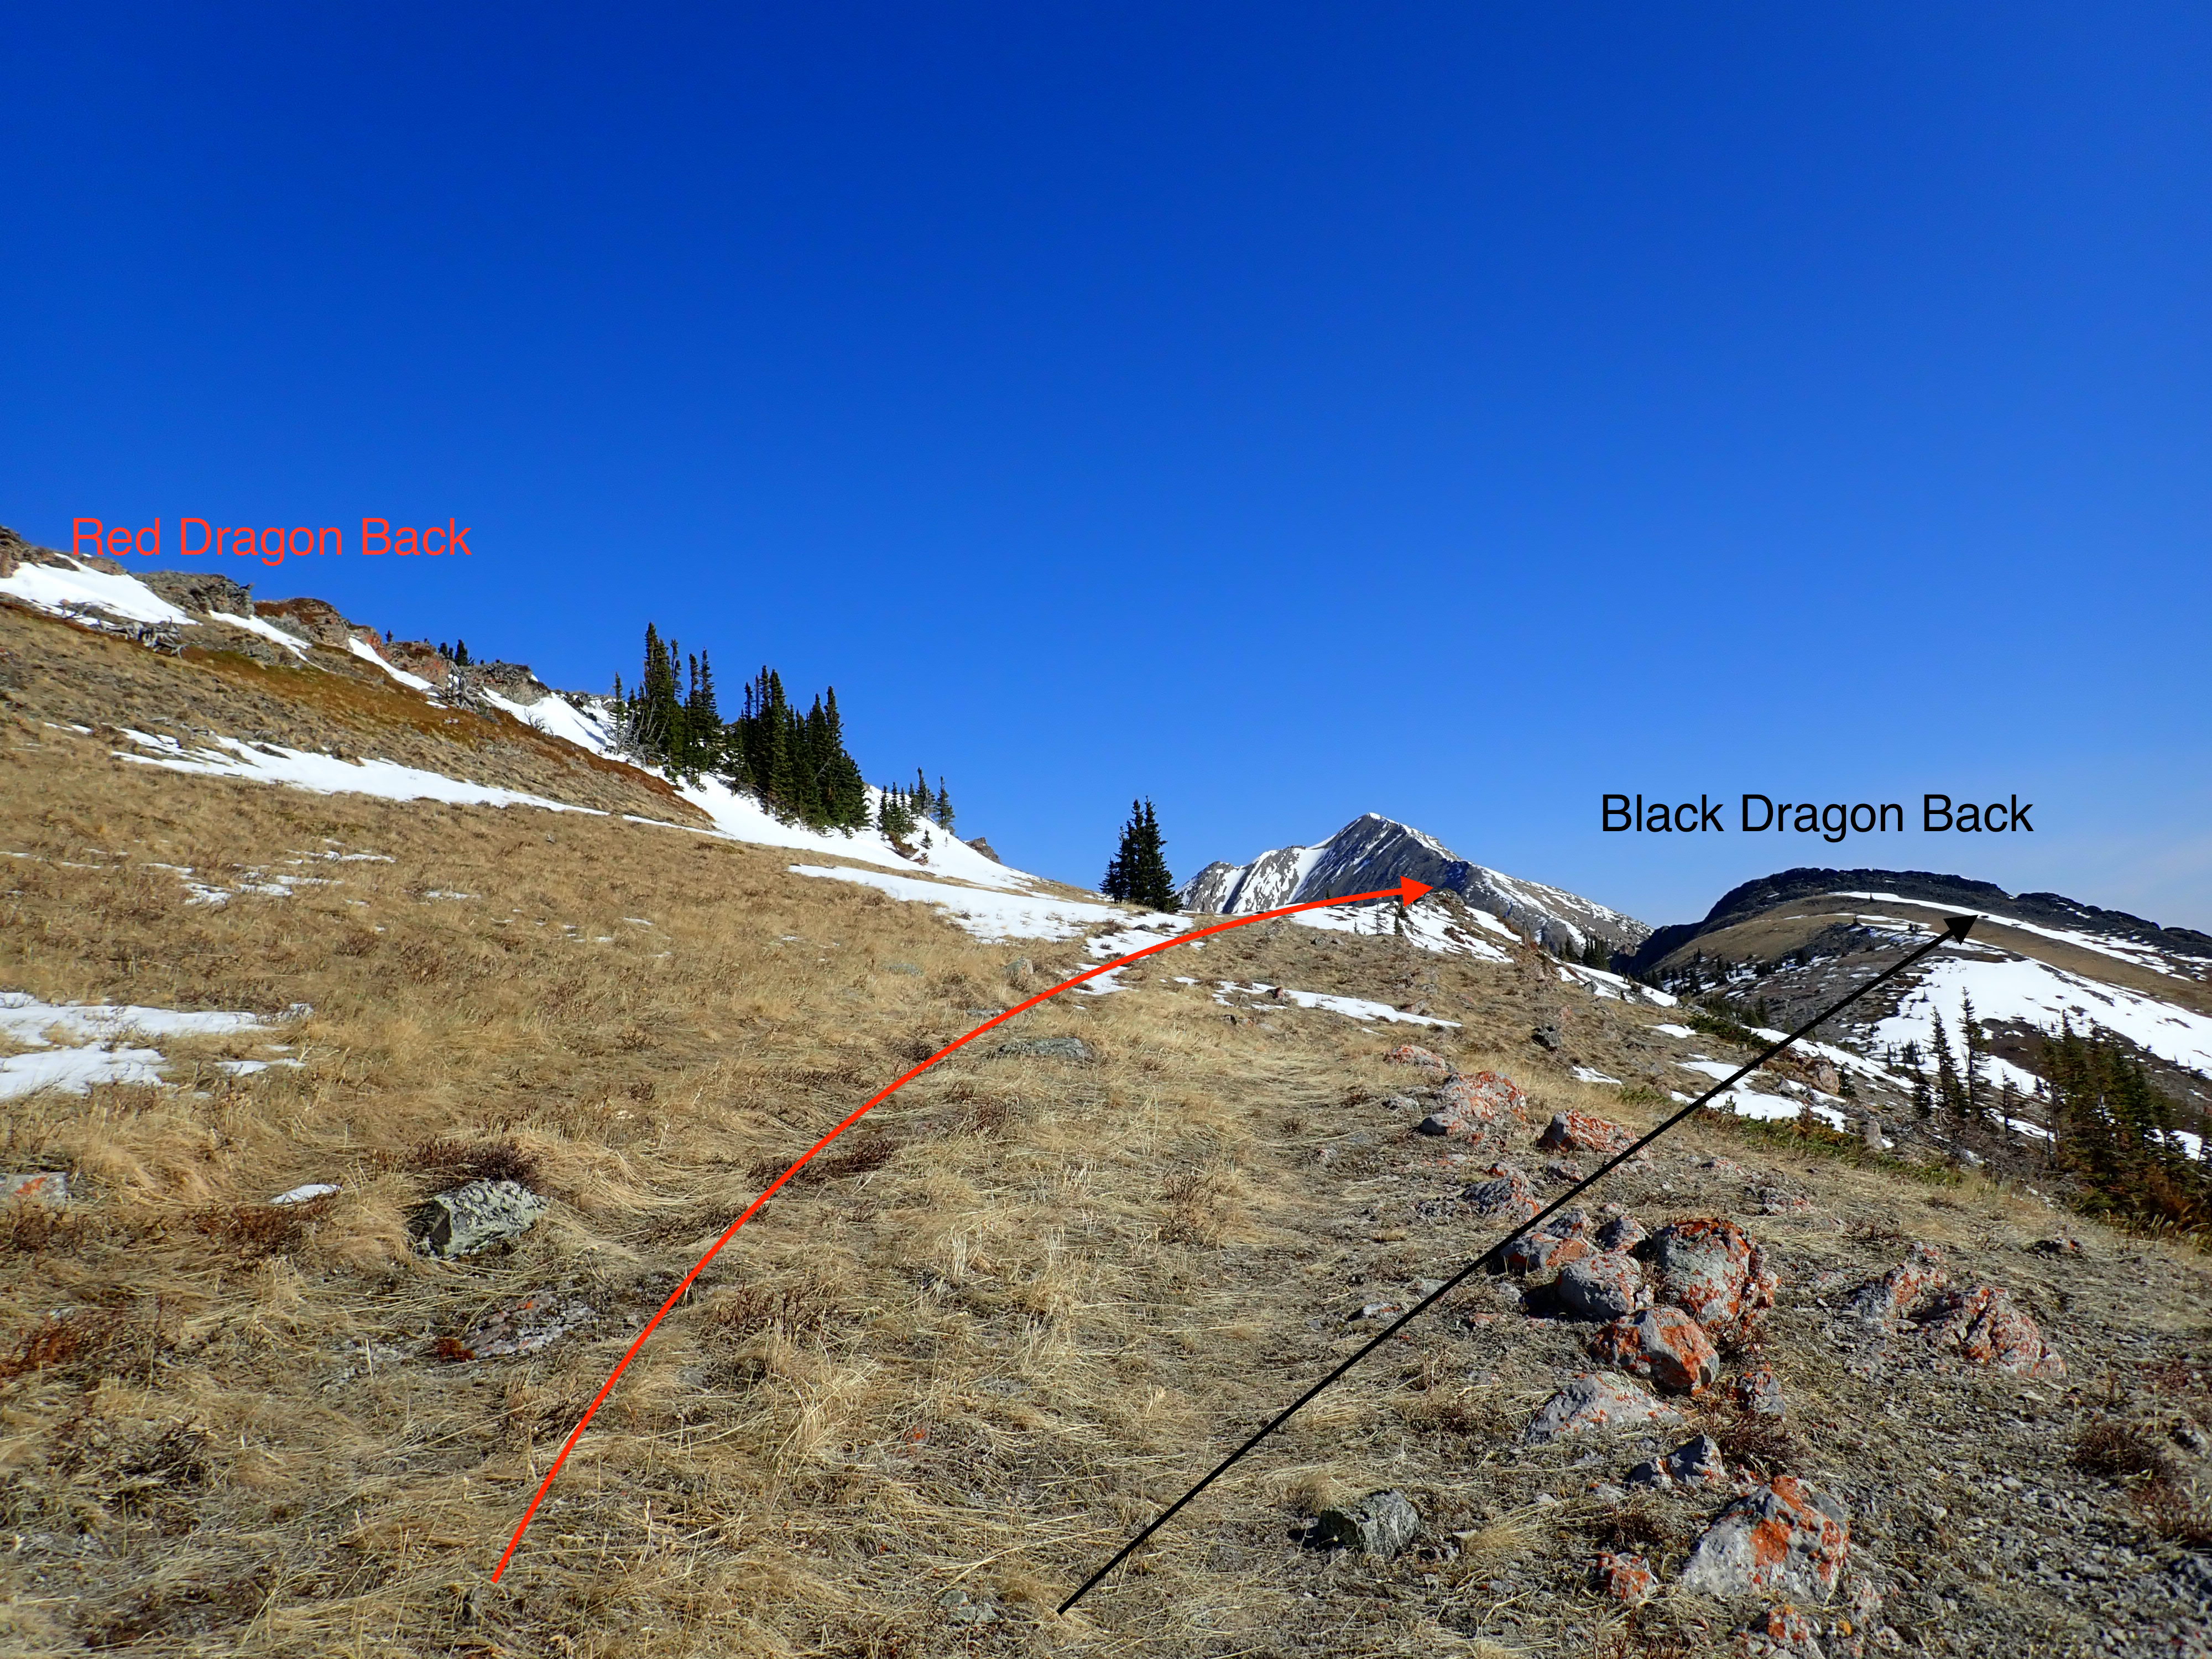
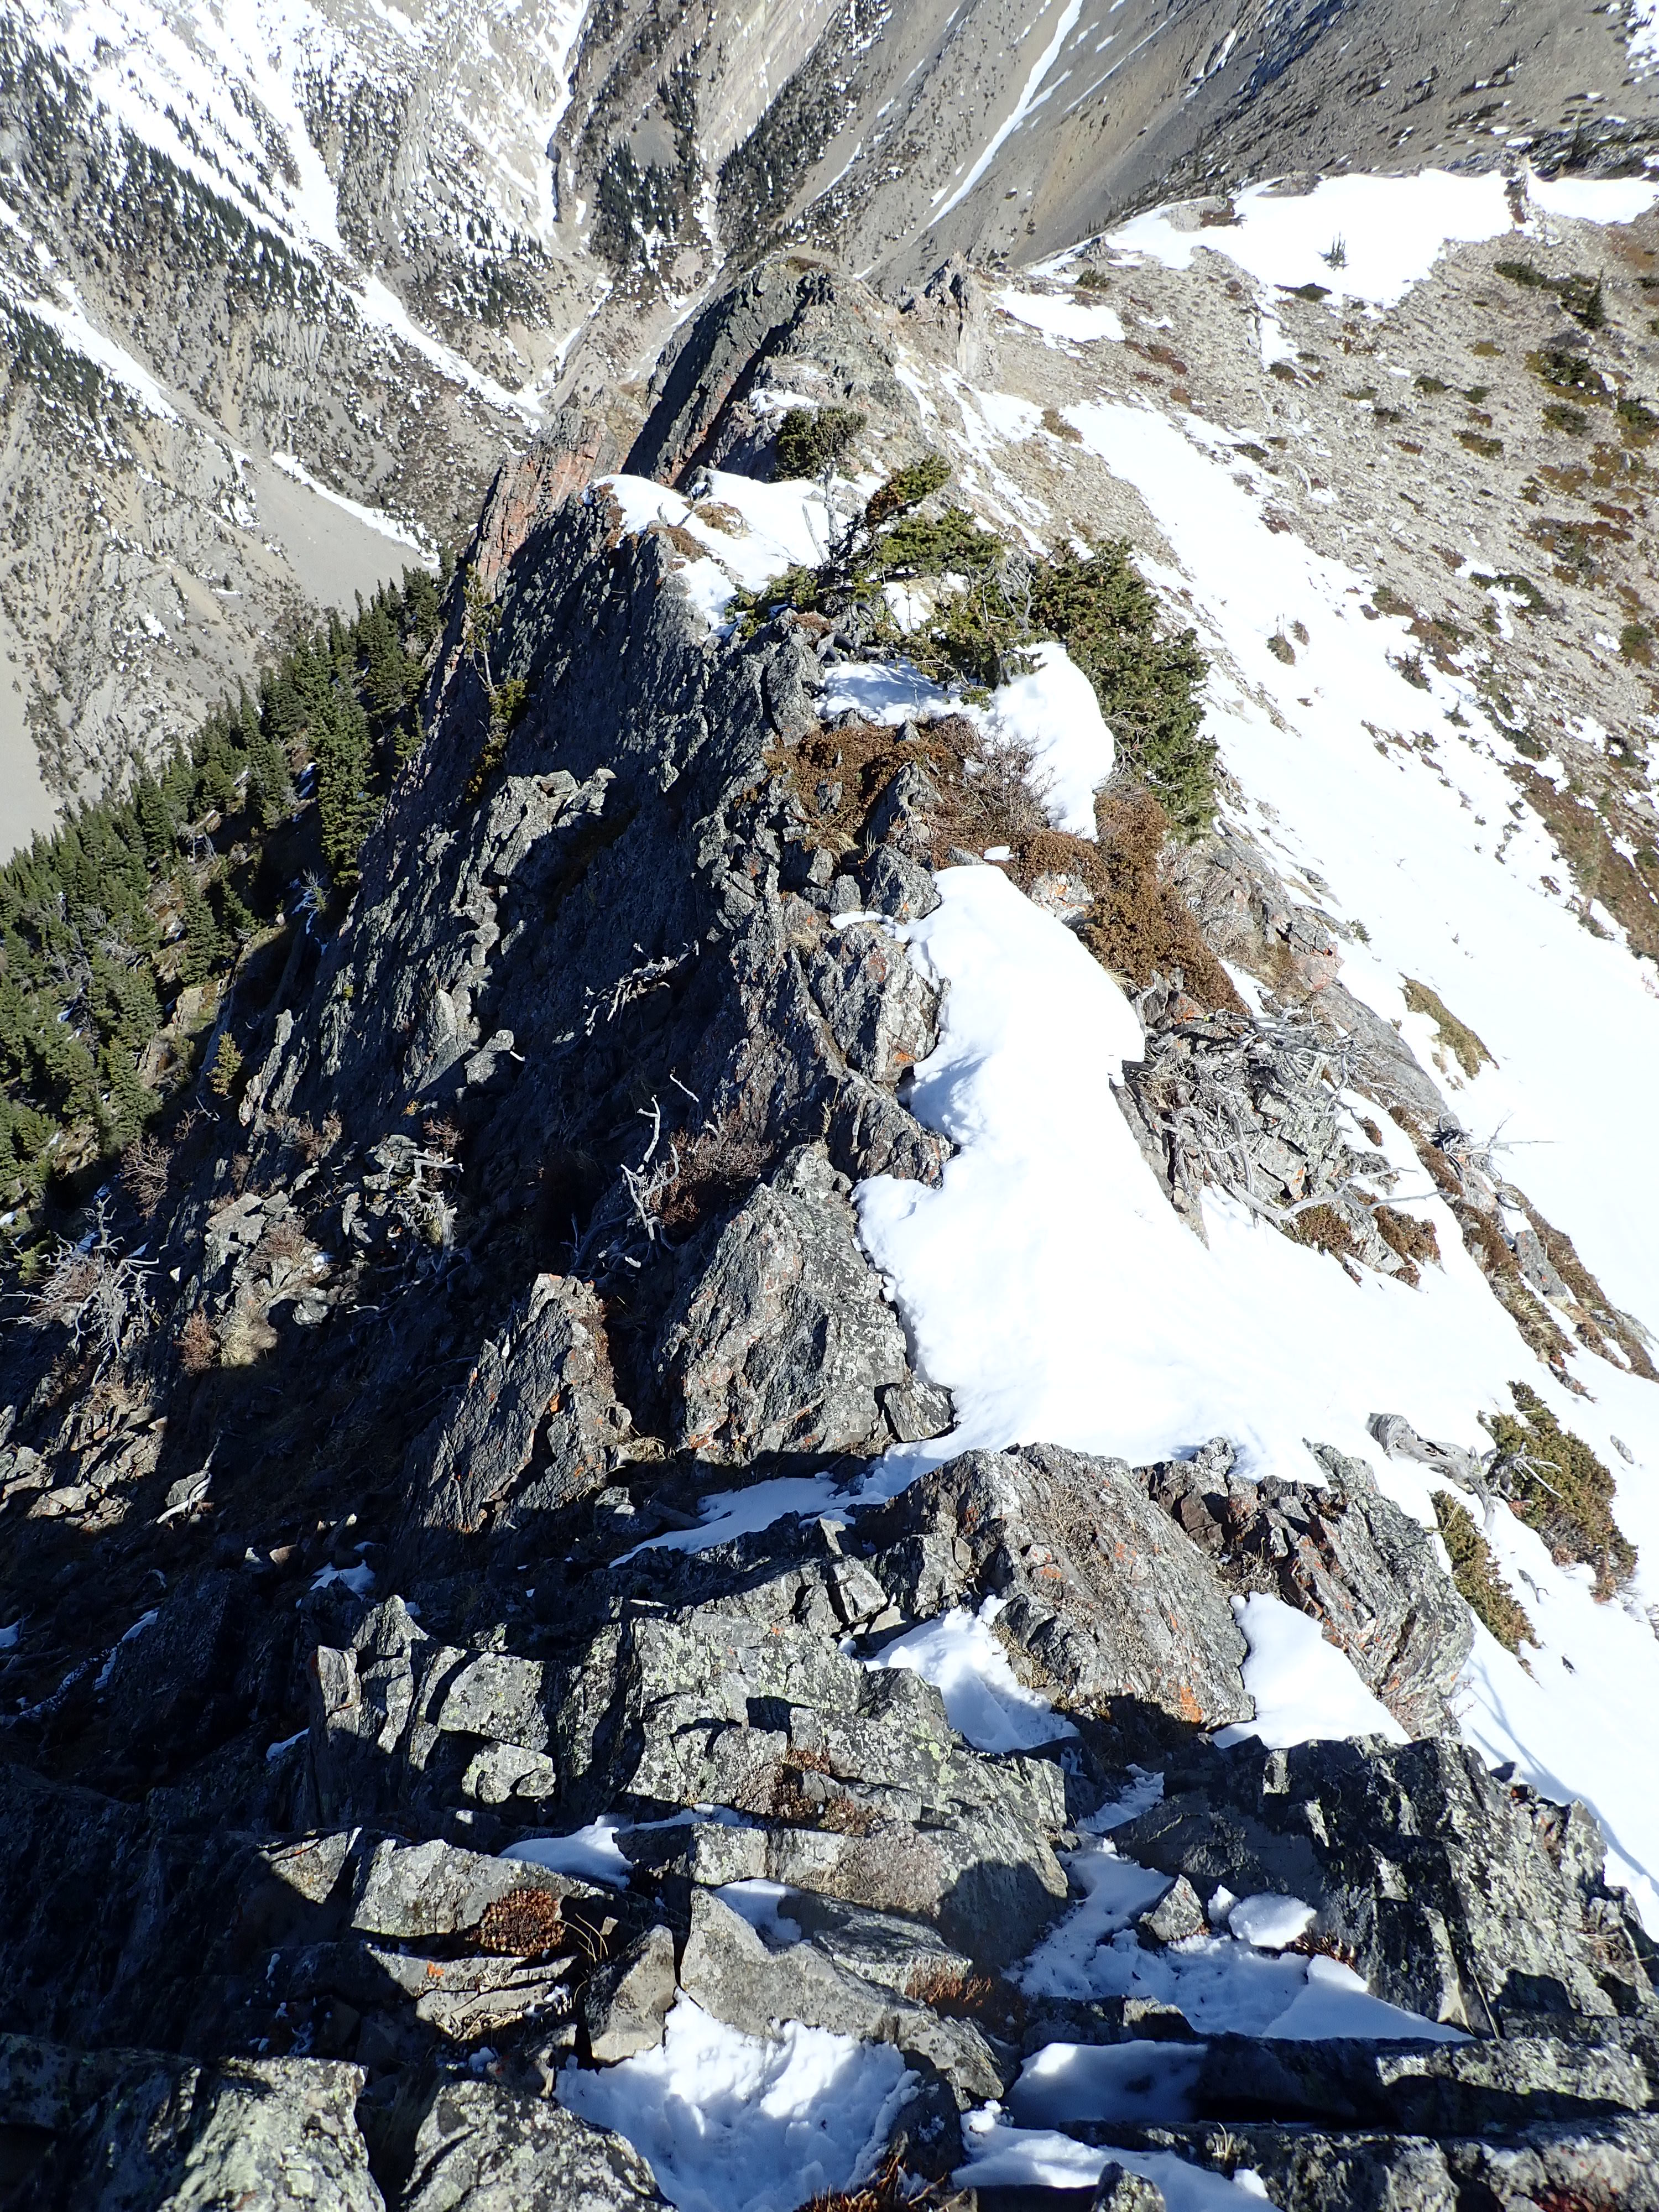
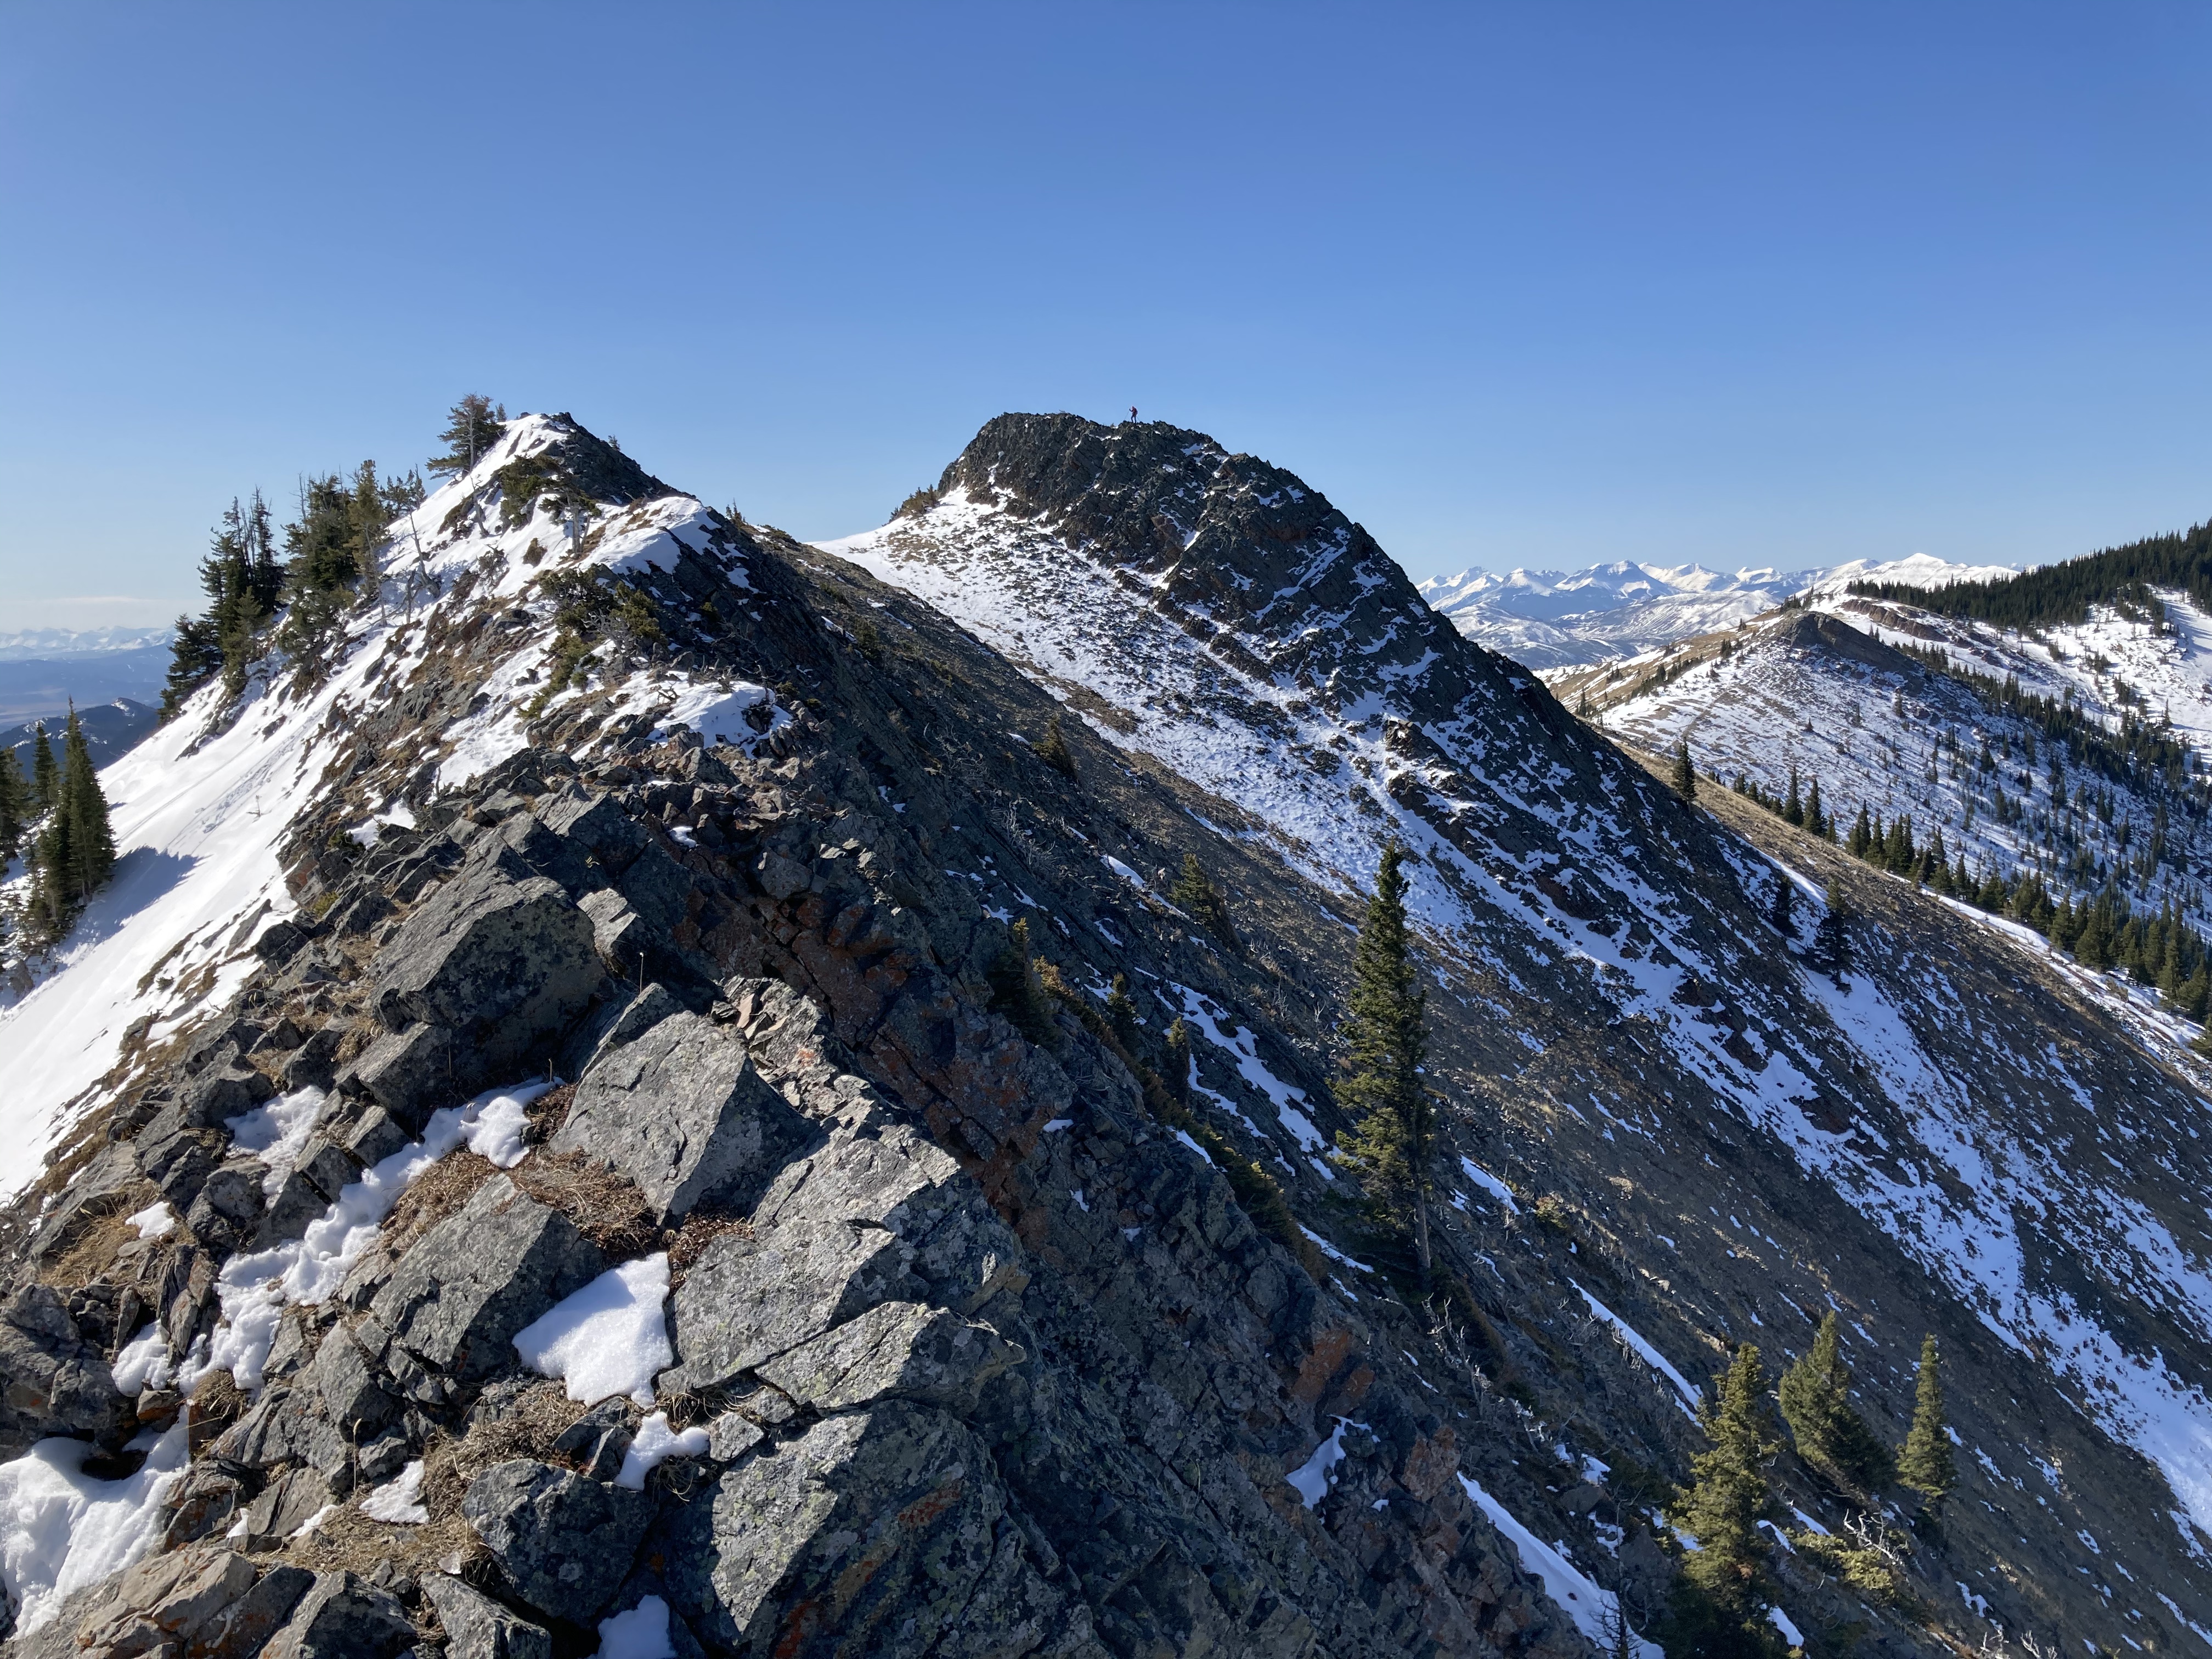
Beyond the saddle, the ridge carries on to the north and continues to ascend. Eventually, 2 landmarks come into play: the Dragon Back, and the Notch. These are referred to by several people online, and I think they originate in the old Historic Crowsnest Pass hiking book. However, exactly which spiny rock formation is the Dragon Back, wasn’t clear to me. Up on the mountain I found myself first encountering a crest of red lichen covered rocks which marked the spot where one could either continue straight ahead to a rocky pinnacle or deviate directly towards an obvious gap (the Notch) in a black rock band in the distance, bypassing the pinnacle. The red rocks and the black rocks both looked sort of look like dragon backs, so I decided there are 2 Dragon Backs: red and black. As for the Notch – it is the route through the black rocks that form the “Black Dragon”. There’s a big obvious one, and also a more obscure notch that some people use, marked by a cairn. I used the big one on my way up, and the obscure one on my way back. This whole paragraph will probably make more sense after you see the pictures below.
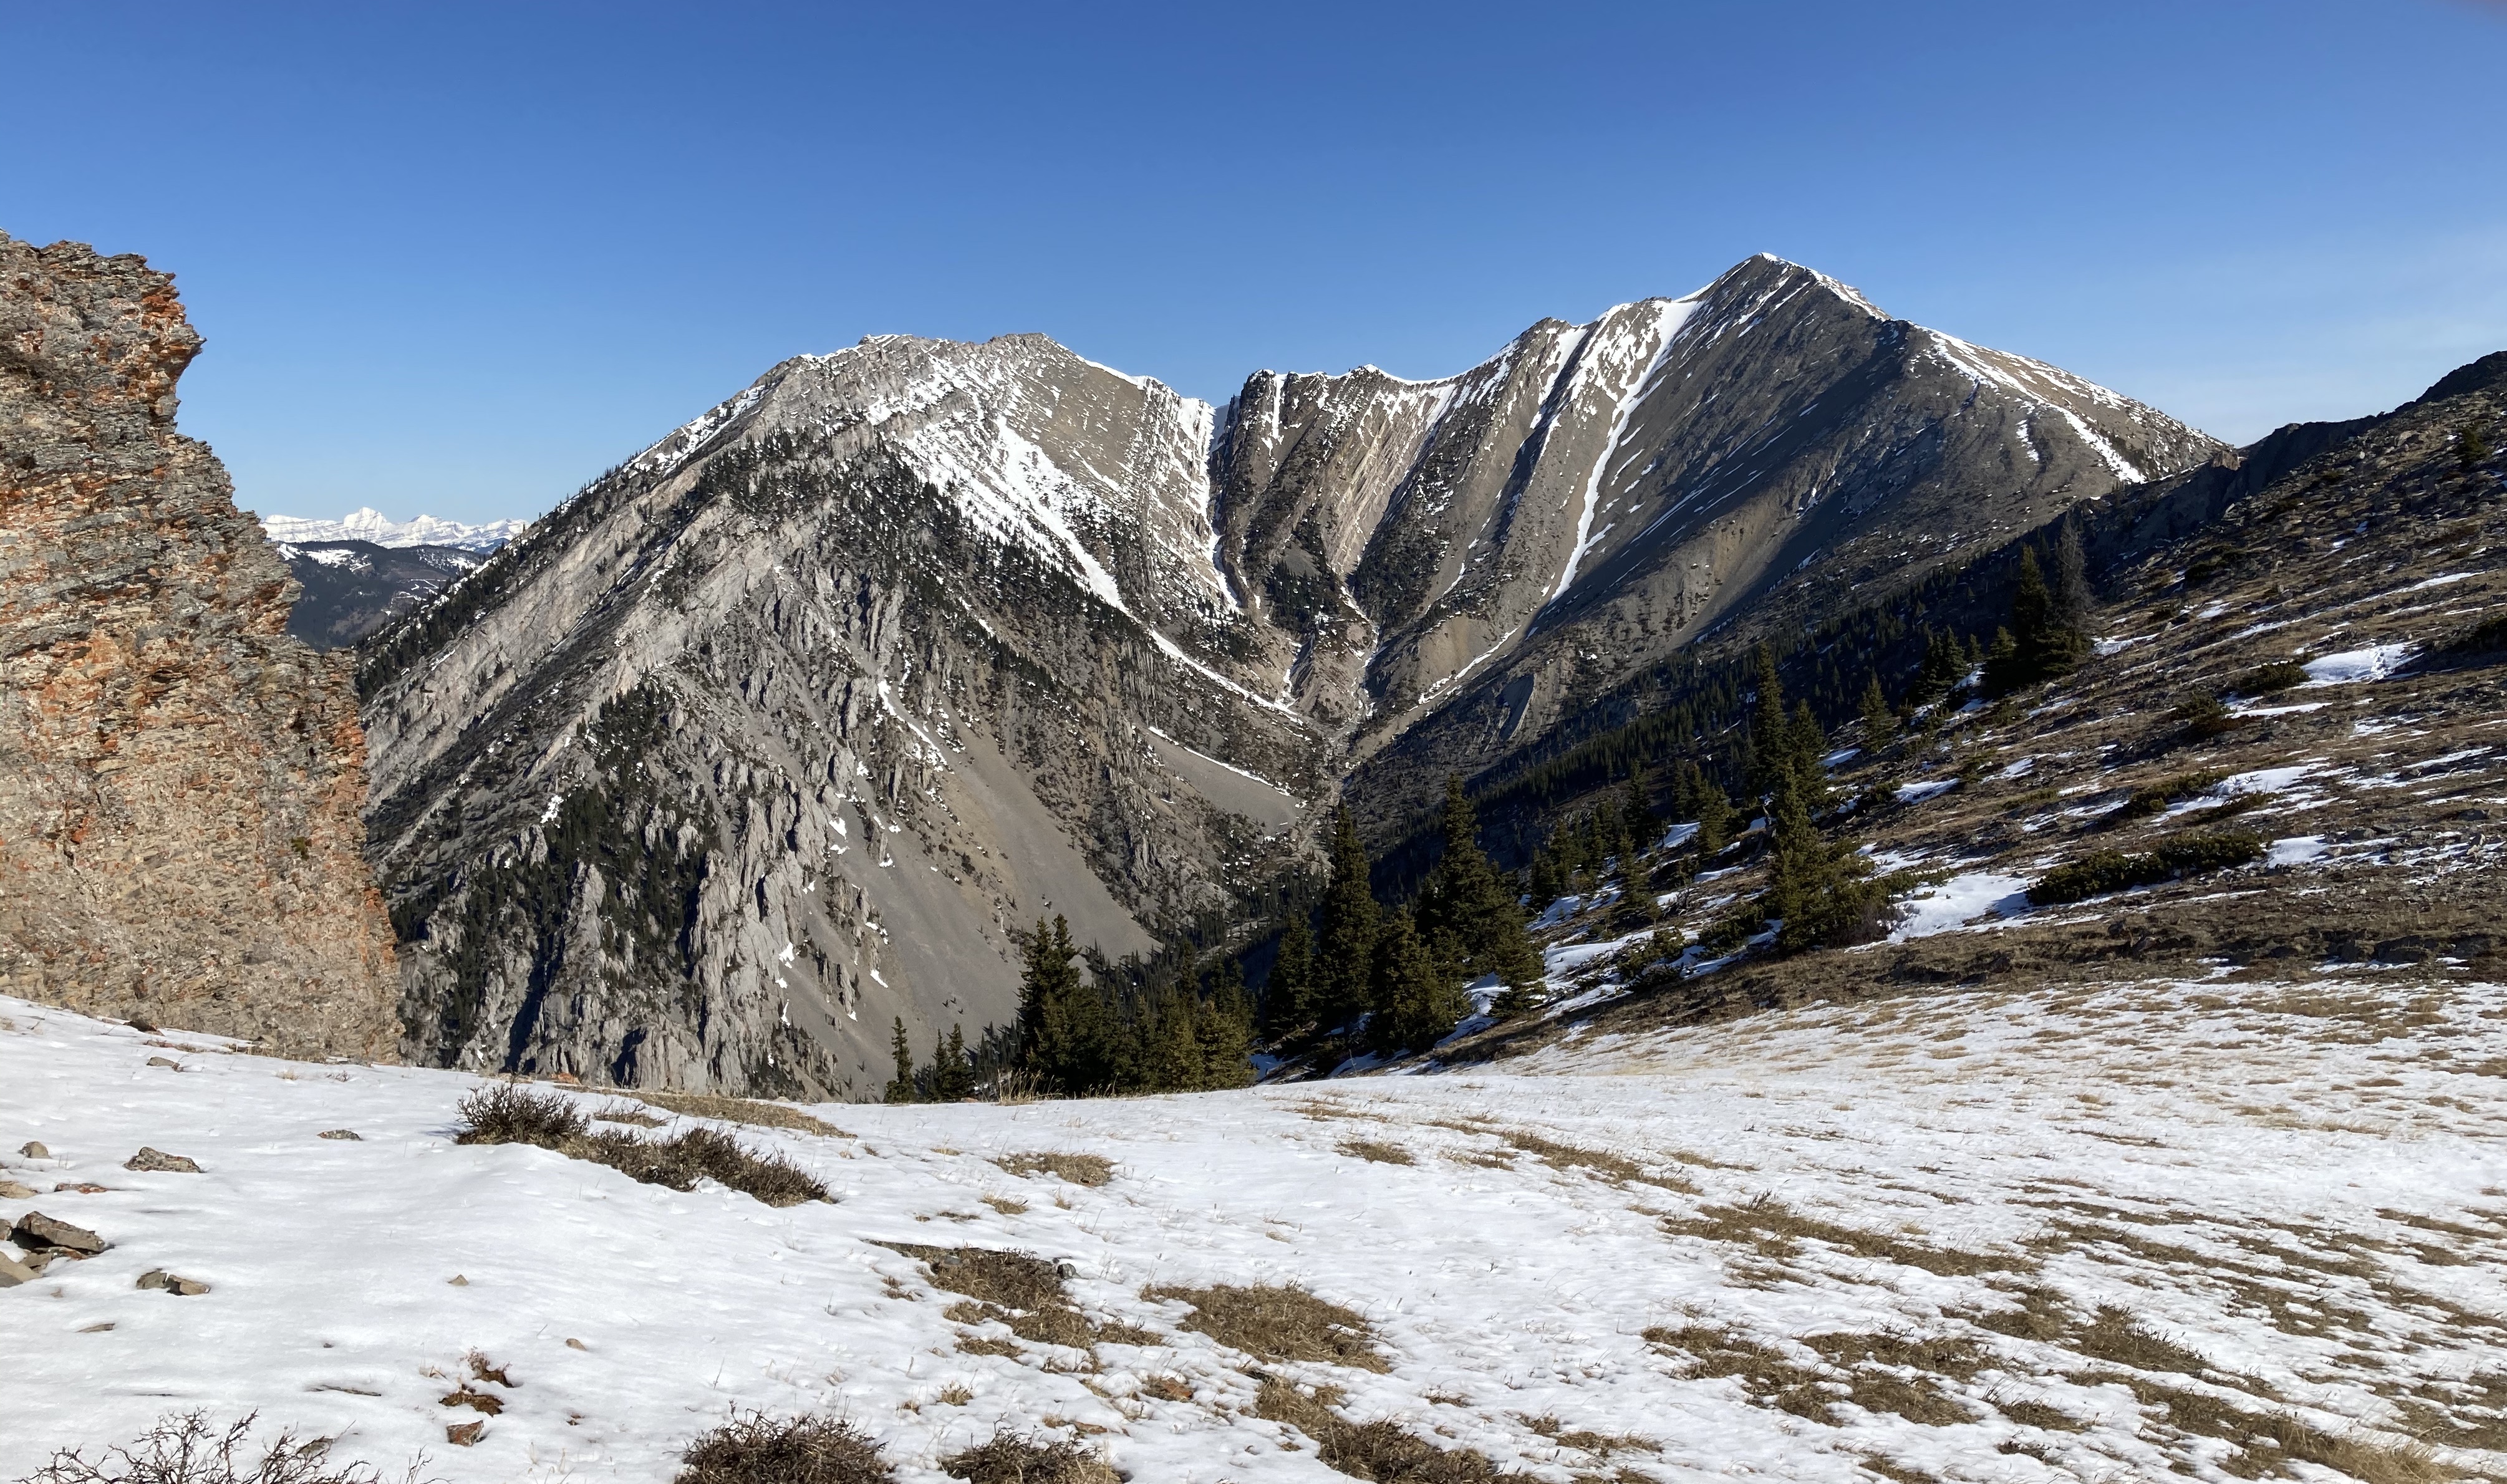
Beyond the Notch, there’s a short area where the ridge narrows. Staying on the ridge top doesn’t present too much of a challenge if you’re confident moving on narrow, uneven rock. There are a couple spots where there’s exposure to the left, though. This is the “moderate scrambling step”, but it’s avoidable by staying off the ridge slightly to the right. However, that’s the lee-side of the ridge where there will be more snow load. Early in the season the easy path may be snow covered and thus treacherous in its own way. A slip would result in a bit of a prolonged downhill slide, not a death-drop, though.
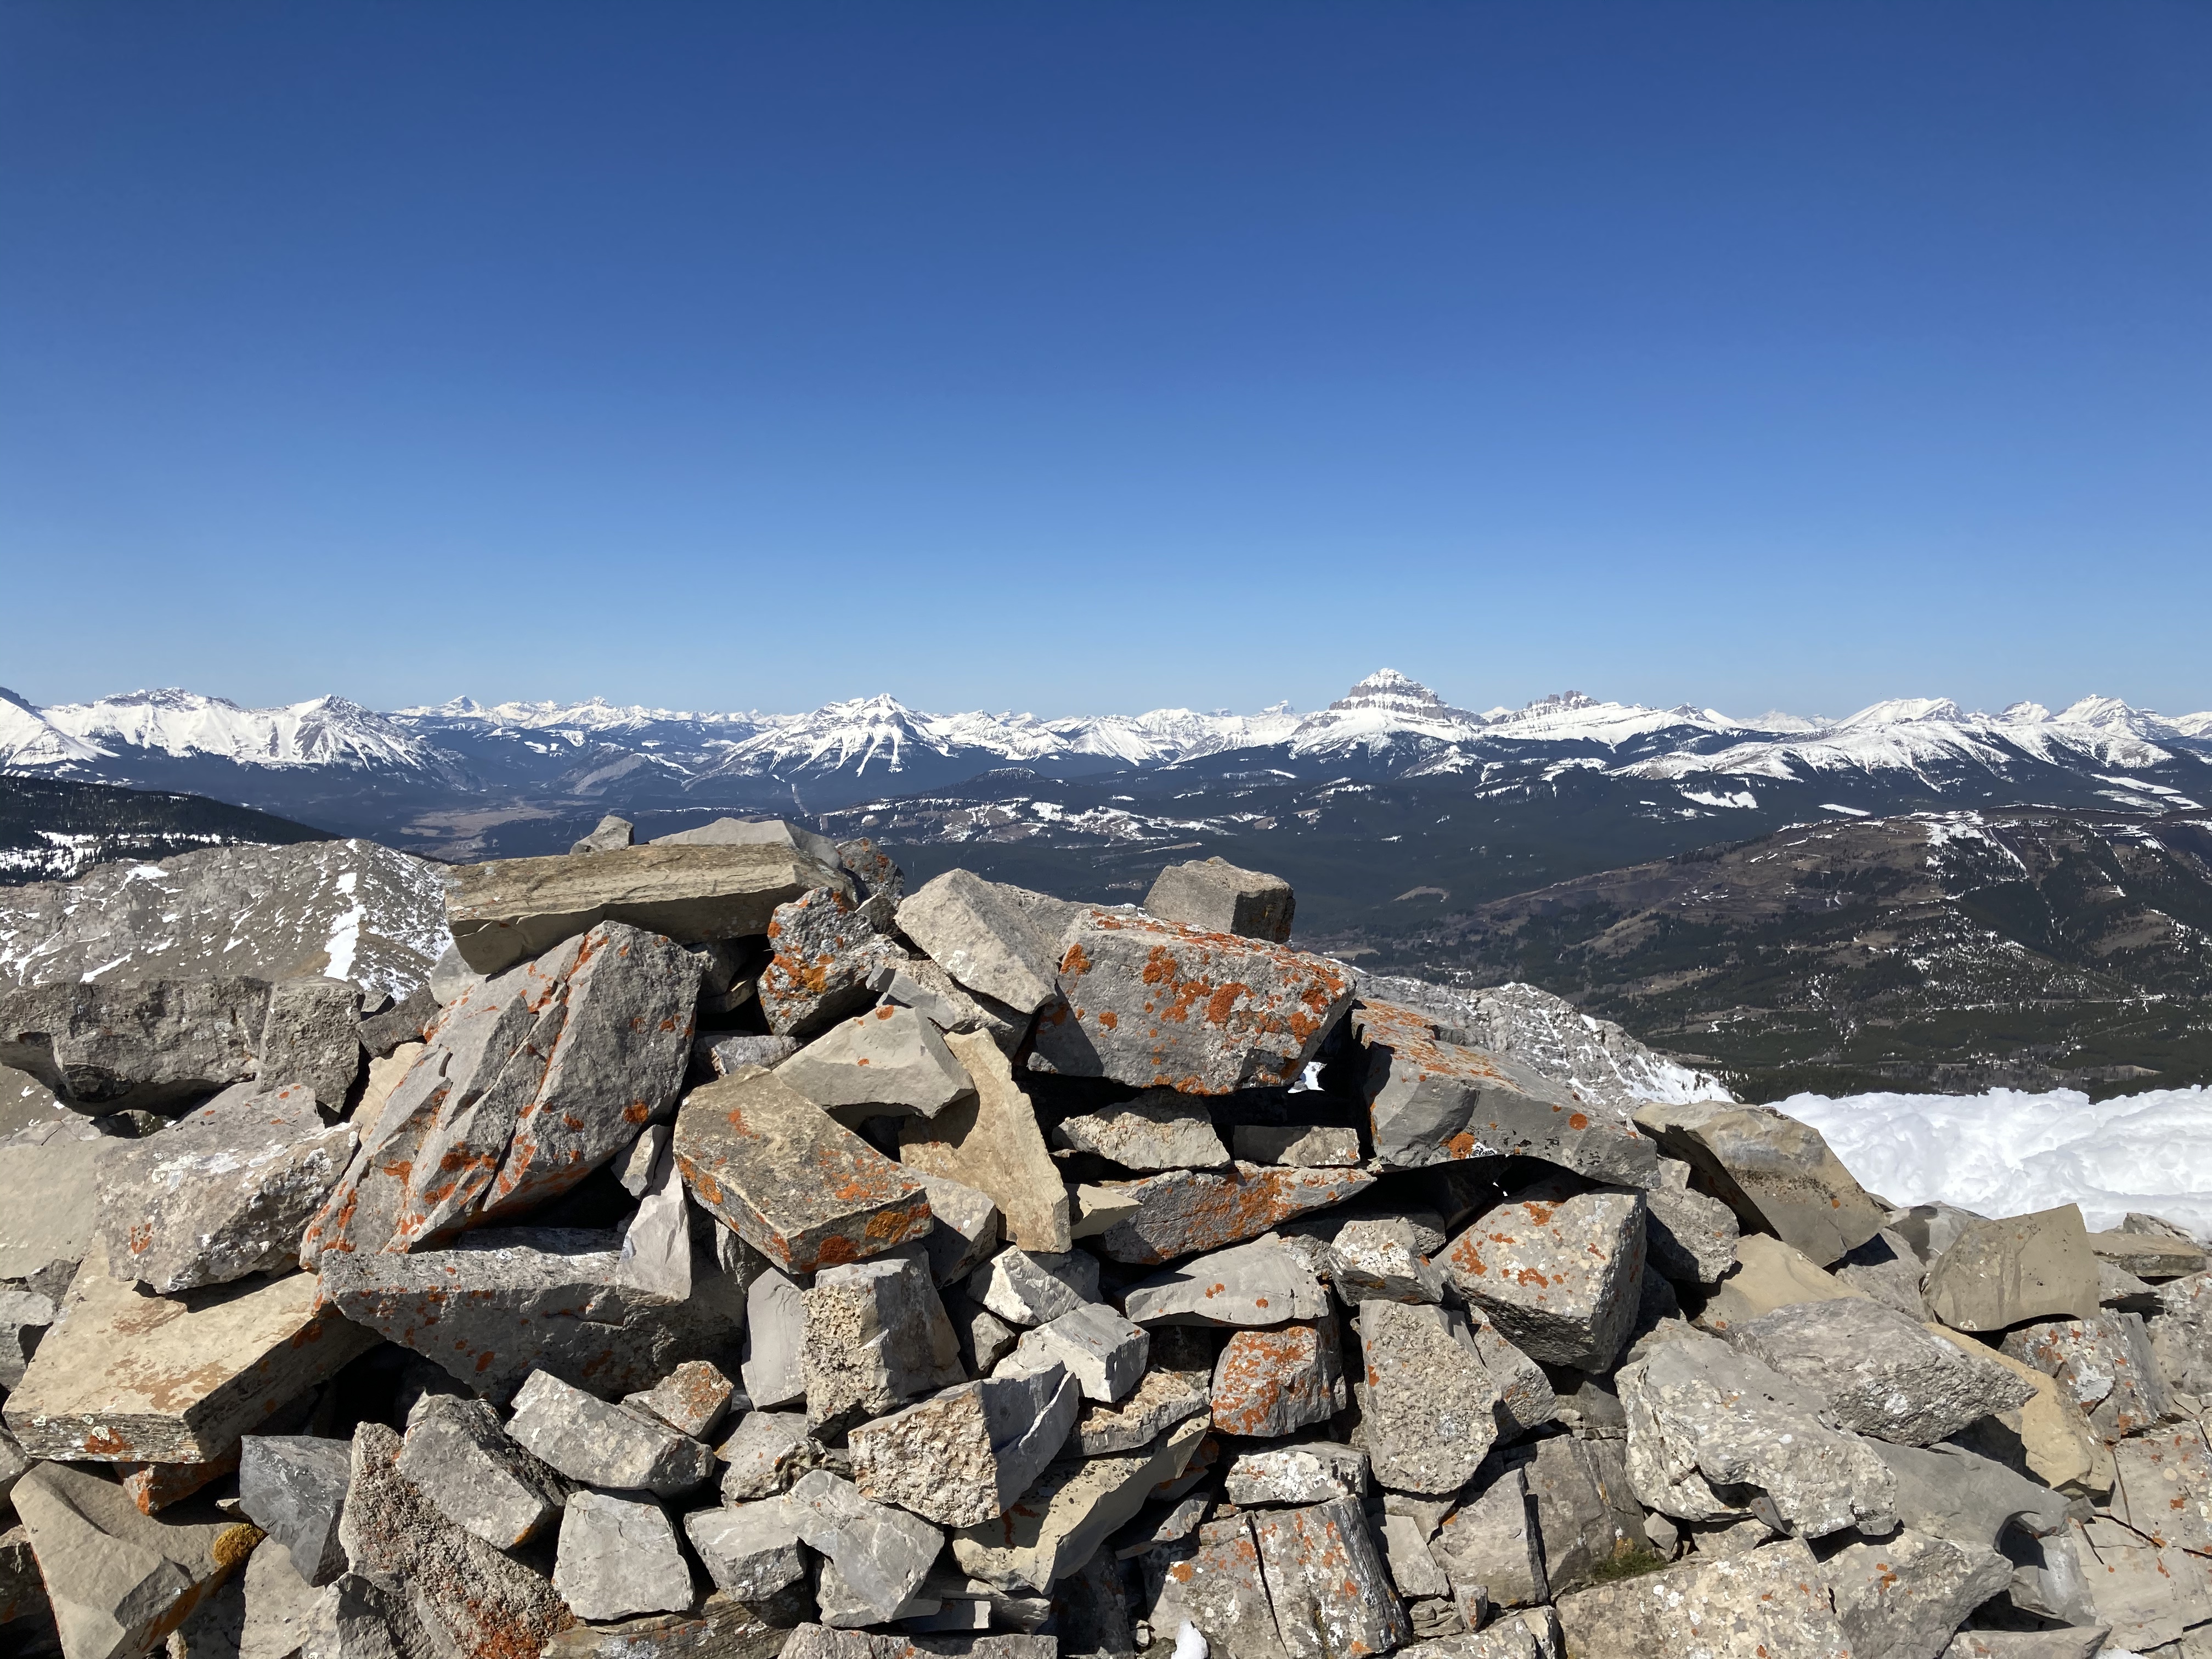
After the narrow ridge, it’s a straightforward climb to the summit. A large cairn marks the objective. There was still snow on parts of the cairn. I didn’t see a register, but maybe it was embedded in the rocks under the snow. I spent a nice long time up there. A few other parties were on the mountain that day, but it’s a roomy summit and everyone had space to contemplate the expansive and dazzling views of snow-covered mountains.
Other trip reports to check out, some of which feature options for extending the trip:
Click on the pictures in the gallery below to access full-sized images:


Very good, Par!
LikeLike
Very nice post and as usual, great photos.
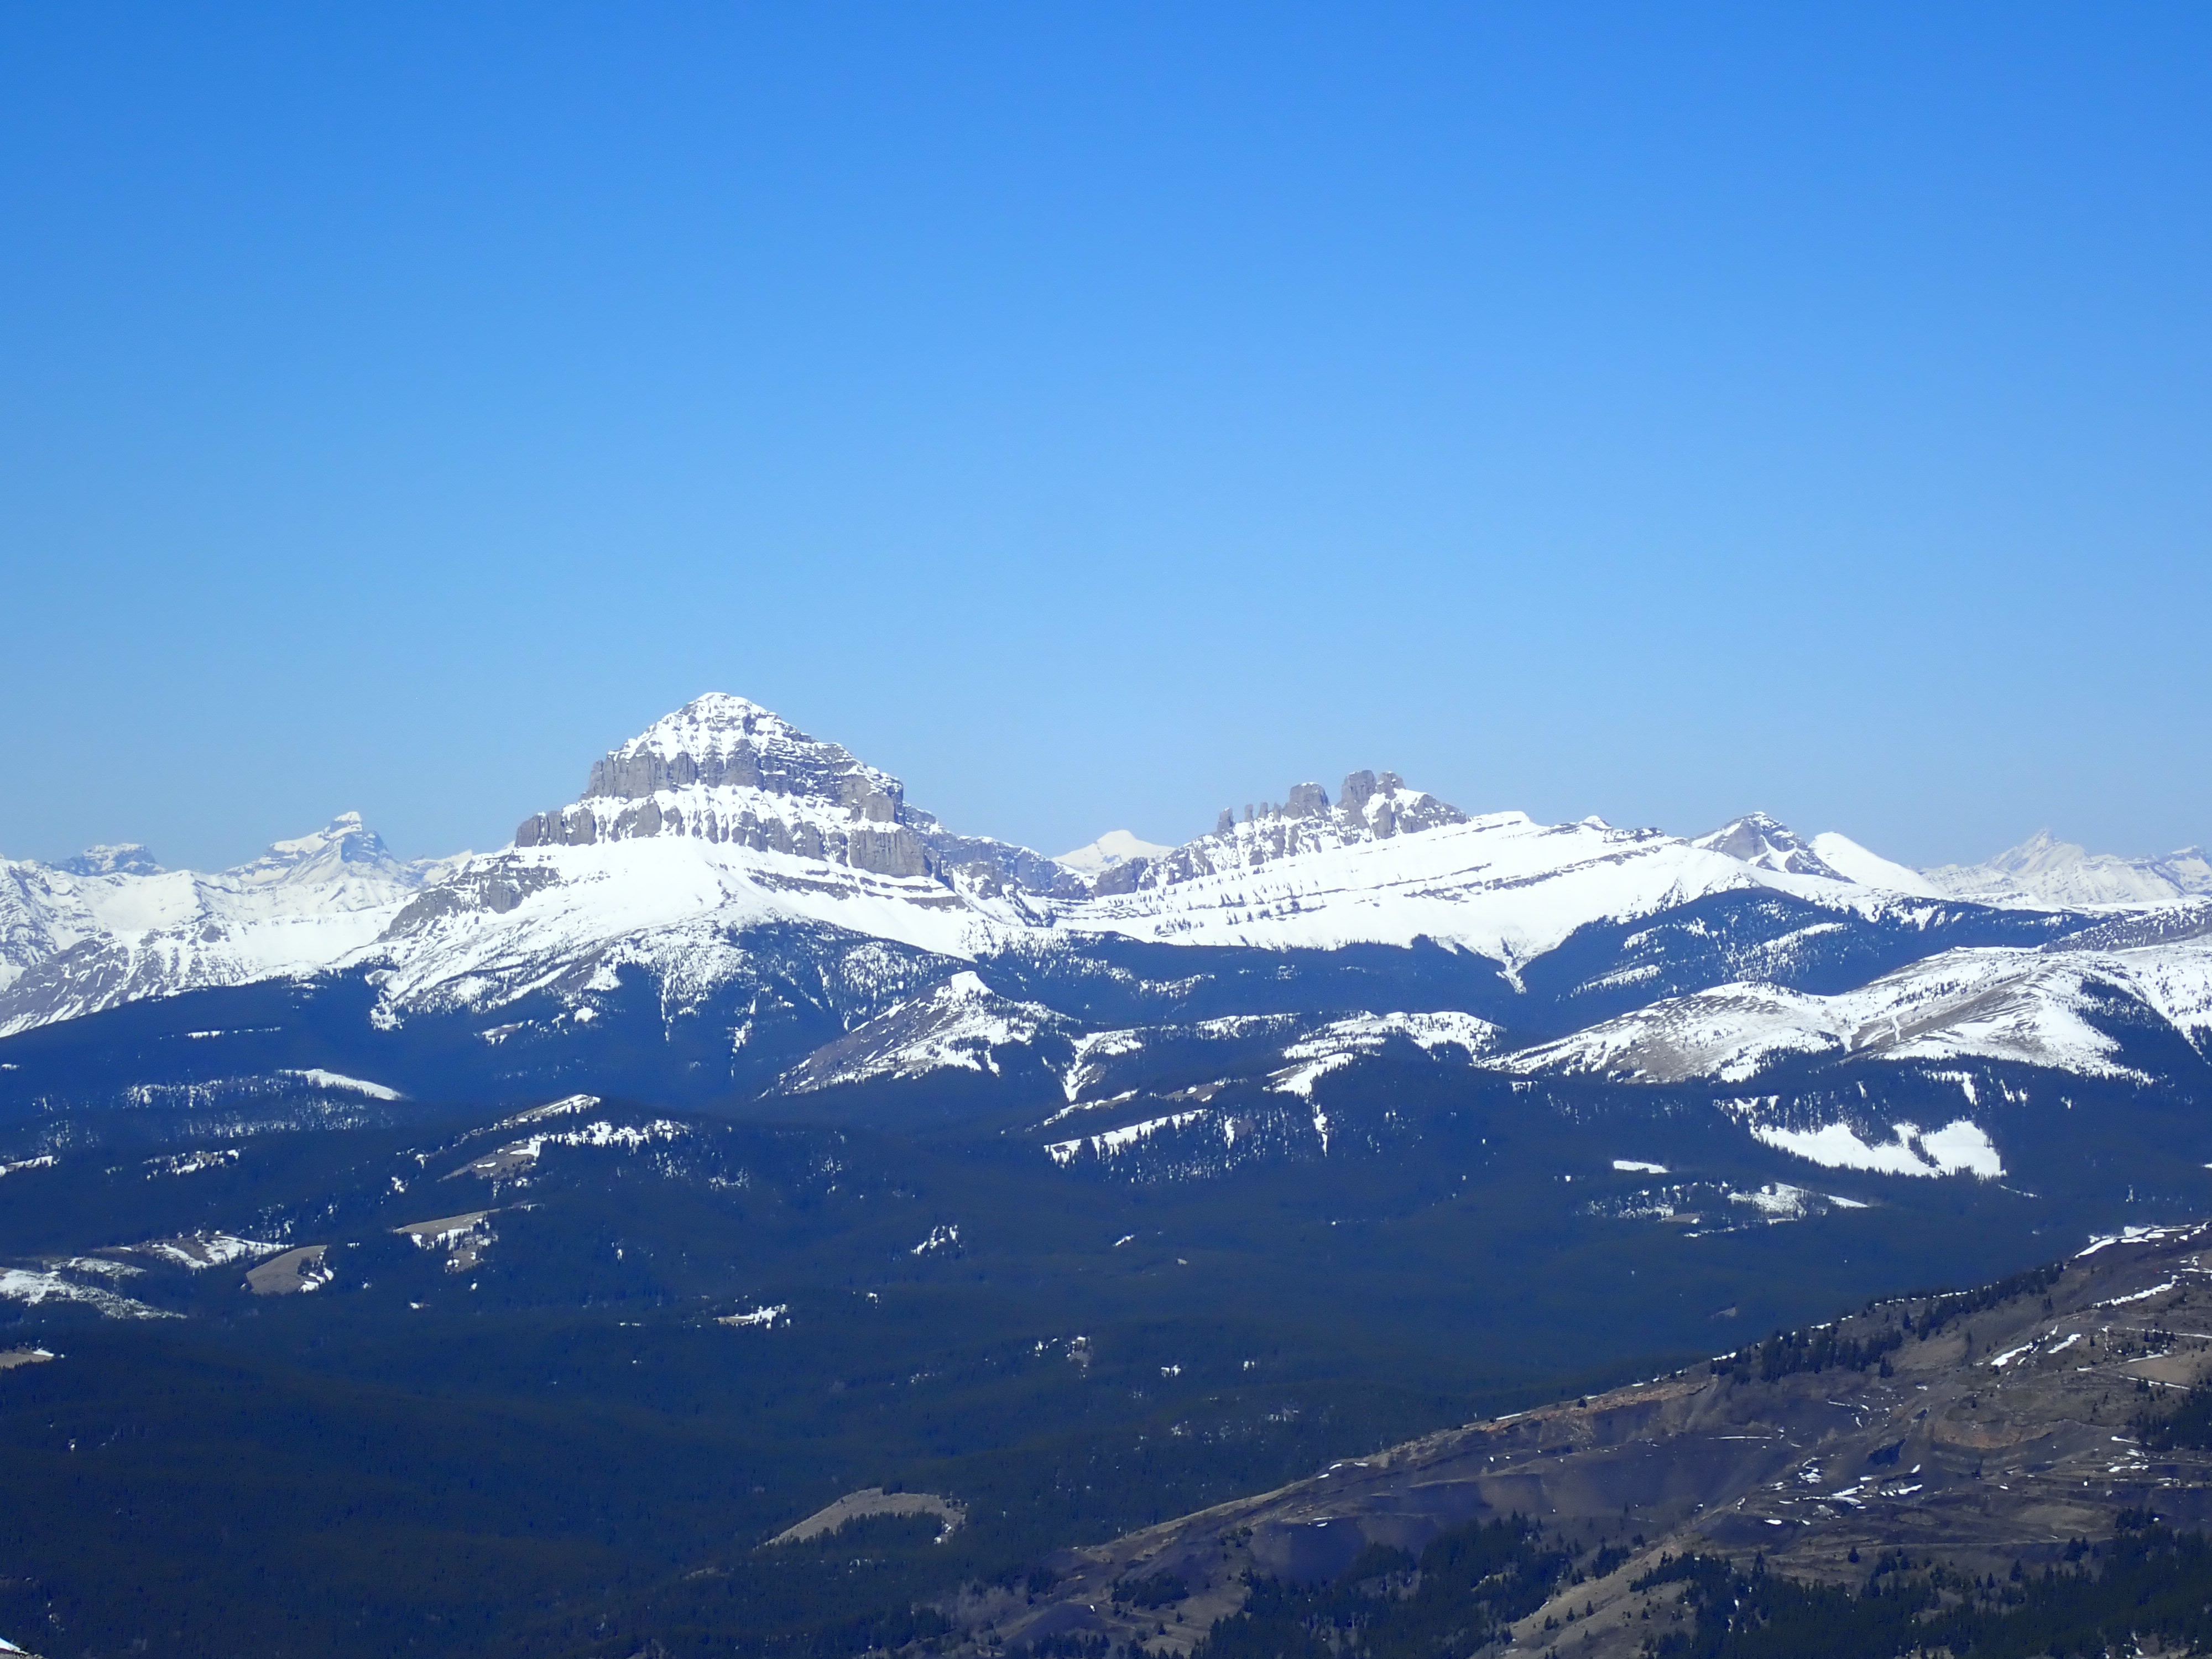
I particularly like the photo you show Crowsnest Mountain and Seven Sisters and I was wondering if you have ever been on those peaks?
LikeLiked by 1 person
I climbed Crowsnest a long time ago, but I’ve been meaning to do it again. I’ve never been on Seven Sisters, and I’m not sure if there are any non-technical routes.
LikeLike
Much appreciated insight. I can’t wait to follow in your footsteps. You have given me both inspiration and confidence. Thank you
LikeLiked by 1 person
I’m glad to hear that! Thanks for reading.
LikeLike
Superb photos, thanks for sharing.
LikeLiked by 1 person
Looking at this for tomorrow. Thanks for the report Par.
LikeLiked by 1 person